Teaching your AI companion to listen to your voice
 sahitid
Part 3/4 | Prerequisite: a little web dev knowledge (HTML, JS, CSS) | 45-60 minutes
Welcome back to our little journey to create a walking talking Orpheus AI Companion (but of course, your own AI Companion will serve its own purpose to you).
First Let's RECAP
In the first part of the Jams, we used Teachable machine to train a model in order to recognize the keyword "Orpheus". We then used the Replit online IDE to create an empty site that would print a message in the console every time the keyword was detected to be said.

In the second part of the Jams, we gave Orpheus a voice! Now instead of printing out a message in the console, our AI Companion would speak and say it out loud.
Now in the third part of the Jams, we will allow Orpheus to convert the speech that we say when we talk to it into text.
Reminder: If you're ever stuck or confused or have a spelling mistake in your code that your IDE isn't catching but continues to break the whole program, try asking AI such as ChatGPT to figure it out for you!
Outline:
- Enter The Code Editor (start coding in your browser)
- Set Up the HTML Some More (visualize the conversation with AI)
- Let's Get Orpheus to Speak! (text to speech recognition!)
First let's store the history of our messages in our:
let messages = []
Go in and update the addMessage function.
function addMessage({ role, content }) {
  let message = document.createElement('div')
  message.innerText = content
  document.getElementById("messages").appendChild(message);

  if (role === 'user') message.classList.add('user')
  else message.classList.add('system')
  document.getElementById('messages').appendChild(message)
  message.scrollIntoView(false) // Scroll to the message
}
Now we are going to add a new async function that we're calling hear. Essentially, we are:
- Creating new instance of
SpeechRecognition() - Starting it with
recognition.start() - Adding an event listener to it so that when the user is done speaking, so we can get a transcript of what the user said
- Stopping the listening with
recognition.stop() - And finally, returning the transcript successfully
async function hear() {
  return new Promise((resolve, reject) => {
    let SpeechRecognition =
      window.SpeechRecognition || window.webkitSpeechRecognition
    let recognition = new SpeechRecognition()
    recognition.start()
    recognition.addEventListener('result', function (event) {
      let current = event.resultIndex
      let transcript = event.results[current][0].transcript
      recognition.stop()
      resolve(transcript)

    })
  })
}
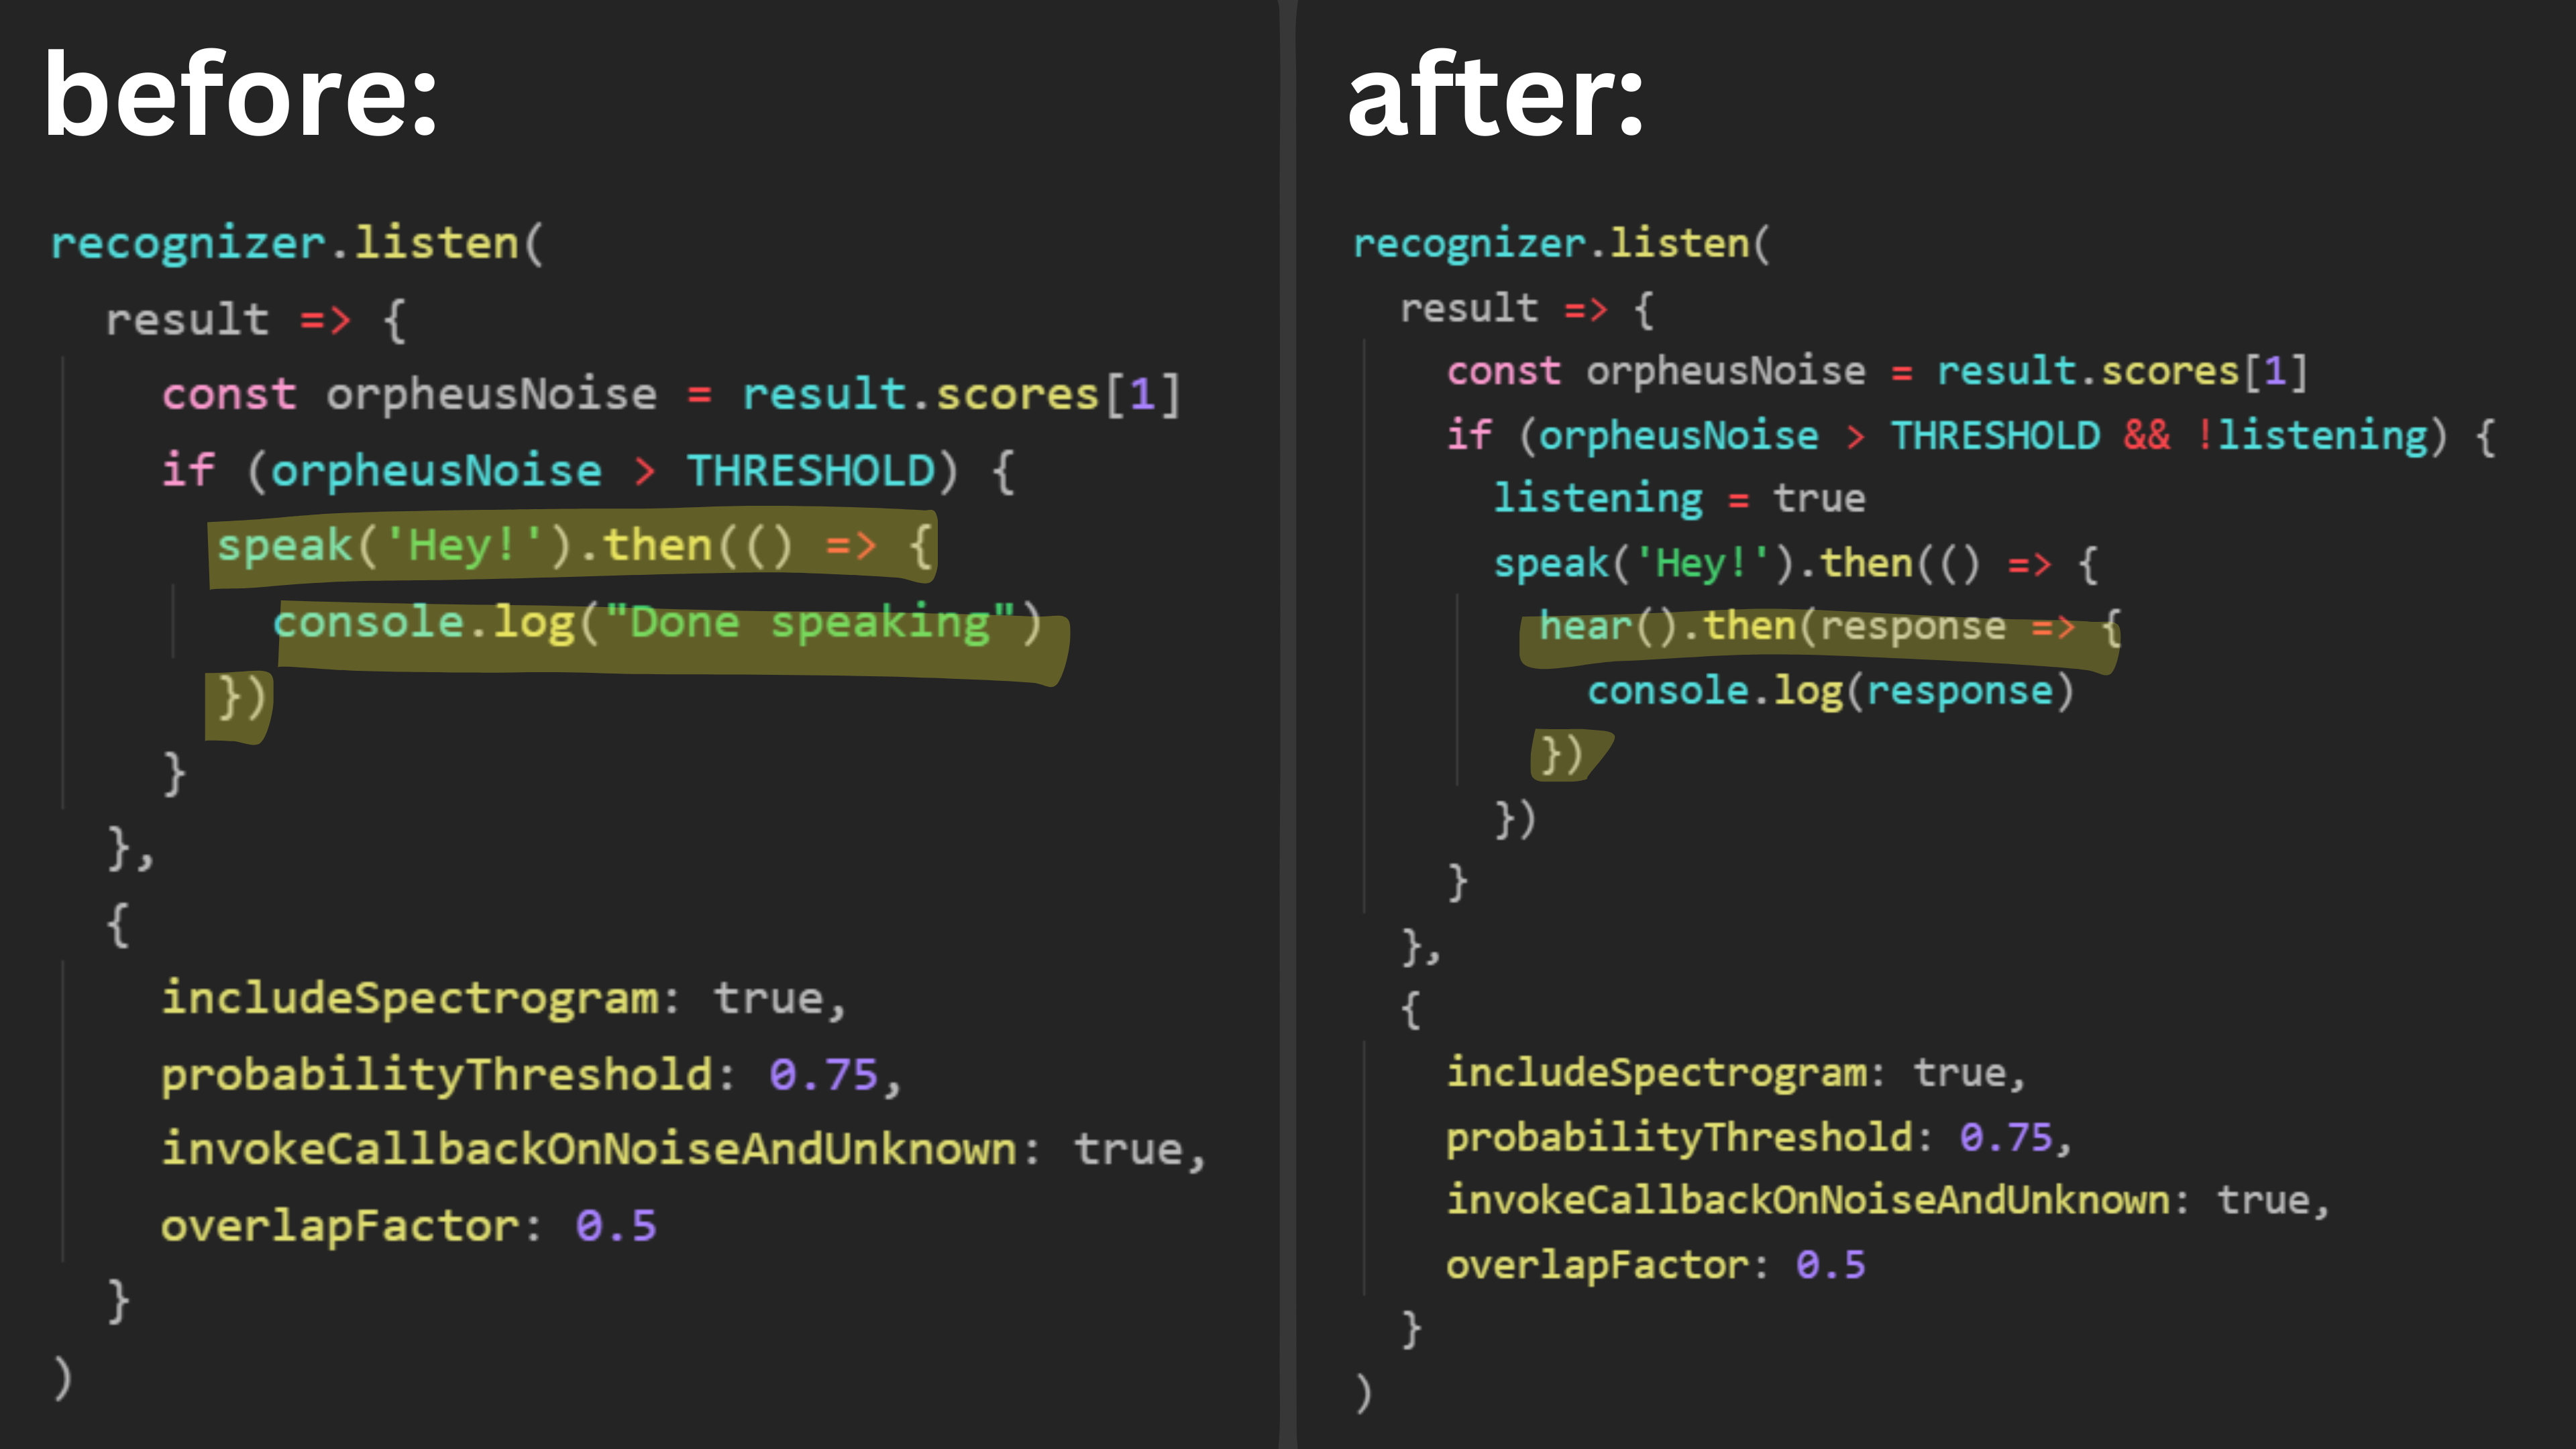
Now we can actually put it to use! We are going to edit the recognizer.listen function again so that after Orpheus says "Hey", she will start listening to us. This is how the code will look now:
recognizer.listen(
  result => {
    const orpheusNoise = result.scores[1]
    if (orpheusNoise > THRESHOLD && !listening) {
      listening = true
      speak('Hey!').then(() => {
        hear().then(response => {
          console.log(response)
        })
      })
    }
  },
  {
    includeSpectrogram: true,
    probabilityThreshold: 0.75,
    invokeCallbackOnNoiseAndUnknown: true,
    overlapFactor: 0.5
  }
)
Here's the edit you just made, if it's not obvious enough.

See It In Action!
Now when you refresh the page, you should see the flow come to life:
Try saying the keyword and Orpheus will say "Hey" back.
Now try saying something else to your AI Companion and watch as it console.logs what you said! Woah!

And now do you see how useful promises are? We can wait for speak() to finish before we start hear()ing, and then only after the computer is done hearing do we log the message.
The last thing to do in this workshop is to get this message to the screen when the user is done. We do also want to show a loading bubble while we're speaking. Here's how the final recognizer.listen function will look like:
recognizer.listen(
  result => {
    const orpheusNoise = result.scores[1]
    if (orpheusNoise > THRESHOLD && !listening) {
      listening = true
      speak('Hey!').then(() => {
        document.getElementById('result').style.display = 'block'
        hear().then(response => {
          document.getElementById('result').style.display = 'none'

          let message = { role: 'user', content: response }
          addMessage(message)
          document.getElementById('loading').style.display = 'block'

        })
      })
    }
  },
  {
    includeSpectrogram: true,
    probabilityThreshold: 0.75,
    invokeCallbackOnNoiseAndUnknown: true,
    overlapFactor: 0.5
  }
)
Now the process is:
- Say hi to Orpheus
- Orpheus responds "Hey"
- Our bubble pops up
- We start talking
- The loading bubble disappears and our message shows up on the screen
Yay! Now Orpheus can hear you and convert your voice into text.

Additional Challenge Hacking! (recommended)
It's that time you've all been waiting for! Let's Hack our Jam! Try doing one of the following:

- Change up your character! We're doing Orpheus but you don't have to.
- Our UI is also going to look like a smart phone & text messaging system. But I encourage everyone to do their own play on this AI Companion. What if your screen has a sound visualizer?
Stay Tuned To Build Your Very Own Smart Voice Assistant
We now have a model that can understand what we are saying and convert that speech into text. But a good friend can't just listen! They also need to talk back!
In the next part, we'll dive deeper into APIs and integrate the OpenAI GPT-3.5 language model for chat completions. This is the most pivotal step and will give our AI Companion the skill of having a conversation with us.
Congratulations! 🎉 🎉 🎉Share your final project with the community