Create Your First App
 SerenityUX
Aye there mate, welcome to the forth Jam in this Batch. We're quite impressed by your resilience. Surely you're a bit impressed with yourself as well.
Our first app is going to be a text-based app where you can create little text-based posts about yourself or whatever you'd like to post about. Your app is going to look totally different from mine, so prepare to get your creative thinking cap on and begin your first app.
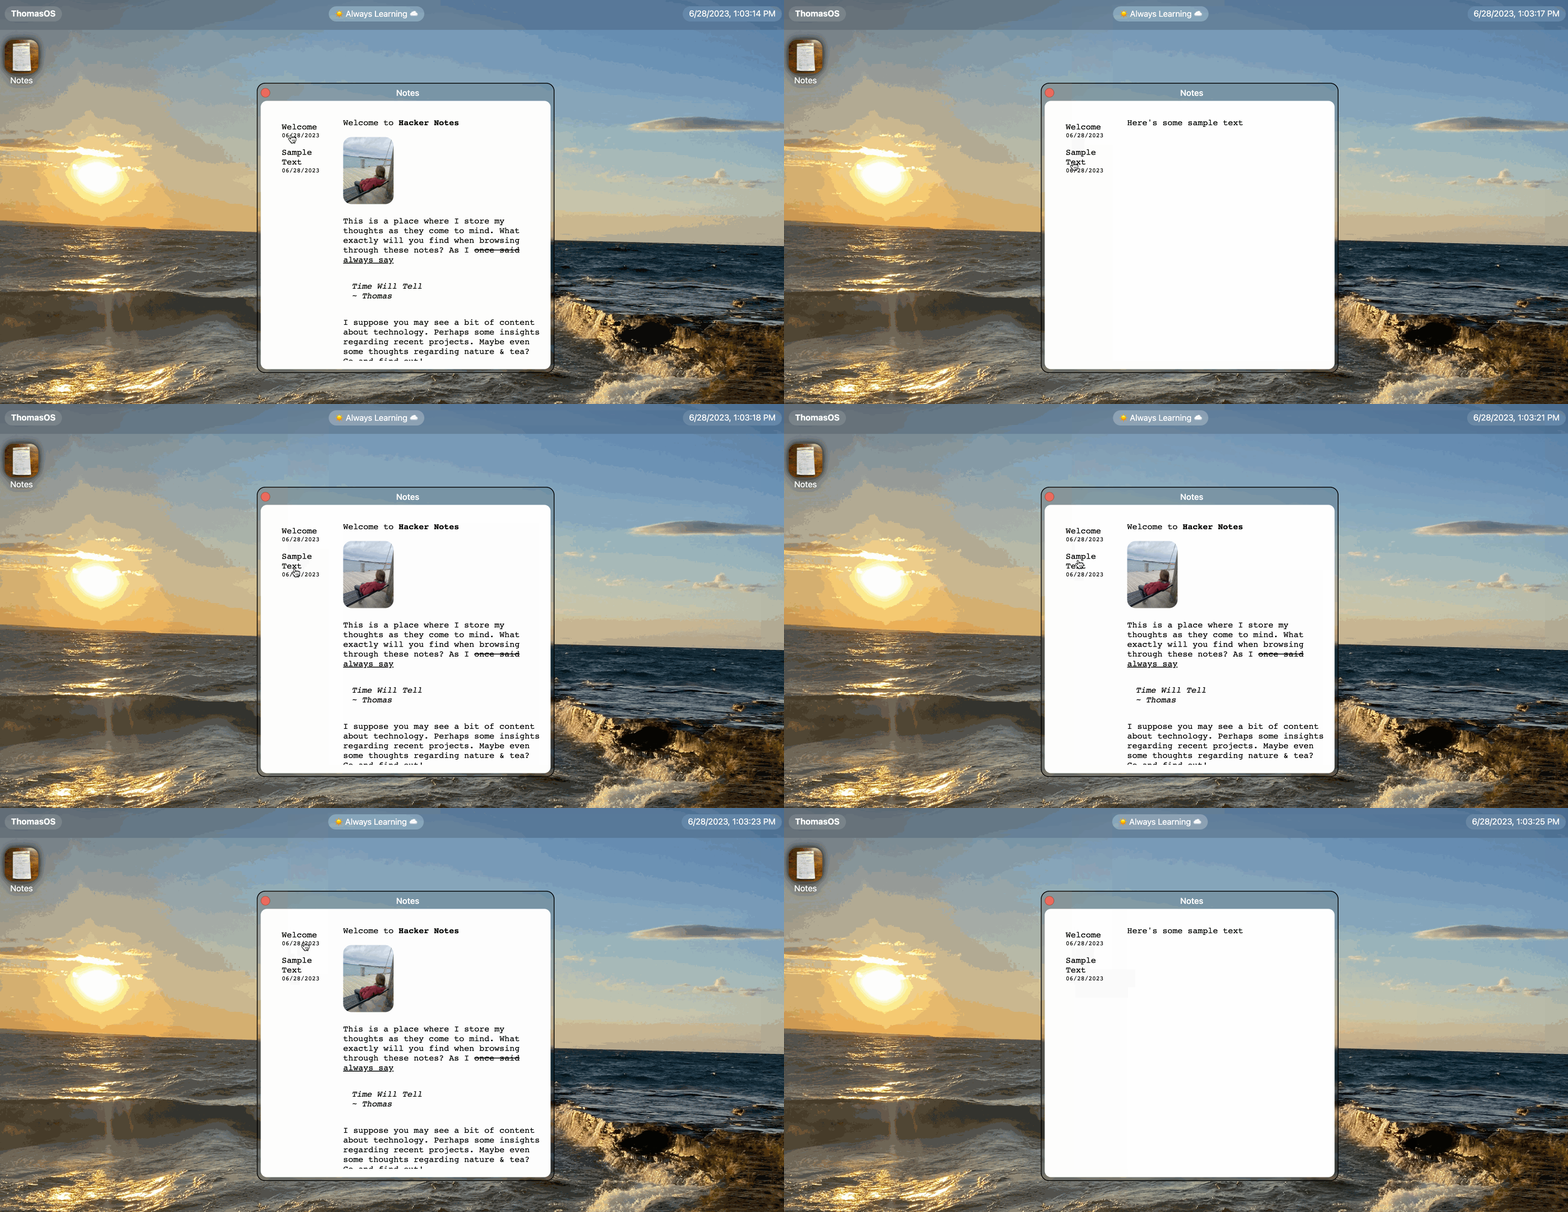
You could make the theme of your blog/article app about whatever you'd like! For example, you could use this as a place to store reviews of/notes about your favorite restaurants, cafes, recipes, books, etc.
HAVE FUN WITH THIS! IT'S YOURRRR app ON YOUR personalOS! Do whatever you'd like.
Outline:
- Adding App to Desktop
- Making App Icon Tappable
- Making our App Window
- Making Our First App
- Additional Challenges
Adding App to Desktop
Alrighty, so let's go into our body tag and create a div beneath the menu bar (hey, pro tip btw, you can collapse your divs to make your code more readable for cases like this by tapping the dropdown button next to the code line number of a div)
  <div id="desktopApps" style="padding-top: 64px; padding-left: 16px;">
    <p>Name Of Your App</p>
  </div>
Note: I added some padding on the top and left to give the application icons some breathing room and to make sure it was not covered by the top-bar.
Here's what my code looks like
<body style="font-family: Noto Sans, system-ui, sans-serif; height: 100vh; background-image: url(./beautifulImage.png); background-size: cover; background-repeat: no-repeat; margin: 0px;">
	<div class="window" id="welcome" style="top: calc(50% - 90px); left: calc(50% - 180px);">
		(window content)
	</div>
	<div style="position: absolute; window: 100%; display: flex; backdrop-filter: blur(10px); background-color: rgba(0, 0, 0, 0.125); color: #fff; justify-content: space-between; gap: 32px;">
		(topbar content)
	</div>
	<div id="desktopApps" style="padding-top: 64px; padding-left: 16px;">
		<p>Hacker Notes</p>
	</div>
</body>
Add Your Icon
Create an Icon
My app is going to be called Hacker Notes.
Note: Want to also name your app Hacker Notes? Ha, no you cannot because you're not doing a workshop, you're doing a JAM and JAMS require that you do-ya-own-thing™.
I took a photo of a friend's notebook (note from Thomas's "friend", Sahiti: "WHY MY NOTEBOOK?!") to use as the icon for the app.
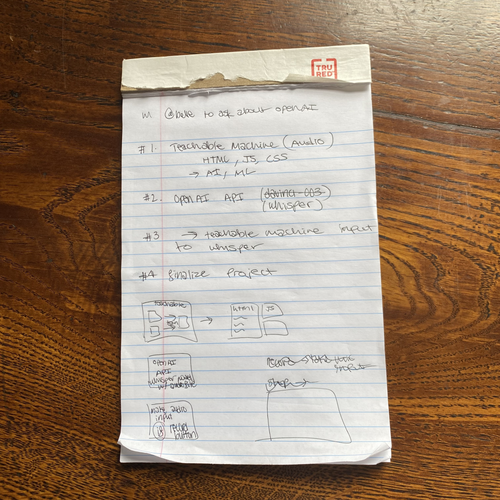
Take your own image that fits your app and send it to your computer using email or AirDrop and then drag it into Replit (just as we did for the background). Make sure the file format is .png or .jpg (otherwise find an online file converter).
You can also you can icon you create or find online. I really don't mind, this is your operating system after all and you're the chief designing, so you make the call pal.
Use Your Icon
Create an image tag, and apply some styles of your choice! I customized the width, height, border-radius, and added a drop-shadow.
It's also probably a good idea to wrap your icon in a div so we can later tap on that icon to open the window.
Here's what my code looks like:
  <div id="desktopApps" style="padding-top: 64px;">
    <div style="text-align: center; padding: 16px; filter: drop-shadow(0 0 8px black); width: fit-content">
      <img src="./notebook.png" style="width: 64px; height: 64px; border-radius: 16px;">
      <p style="margin: 0px; color: #fff; ">Notes</p>
    </div>
  </div>
Note: PLEASE DO NOT COPY THIS CODE! Do your own app and style your icon in your own way. Want to make all the icons circles, go for it (increase that border-radius)!
Here's what my icon is currently looking like inside my application
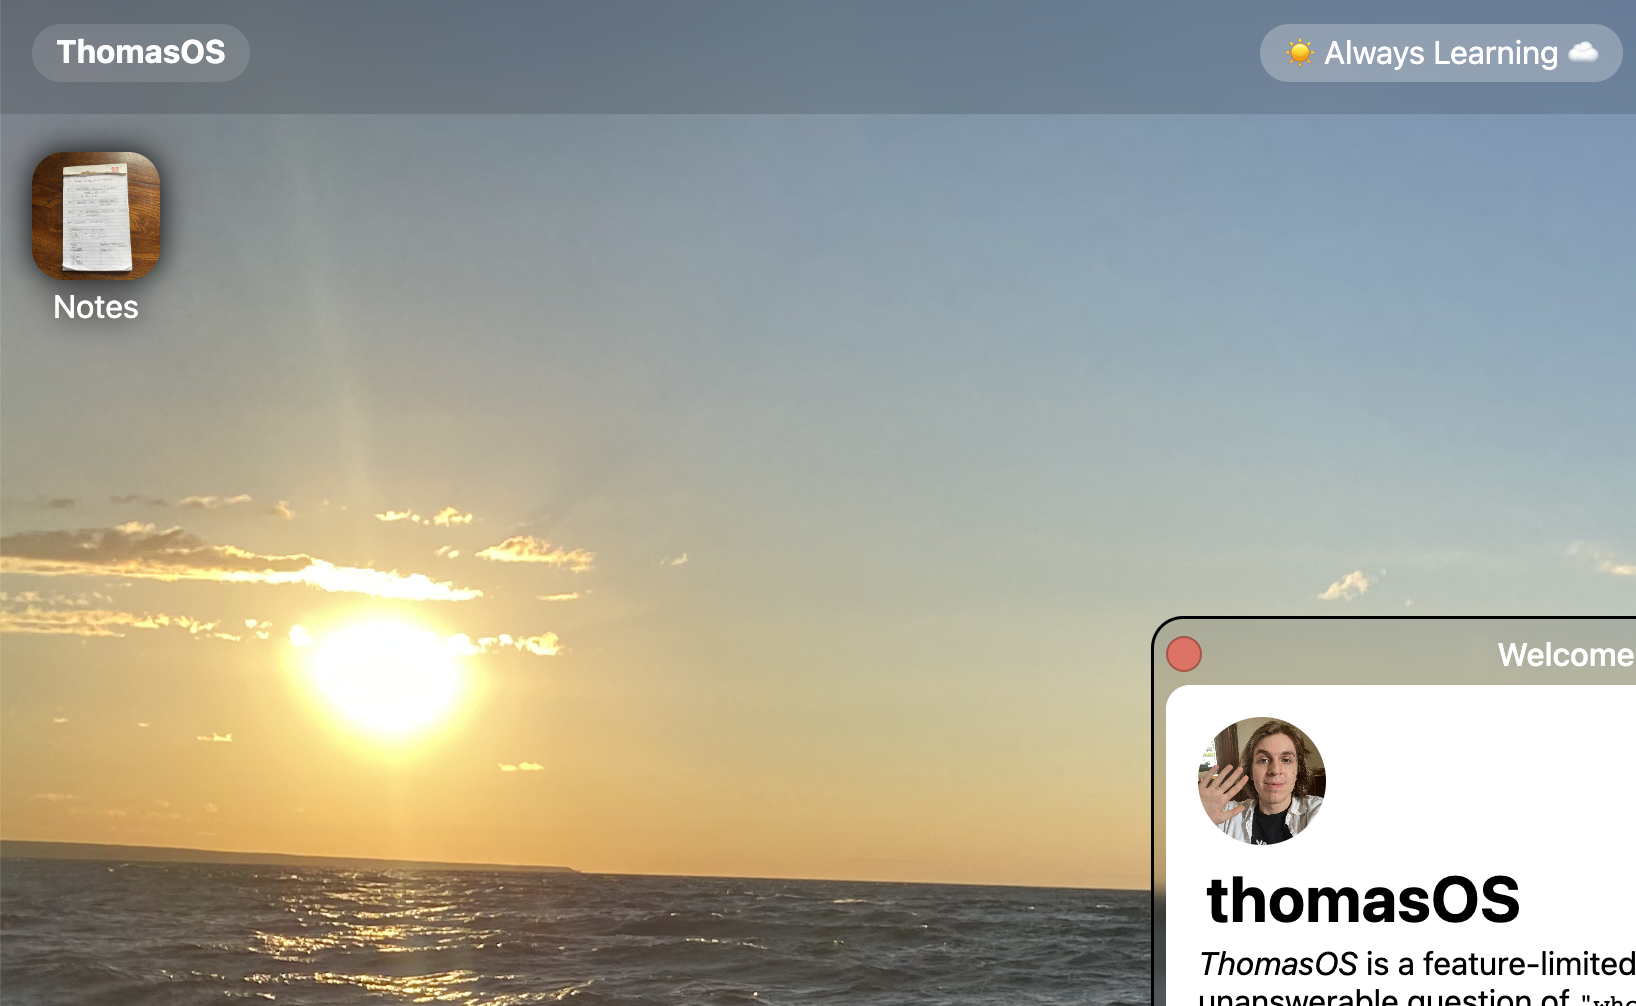
Currently when we tap on the icon... nothing happens. Let's select the icon when we tap on it!
Making App Icon Tappable
Alright let's break this into parts.
- Store what icon is selected
- We need a way to communicate to the user whether the icon is selected or not selected
- We need a way to change the icon's appearance to show that it is selected
- We also need a way to change the appearance when deselected (tapped that second time)
Store the State of the Selected Icon
Let's begin by storing what the selected icon is (by default, this will be undefined because there is no selected icon).
For that we will use a... you guessed it... variable
var selectedIcon = undefined
(p.s. this is JavaScript code, so it's in our JavaScript file)
Lovely, now let's make a function for changing the visual appearance of the icon. I challenge you to give it some thought & think hmmm "how can I change the style of an icon without using in-line styles".
Communicate whether an icon is selected
We're going to this using classes!
Let's make a class for a selected icon. For testing purposes, you can go ahead and add the class to your icon div like so:
<div class="selected" styles="(styles)">
	(content)
</div>
Here's what I added in my css file. Please DON'T TAKE THIS CODE. Communicate that it is selected in your own way. This may be through a curvy underline, a rounding of the corners, a green background, etc whatever you'd like!
Programmatically Adding/Removing a Class
Poke around this geeksforgeeks site on classes and see if you can programmatically add a class to an element
Let's go ahead and add some style properties for when the icon is selected.
function selectIcon(element) {
  element.classList.add("selected");
  selectedIcon = element
}
& now try implementing a function for deselecting an icon
When I first introduced JavaScript, I described it as the logic of your program.
I think we've already worked with if else statements, but just in case you were lost, here's a brief introduction.
If else statements check if a certain condition is true in which case a certain block of code runs & if that condition is not true a different block of code runs.
Try to write an if-then statement inside a handleIconTap function that selects the item if it's not selected, but deselects it if it is already selected.
Your code may look a little like this:
function handleIconTap(element) {
  if (condition) {
    functionA(element)
  } else {
    functionB(element)
  }
}
Hint: element.classList.contains("selected") exists and returns a Boolean value (either True or False)
Making our App Window
Copying & customizing the old window
We can basically copy the code from our other window and remove the content.
Once we copy that code, change the id to "theNameOfYourApp" (actually make it the name of your app). Then inside the div that contains the content of your app, you may want to adjust the height and width. You can also change the header text.
Here's what my code looks like (keep in mind if you copy this code it will probably break your site because it should have significantly different styling than what is here)
(don't copy)
  <div class="window" id="notes" style="top: calc(50% - 240px); left: calc(50% - 260px); ">
    <div class="windowheader" id="notesheader">
      <div class="closebutton" id="notesclose">
      </div>

      <p class="headertext">Notes</p>
      <div style="width: 16px; margin-right: 6x; height: 16px;"></div>
    </div>
    <div style="background-color: #fff; margin: 6px; border-radius: 12px; width: 520px; height: 480px; padding: 16px;">
      <p>Hacker Notes</p>
    </div>
  </div>
Making our App Draggable
Also make sure to run in your script.js file the code
dragElement(document.querySelector("#notes"))
just as you did with your other window.
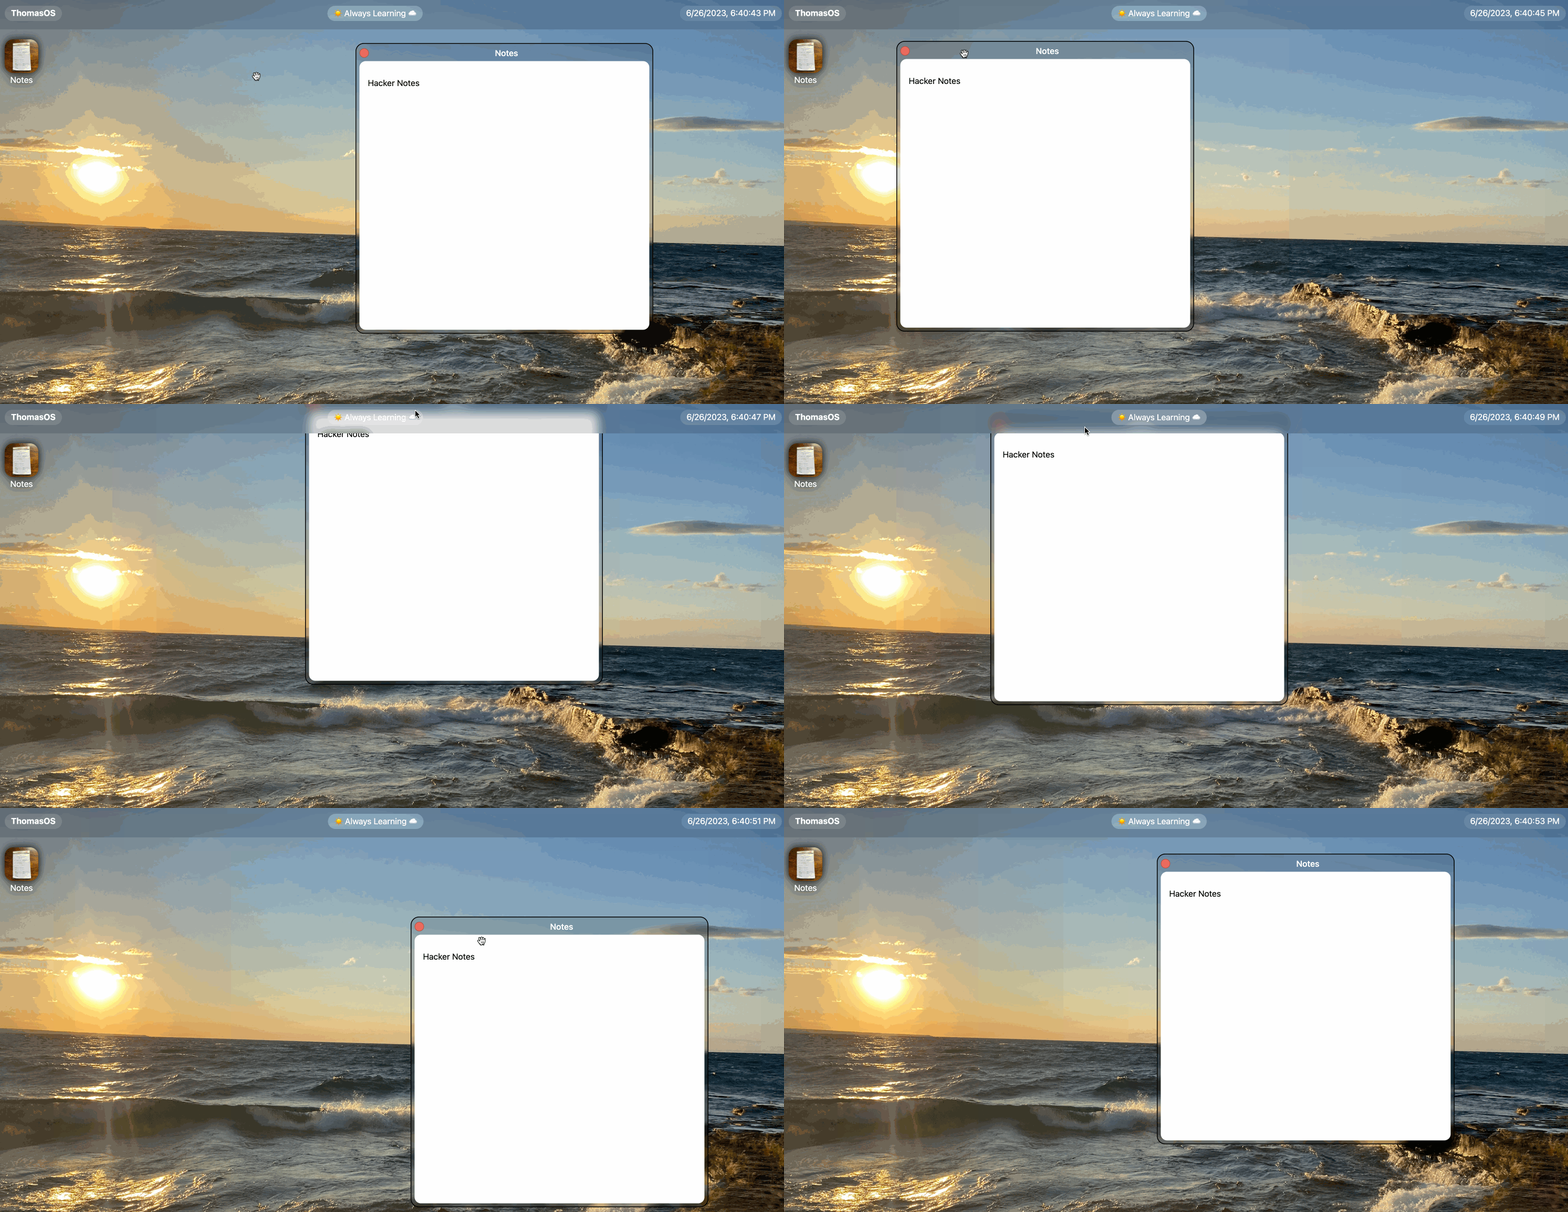
Boommmm, we have our second window!
Now we're able to move it around, but we cannot yet close it.
Making our App Closable
Let's look at the code we implemented for the welcome screen
var welcomeScreen = document.querySelector("#welcome")

var notesScreenClose = document.querySelector("#welcomeclose")

notesScreenClose.addEventListener("click", () => closeWindow(welcomeScreen));
Now try editing your HTML code id (for the close button) and write a new set of code for making this screen closable
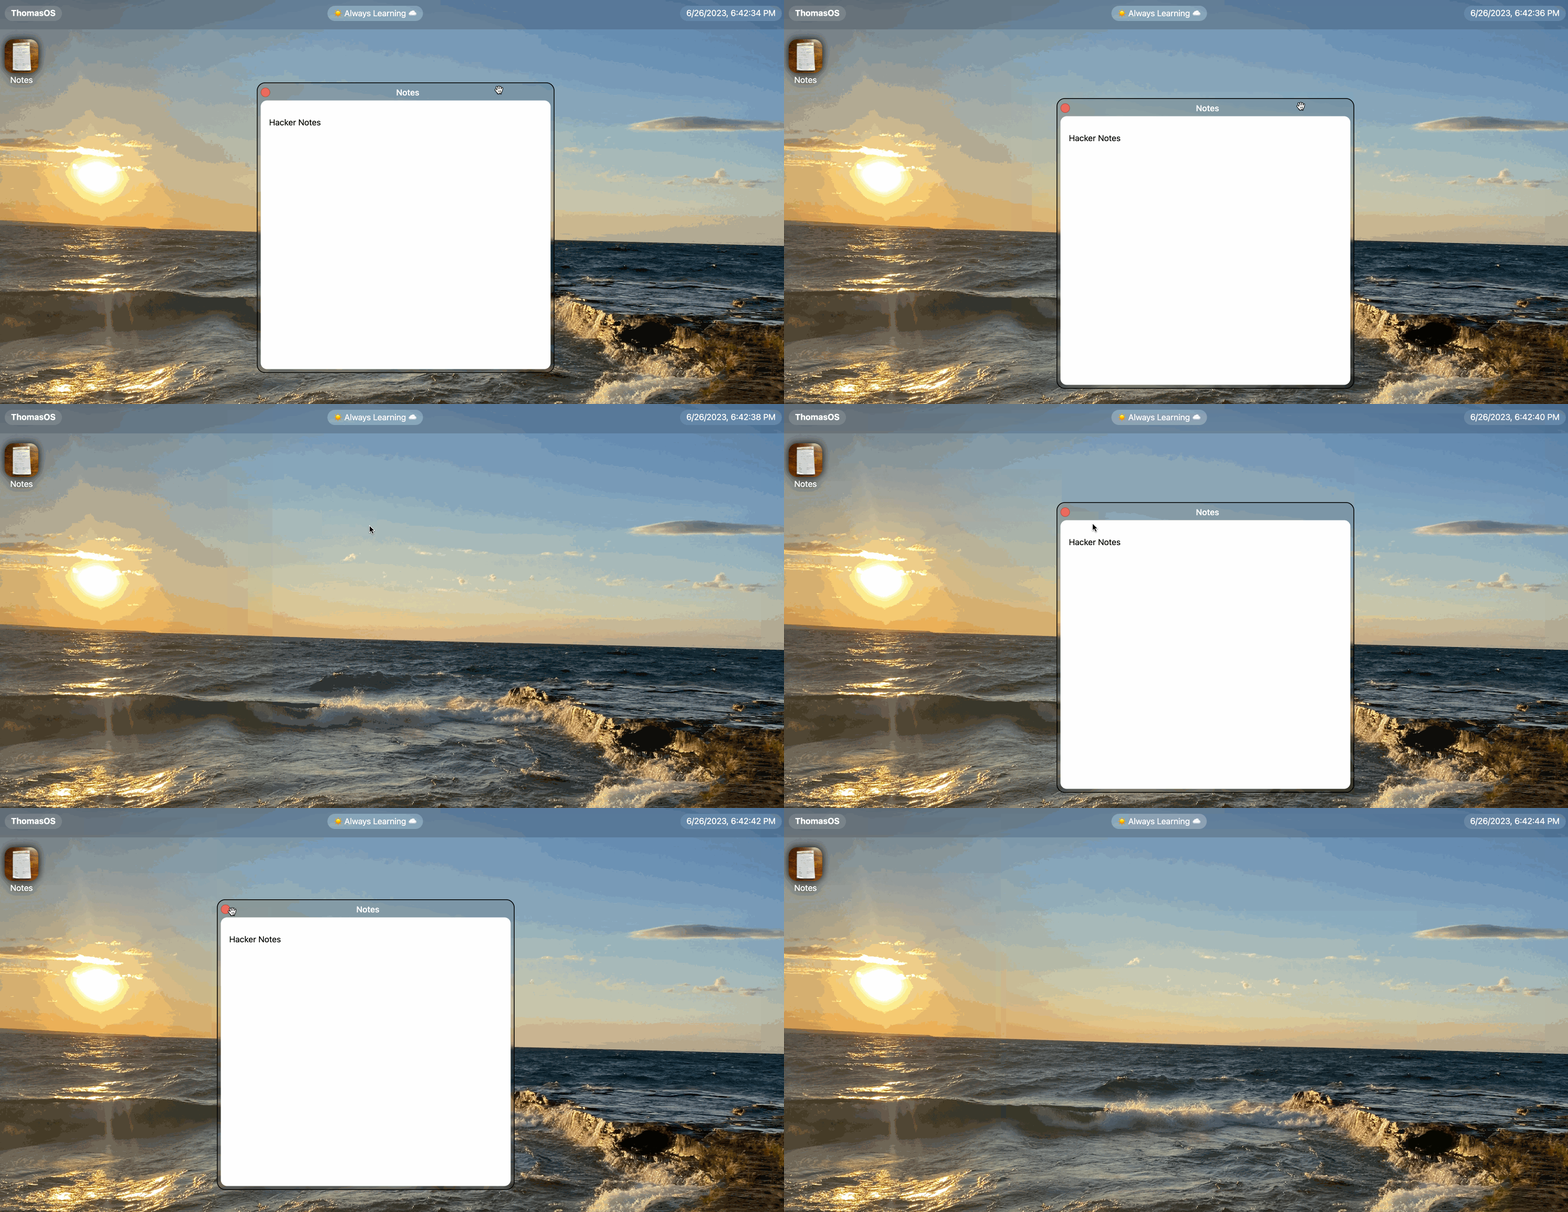
Soo... this is quite annoying... repeating code that is...
When you repeat code, that's a good sign you should make it a function. Try turning it into a function and calling said function
Making Our Window Closed By Default
This is quite simple! Just add the display: none; style property inline to your notes div.
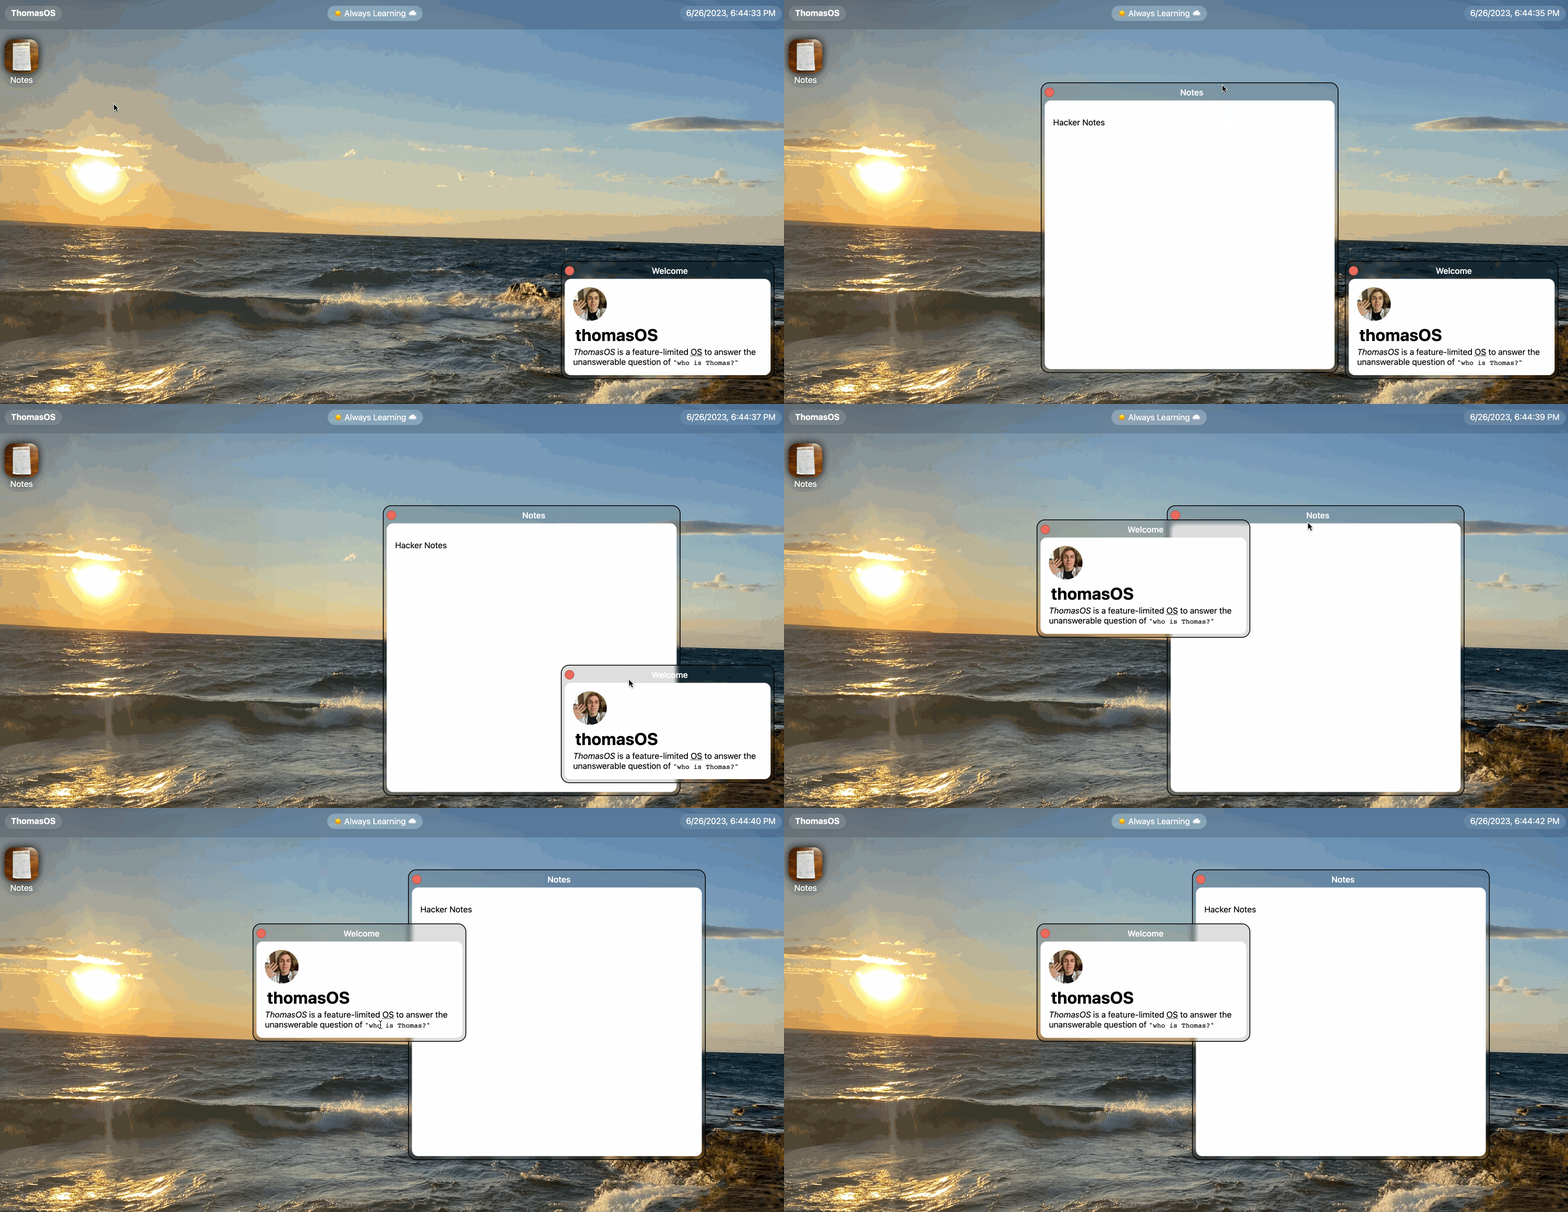
Making our Rise To The Top
You'll notice on that last gif that when we tap on the notes window, it doesn't rise on top of the welcome screen.
When we tap on a window, we should make it rise to the top. We can do this using the z-index style property.
If you're feeling quite confident, try implementing this feature on your own! Otherwise, go through the notes below
Defining the largest index
We need to store the largest index so we can know what value we need to set the tapped on window to. We want the window we tap on to have an index greater than the one previously tapped on.
var biggestIndex = 1;
I initialized it at 1. You can initialize the variable at any value you'd like to initialize it at.
Checking for a Tap on the window
We need a function to make the window listen for the user to click on it (we call this "mousedown"). When the user taps on the window, we then run the will run some block of code (handleWindowTap) to move it to the top
function addWindowTapHandling(element) {
  element.addEventListener("mousedown", () =>
    handleWindowTap(element)
  )
}
Remember to call the addWindowTapHandling for each of your elements (so for example addWindowTapHandling(welcomeScreen) and addWindowTapHandling(notesScreen)
Making the Window to the Top On Move on Tap
We're now lifting the window up to the top by incrementing the biggestIndex and setting the zIndex to that new biggestIndex
function handleWindowTap(element) {
  biggestIndex++;  // Increment biggestIndex by 1
  element.style.zIndex = biggestIndex;
}
Making Window Move To Top On Open
Awesome, we want to make it so when we open the window, it moves straight to the top immediately.
function openWindow(element) {
  element.style.display = "flex";
  biggestIndex++;  // Increment biggestIndex by 1
  element.style.zIndex = biggestIndex;
}
Protecting The Top Bar
An issue we encounter is that eventually the window goes on top of the topBar. To counter that, let's identify the top bar and then increment it's value each time we increment the window
<div id="top"
    style="(styles)">
</div
(in HTML)
var topBar = document.querySelector("#top")

function openWindow(element) {
  element.style.display = "flex";
  biggestIndex++;  // Increment biggestIndex by 1
  element.style.zIndex = biggestIndex;
  topBar.style.zIndex = biggestIndex + 1;
}

function handleWindowTap(element) {
  biggestIndex++;  // Increment biggestIndex by 1
  element.style.zIndex = biggestIndex;
  topBar.style.zIndex = biggestIndex + 1;
  deselectIcon(selectedIcon)
}
(in JavaScript)
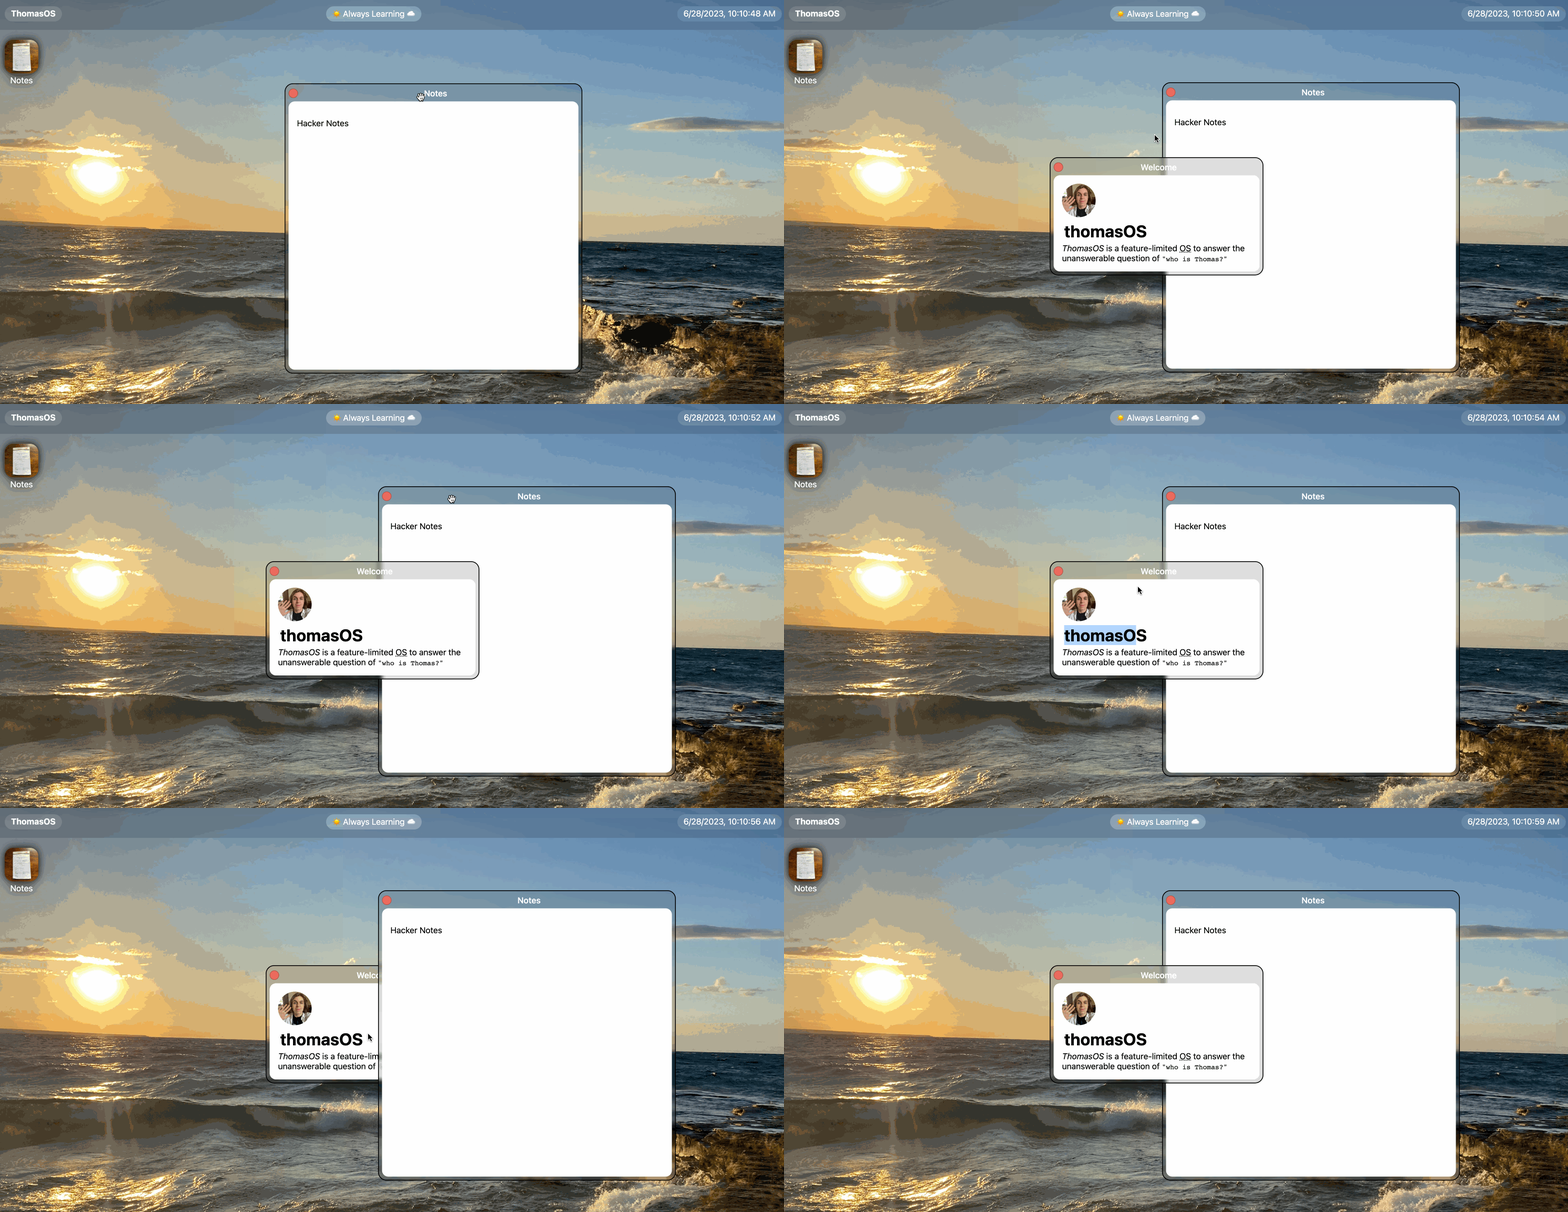
Celebrate it works
Awesome! Now we're able to tap on our windows and see them ov
Putting All Of This Into One Function to Initialize a Window
We're writing a bunch of functions to initialize the window, I challenge you to try putting it all into one window. This isn't necessary, but it will just be helpful later on.
Calling Our Function
Make sure you call the function you create to ensure your window functions properly
initializeWindow("notes")
Making Our First App
The time has come young one. You're going to make the first app for your OS. It's going to be a text-based app about whatever you'd like. Mine will be my "Hacker Notes," but maybe yours will be your "Hiking Notes" or your "Favorite Recipes," or your "Random Inspirational Quotes."
It's totally up to you. There's only one app you cannot make (& that is Hacker Notes). You need to do your ownnnn thinggg my friend! Don't be a follower, be a leader!!!
Making Initial View
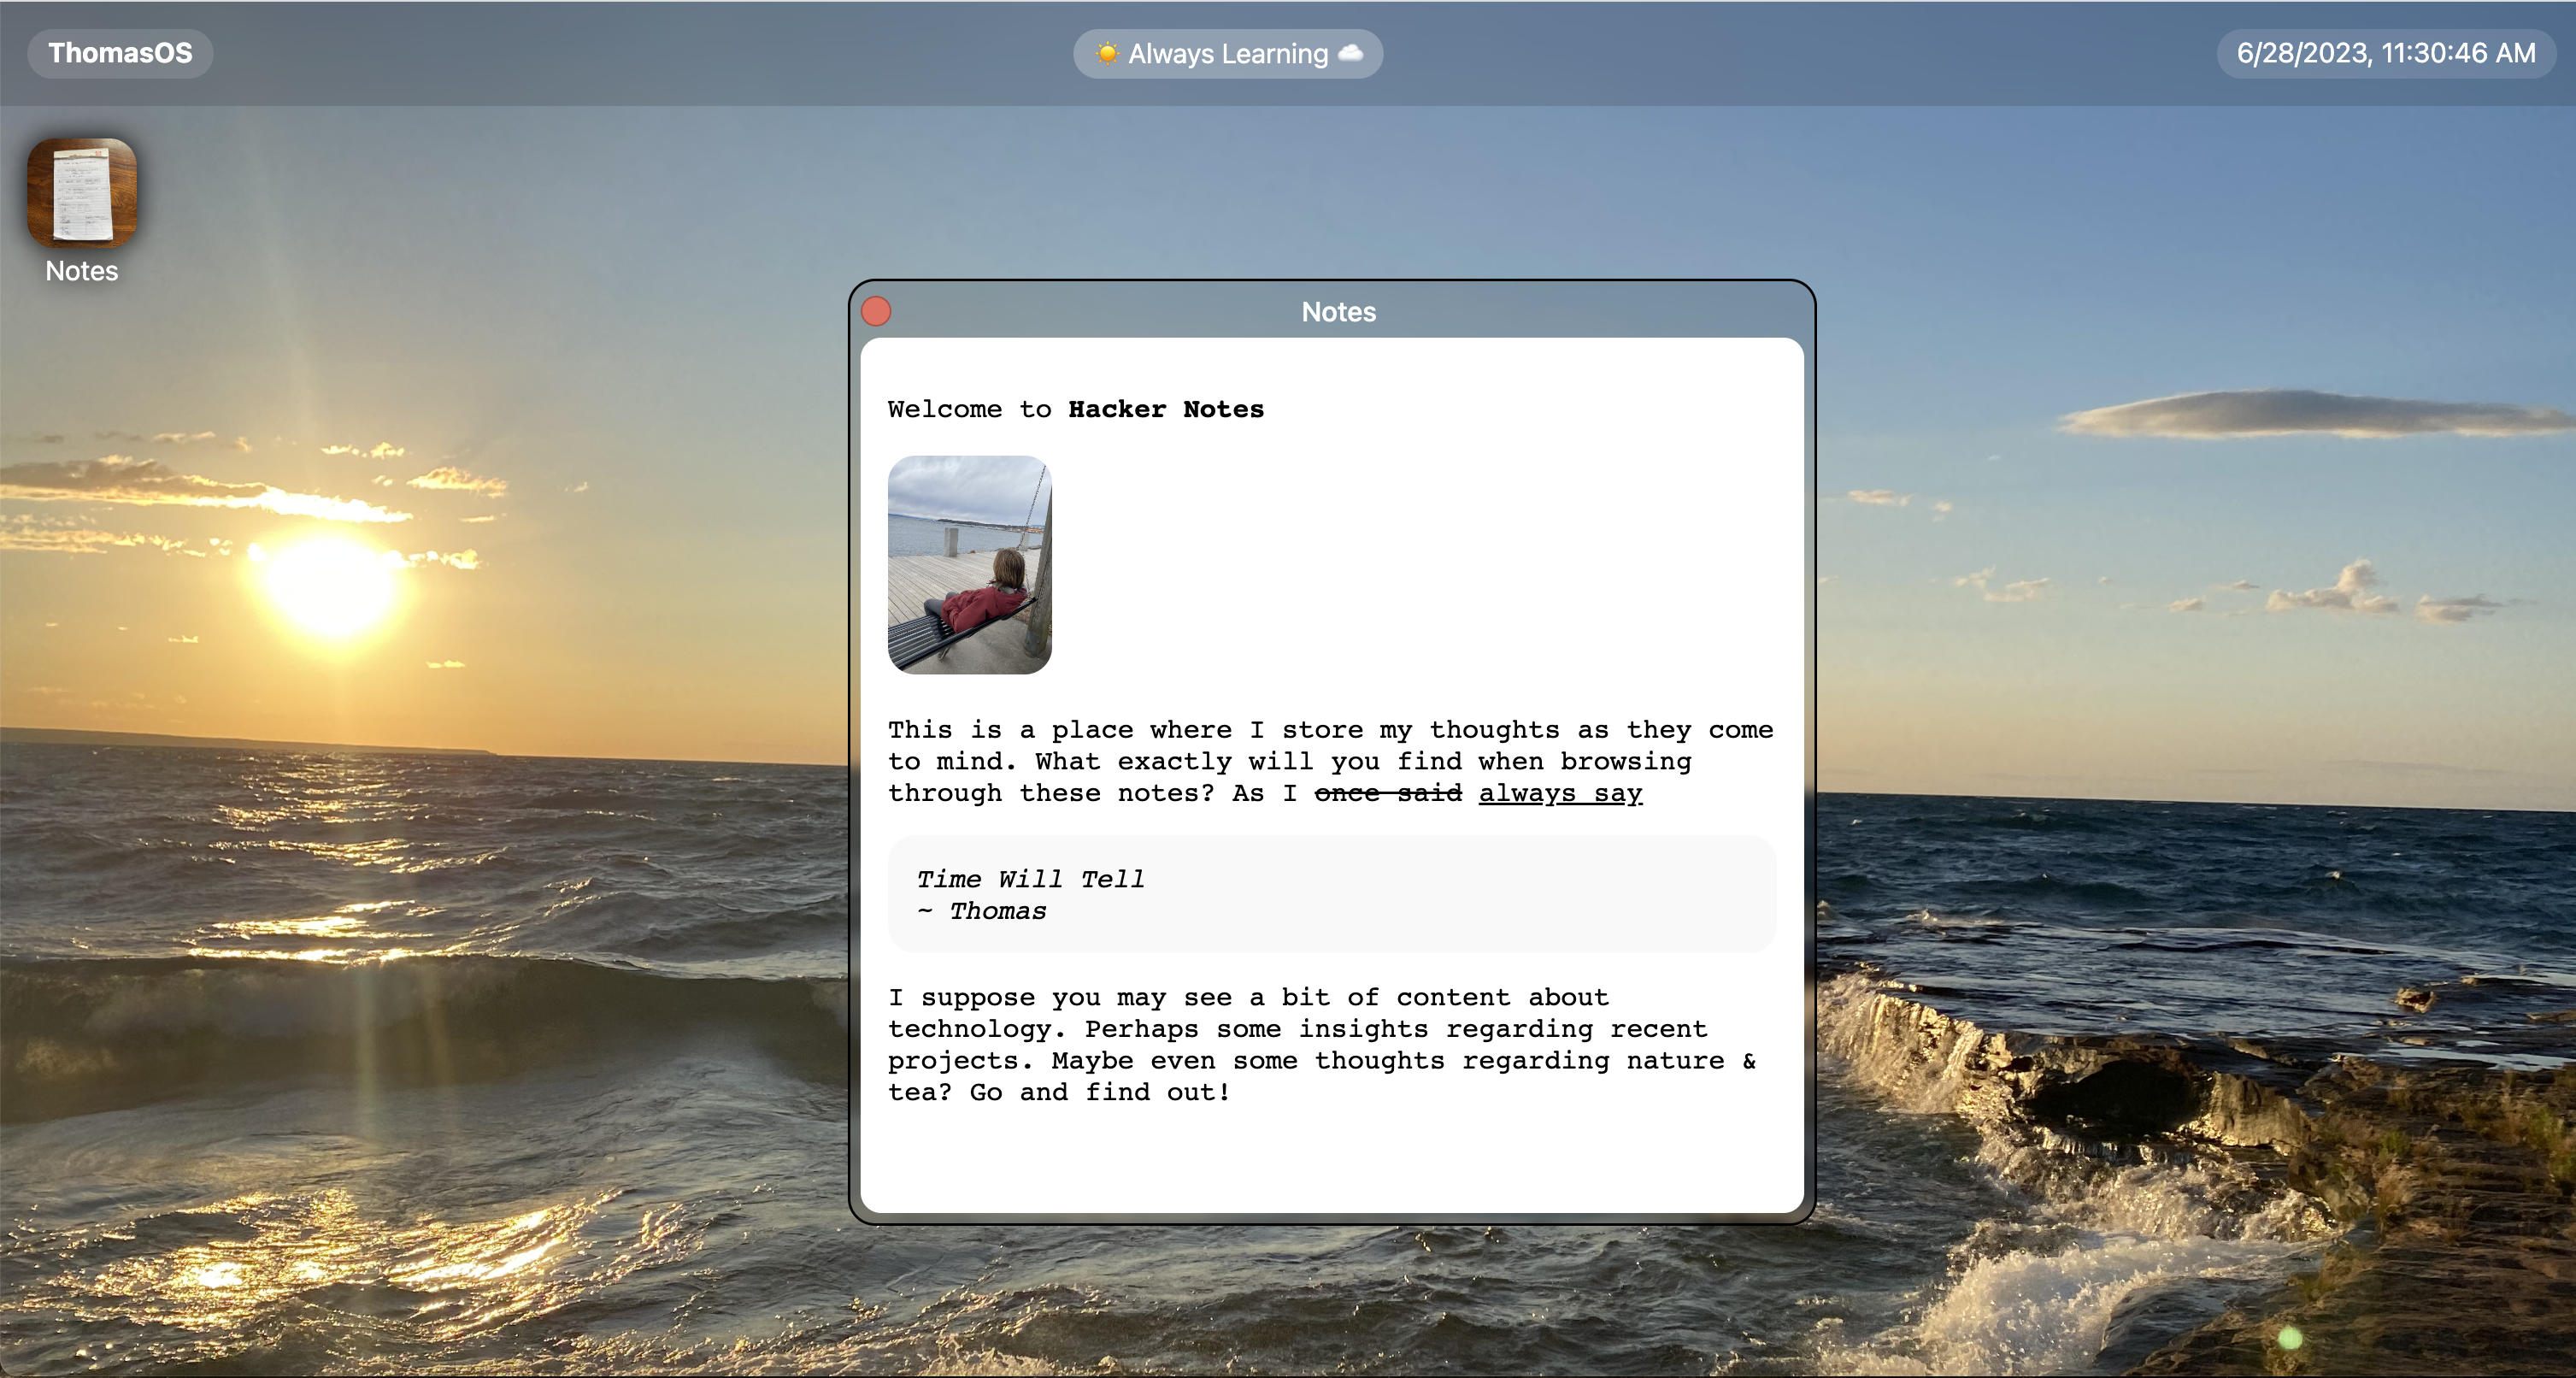
The initial view for my site will be introducing the concept of Hacker Notes. If you would like, you can make an initial view that represents your site well. I changed the font, added some text, and just generally had fun with it. I encourage you to do the same (& add your own unique style with images, awesome styles, etc).
Adding Content Selection
Having one piece of content on your app is sort of boring. We should make it so the user can select between multiple pieces of content.
Creating a side bar, bottom bar, top bar, or whatever you'd like
You need a space to store your content selection options. I put this in a side bar. You can put this in whatever you'd like.
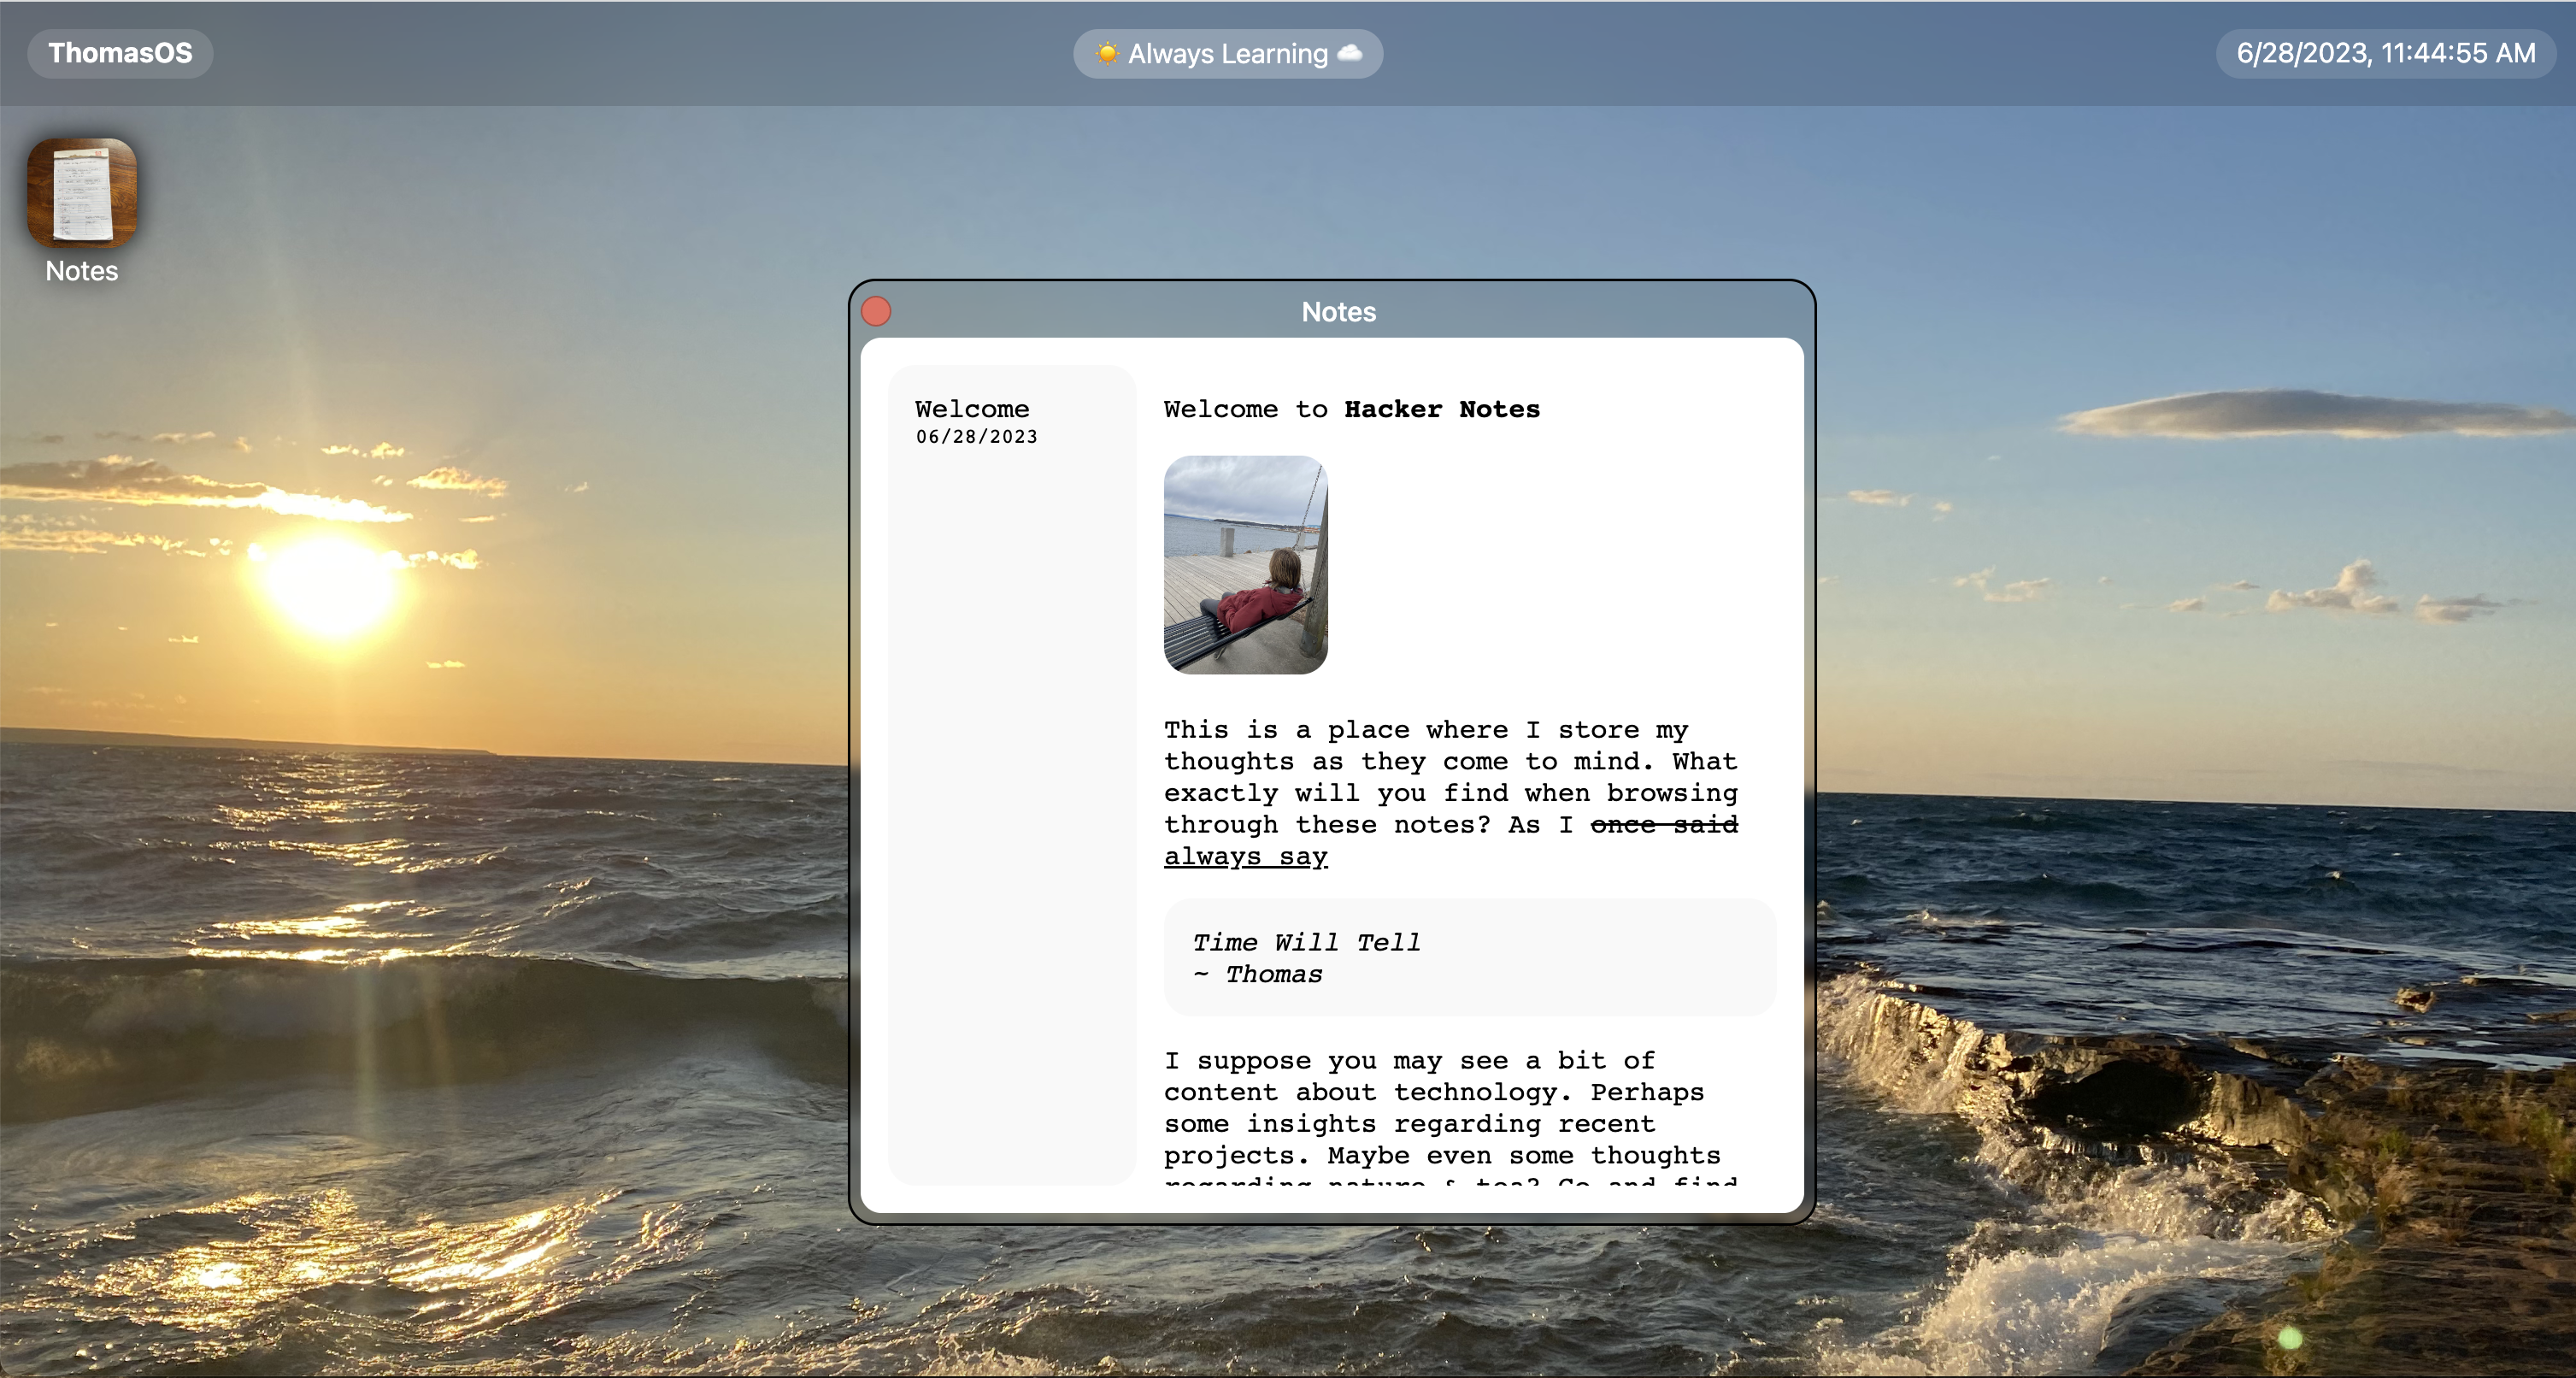
I encourage you to create something other than a sidebar to display your content selection options. Get creative, and be unique.
Here are the steps I took to create this sidebar.
- Wrapped my text content inside of a div
- Created a div inside of the window content div
- Made the window content div use
display: flex;andflex-direction: row; - Added some padding and some margin
- Styled the sidebar to make it look nice and added the first entry (with a name and date)
If you're stuck and want to see my code, take a look (but please don't copy and paste)
  <div class="window" id="notes" style="top: calc(50% - 240px); display: none; left: calc(50% - 260px); ">
    <div class="windowheader" id="notesheader">
      <div class="closebutton" id="notesclose">
      </div>

      <p class="headertext">Notes</p>
      <div style="width: 16px; margin-right: 6x; height: 16px;"></div>
    </div>
    <div
      style="background-color: #fff; margin: 6px; border-radius: 12px; width: 520px; height: 480px; padding: 16px; font-family: Courier; display: flex;">
      <div style="background-color: #F9F9F9; width: 520px; margin-right: 16px; padding: 16px; border-radius: 16px;">
        <p style="margin: 0px;">Welcome</p>
        <p style="font-size: 12px; margin: 0px;">06/28/2023</p>
      </div>

      <div style="overflow-y: scroll;">
        <p contenteditable="True">
          <span contenteditable="true">Welcome to <strong>Hacker Notes</strong>
            </br>
            </br>
            <img src="https://cloud-pc8imajxj-hack-club-bot.vercel.app/0img_0837.jpg"
              style="width: 96px; border-radius: 16px" />
            </br>
            </br>

            This is a place where I store my thoughts as they come to mind. What exactly will you find when browsing
            through
            these notes? As I <del>once said</del> <ins>always say</ins>
          </span>
        <blockquote
          style="background-color: #F9F9F9; margin-top: 16x; margin-bottom: 16px; margin-left: 0px; margin-right: 0px; padding: 16px; border-radius: 16px;"
          contenteditable="true">
          <i>Time Will Tell
            </br>
            ~ Thomas
          </i>
        </blockquote>
        <span contenteditable="true">
          I suppose you may see a bit of content about technology. Perhaps some insights regarding recent projects.
          Maybe
          even some thoughts regarding nature & tea? Go and find out!
        </span>
        </p>
      </div>
    </div>
  </div>
Storing Our Content in JS
We're going to be storing our content in a JavaScript array of objects. What data you'll have inside of each object will vary depending on what you're making.
For example, your objects may have a property of music if your app will display different songs for piece of content selected.
An object is a collection of properties (or smaller pieces of data)
{
	title: "Welcome",
	date: "06/28/2023",
	content: `(a bunch of html content in my case)`
}
title for example is a property and "Welcome" is the value of that property.
Note: I used `` instead of " " to ensure that the quotations inside of my html code would not prematurely end the string
Storing our content
We don't want to hard code the content, rather we want the content to be programmatically added to the screen so we can easily change it.
Let's begin by commenting out our HTML code and pasting it into our Java Script object. We'll have an object for each post.
var content = [
  {
    title: "Welcome",
    date: "06/28/2023",
    content: `
              <p contenteditable="True">
          <span contenteditable="true">Welcome to <strong>Hacker Notes</strong>
            </br>
            </br>
            <img src="https://cloud-pc8imajxj-hack-club-bot.vercel.app/0img_0837.jpg"
              style="width: 96px; border-radius: 16px" />
            </br>
            </br>

            This is a place where I store my thoughts as they come to mind. What exactly will you find when browsing
            through
            these notes? As I <del>once said</del> <ins>always say</ins>
          </span>
        <blockquote
          style="background-color: #F9F9F9; margin-top: 16x; margin-bottom: 16px; margin-left: 0px; margin-right: 0px; padding: 16px; border-radius: 16px;"
          contenteditable="true">
          <i>Time Will Tell
            </br>
            ~ Thomas
          </i>
        </blockquote>
        <span contenteditable="true">
          I suppose you may see a bit of content about technology. Perhaps some insights regarding recent projects.
          Maybe
          even some thoughts regarding nature & tea? Go and find out!
        </span>
        </p>
      `
  }
]
(p.s. we're creating an object which is a group of properties and placing that object in an array which is a list of values)
When we refresh the page, our notes page should now have no content.
Programmatically displaying our content
Let's make a function for setting the content.
We need to 1) get where we are placing the content (and make that place identifiable), 2) get the content, and then 3) place the content where it needs to go.
Try implementing it on your own, and if you get lost check the solution below:
Programmatically Populating our content selector
Currently our content selector is hard coded, but we want this to be dynamic so that it can respond to additional notes being added to the array.
Let's take all of the content out of our sidebar in HTML (because we no longer need to hard code it in)
We need to create a function that accepts the parameter of index (we can use the index of the item to identify it because the index (its spot in the array) is unique)
function addToSideBar(index) {
	(code goes here)
}
Try implementing it on your own, and if you get stuck consult the help below.
- We need to get the div where we are placing the content by placing an id on it and then storing it using a querySelector
var sidebar = document.querySelector("#sidebar");
- We then need to get the note content from our index
var note = content[index];
note: index is being given to use by our for loop and we're using that index to select the piece of content
- We then need to create a new div using the document.createElement function and pass it in the element type of "div" (where we'll be storing our listening inside of)
var newDiv = document.createElement("div");
- We need to set the content of this new div we created using the innerHTML property
  newDiv.innerHTML = `
    <p style="margin: 0px;">
      ${note.title}
    </p>
    <p style="font-size: 12px; margin: 0px;">
      ${note.date}
    </p>
  `;
- We need to add an event listener to check if it has been tapped (& in which case we'll programmatically set the content)
newDiv.addEventListener("click", function() {
    setNotesContent(index);
  });
- & last but not least we need to append it to our div
sidebar.appendChild(newDiv);
- & then finally we need to loop through the function to ensure it is done for every object in the array
for (let i = 0; i < content.length; i++) {
  addToSideBar(i)
}
(a for loop runs a segment of code a given number of times and passes in a number that increments each time the code segment runs)
Woooo, it's working!!!
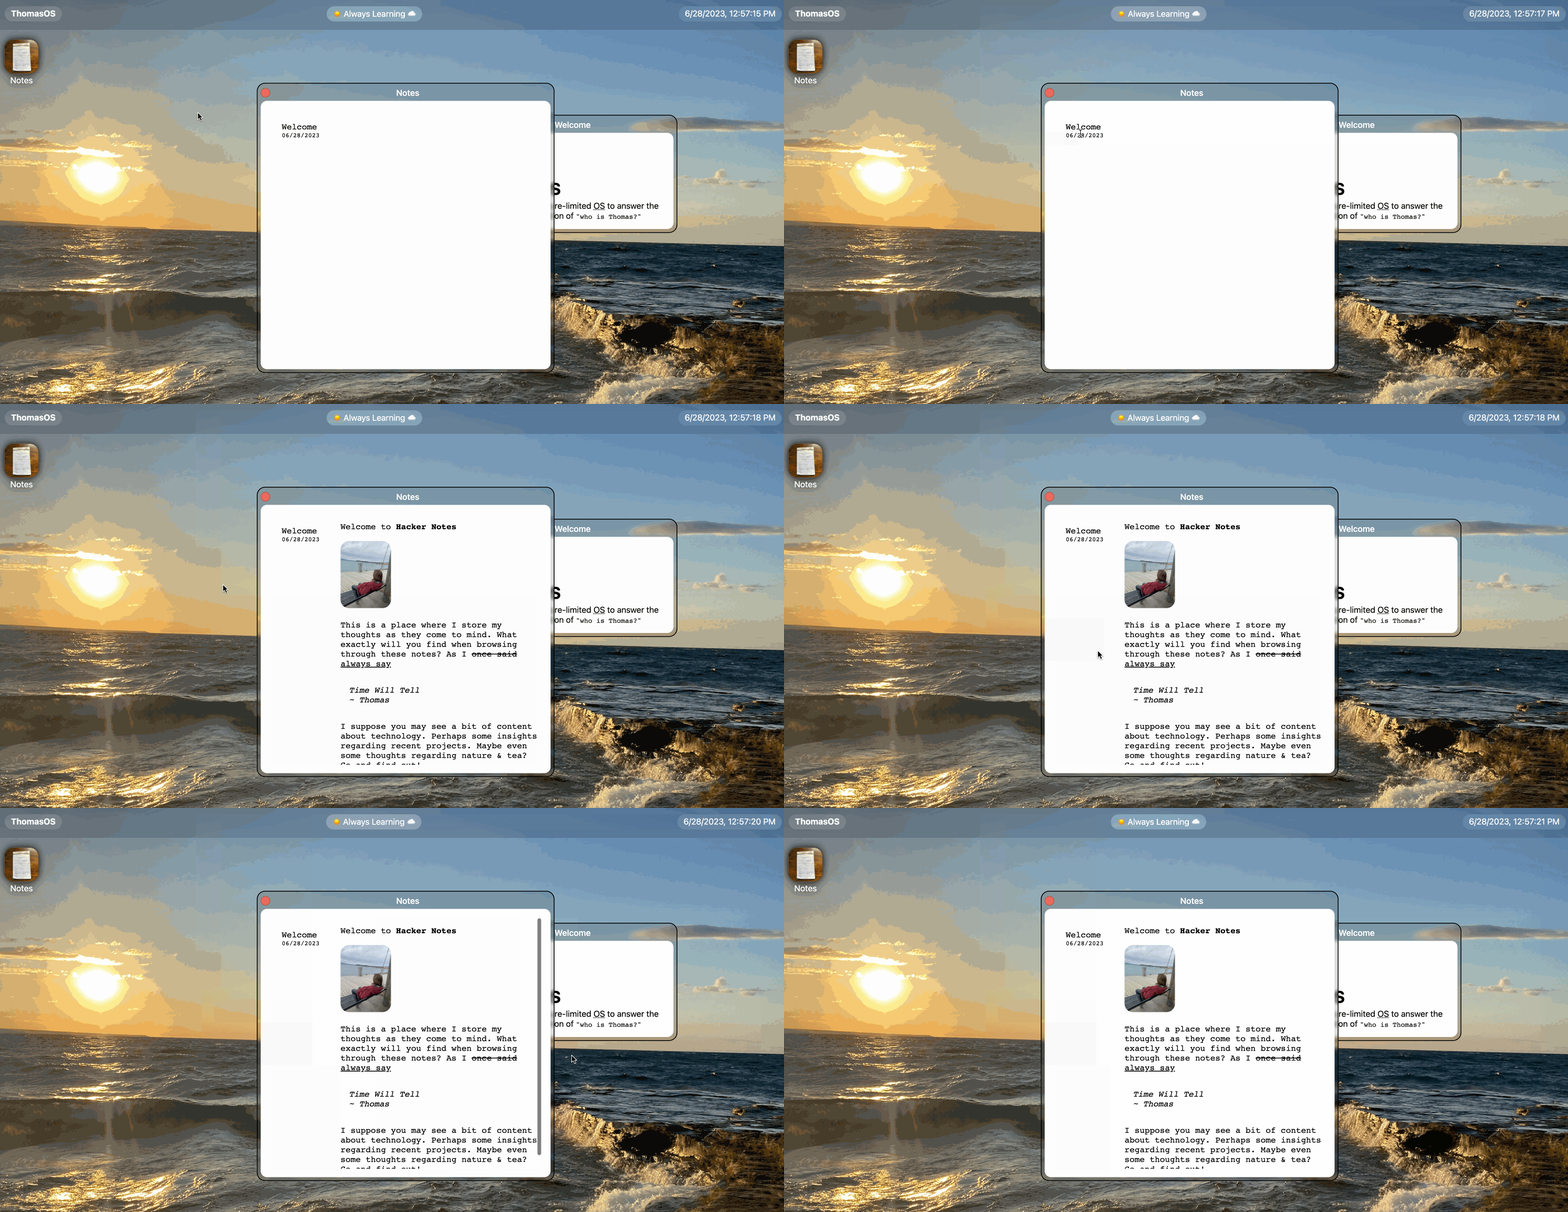
btw if you got confused, here's the complete set of code
Creating Content to Select
I am going to create a sample
Creating content is now quite easy. It actually doesn't involve any code, you can just add it to the array of content & it just automagically works!
Here's how I added to my array of objects (notice now there are two objects in the JavaScript array):
var content = [
  {
    title: "Welcome",
    date: "06/28/2023",
    content: `
              <p contenteditable="True">
          <span contenteditable="true">Welcome to <strong>Hacker Notes</strong>
            </br>
            </br>
            <img src="https://cloud-pc8imajxj-hack-club-bot.vercel.app/0img_0837.jpg"
              style="width: 96px; border-radius: 16px" />
            </br>
            </br>

            This is a place where I store my thoughts as they come to mind. What exactly will you find when browsing
            through
            these notes? As I <del>once said</del> <ins>always say</ins>
          </span>
        <blockquote
          style="background-color: #F9F9F9; margin-top: 16x; margin-bottom: 16px; margin-left: 0px; margin-right: 0px; padding: 16px; border-radius: 16px;"
          contenteditable="true">
          <i>Time Will Tell
            </br>
            ~ Thomas
          </i>
        </blockquote>
        <span contenteditable="true">
          I suppose you may see a bit of content about technology. Perhaps some insights regarding recent projects.
          Maybe
          even some thoughts regarding nature & tea? Go and find out!
        </span>
        </p>
      `
  },
    {
    title: "Sample Text",
    date: "06/28/2023",
    content: `
              <p contenteditable="True">
          Here's some sample text
        </p>
      `
  }
]

WAHOOOOOOOOOOOOO
OUR FIRST APP IS COMPLETE EXCEPT HA NO IT'S NOT!
You saw this coming...
ADDITIONAL CHALLENGE TIMEEEEE
Additional Challenges
Pick some challenges that seem fun & add them to your App
- Add a really unique background color and color for your text
- Make the top bar of the application change depending on the notes currently open
- Make some awesome content for your site
- Fix the bug where the menu gets trapped in the top bar when you pull it up too far (either by limiting how far you can pull it up or by making it possible to click through the top bar)
Celebrate
I am so proud of you. I really did not think you would make it this far...
Next time you'll build your own App (based on your own idea). It's going to be a lot of fun. I'm sure you're a bit tired.
Take some rest & return back ready to CONQUER THE WORLDDDD (& build an awesome App that will be fully determined by your own interests for your OS).
(Seriously though, great job!)
Join Hack Club Flavortown!Congratulations on making your very own WebOS — now ship it with Flavortown and earn free prizes!
Congratulations! 🎉 🎉 🎉Share your final project with the community