Create your own Club Crypto Currency
Before you start.: This guide takes about 30 minutes to complete. Easy Difficulty, Good start for any newbies.
What you will end up with:

How you will use this as a club?
As a club, you will be able to send and recieve these tokens between eachother as a way of rewarding. For example, you the club owner can send your club members 2 tokens after the end of this jam as a way to boost their enthusiasm.
This guide teaches users how to create their own personalized cryptocurrency token using Solidity and Metamask. By following the step-by-step instructions, users set up an endpoint, create a MetaMask account, and code their token on Remix Ethereum. The resulting token can be shared and used as a form of reward or gratitude among club members, fostering a sense of community and enthusiasm. The process is beginner-friendly and offers an opportunity to learn about blockchain concepts while exploring the world of cryptocurrency creation.

Why should you even care?
- Well, imagine a reward you made that you can share withothers.
- Like a sign of gratitude or thanks. Or anything you want! This token can be like a cashback, a reward, a sign , of thanks, a form of currency between your friends
- and well you get to learn something new
- Understanding blockchain concepts can significantly impact your future prospects, especially in the field of blockchain development.
- Learning about current trends can help you keep up and learn something new!
Learning Objectives
- To learn and understand the Ethereum platform
- To create a crypto token
- Understand the basics of Solidity language
Prerequisite knowledge required
- None! This course covers everything you need to know and get started with!
Outline of the course
- Create accounts and an endpoint
- Code in solidity
- Deploy and receive the tokens.
What to keep ready?
- install the metamask extension to your browser (a place to store your coins)
- open and keep quicknode.com ready (a place to interact with the ethereum platform)
- open and keep remix.ethereum.org ready (a place to code and deploy in solidity)
Key Points & Terms
- MetaMask - Think of it like a bank! Metamask is a virtual wallet where you will be storing tokens through this Jam.
- Quicknode - We use this as a method to connect your metamask to the ethereum (or any) blockchain. This helps metamask or any service communicate with the network (blockchain network)
- Endpoint - This is like a connection point between any service and a blockchain network (Quicknode makes one for you making our task easier)
- Solidity - An object-oriented programming language for implementing smart contracts on various blockchain platforms, such as Ethereum.
- ERC-20 - Short for Ethereum Request for Comment 20, It helps guide the creation of new tokens in the ethereum blockchain
- Testnet - The opposite of Mainnet, Coins in the mainnet have monetary value and the value can change but in a testnet all coins are just virtual copies/duplicates without a realworld value. But dont let that get to you as these coins are indeed shareable!
WARNING: THE COINS YOU MAKE ARE IN THE TESTNET AND HAVE NO MONETARY VALUE! DONT EXPECT TO MAKE MONEY OUT OF THIS lol
DOUBLE WARNING (AND TIP): WHEN MAKING YOUR METAMASK ACCOUNT, MAKE SURE TO SAVE THE 12 PHRASES AS THEY ARE LIKE A PASSWORD TO YOUR ACCOUNT, STORE THEM ANYWHERE SAFE LIKE YOUR NOTEPAD, DIARY, ANYWHERE SAFE. ONCE LOST, YOUR ACCOUNT IS GONE BYE-BYE FOREVER. (also dont trust anyone and show them your phrases)
The guide! (dont be overwhelmed by the number of steps, Its easy!)
Creating A Endpoint With Quicknode
-
Navigate to quicknode.com and create an account
-
Click "Endpoints"
-
Click "Create Endpoint"
-
Click "Continue"
-
Click on "Ethereum"
-
Click on "Sepolia"
-
Choose the free version
-
Wait for the process to complete
-
Copy the HTTP link provided at the top
-
Create a MetaMask account (if you don't have one already)
-
WARNING: Keep the secret phrases safe and save them in a secure location
-
Open MetaMask and click on the profile button
-
Click "Add Network"
-
Scroll to the bottom and click "Add a Network Manually"
-
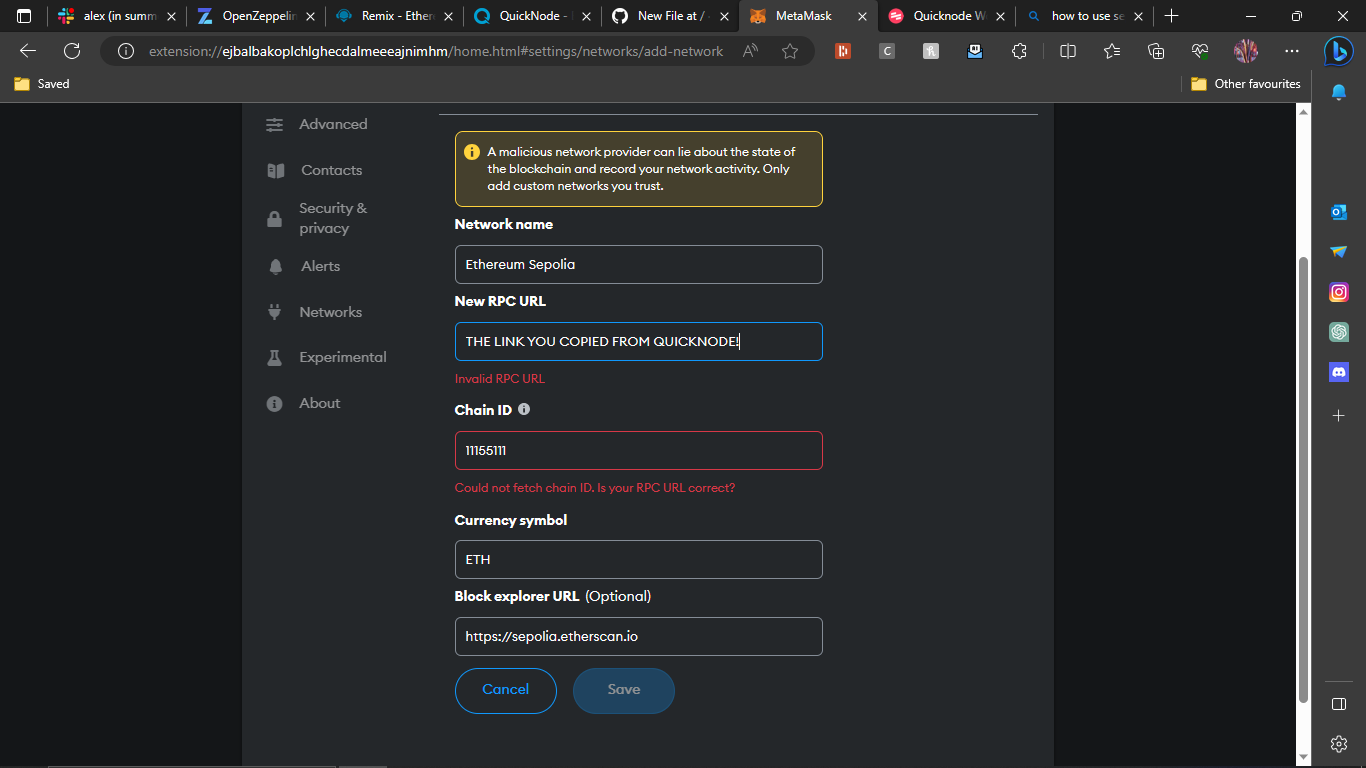
Fill out the form as follows:
- Network Name: Ethereum Sepolia
- New RPC URL: [Paste the copied HTTP link]
- Chain ID: 11155111
- Currency Symbol: ETH
- Block Explorer URL: https://sepolia.etherscan.io
-
Click "Save" or "Add" to add the network
-
Press the text showing "Account 1" to copy the MetaMask address
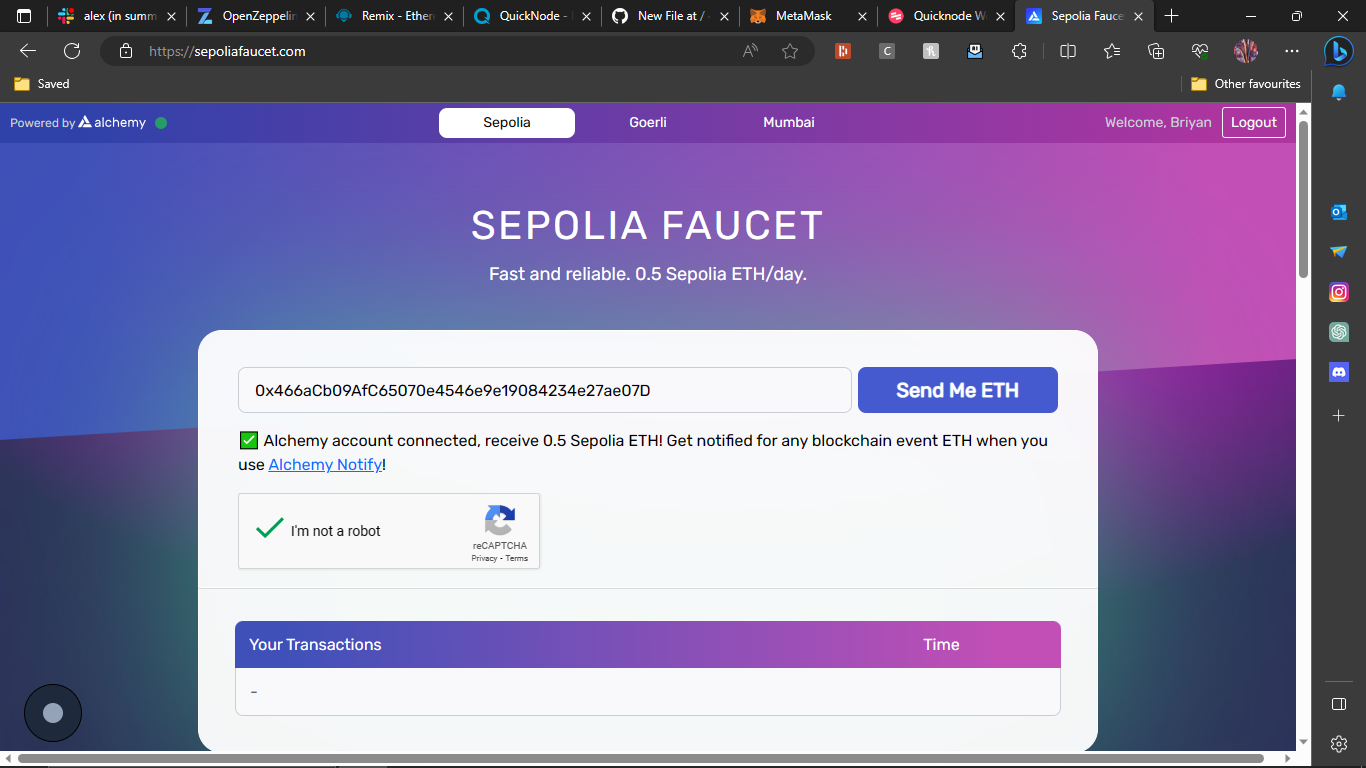
Getting some free ETH for exchange fees! 🤑💲
-
Go to sepoliafaucet.com in your web browser (You're just a few clicks away from being a crypto millionaire! Well, at least in Sepolia. Time to collect those shiny tokens!)
-
Paste the copied MetaMask address into the provided field on the Sepolia Faucet website
-
Follow the instructions on the website to claim the free tokens
The Coding & Creation Part!
-
Go to remix.ethereum.org in your web browser (Now you're a real crypto artist! Grab your virtual paintbrush and start creating your masterpiece.)
-
Create a new file called
MyToken.soland add the following code:
// SPDX-License-Identifier: GPL-3.0

pragma solidity >=0.7.0 <0.9.0;

import "@openzeppelin/contracts/token/ERC20/ERC20.sol";

contract MyToken is ERC20 {

    constructor () ERC20("Your Coin Name", "Your coin symbol (3-4 letters only)") {
        _mint(msg.sender, 1000000 * 10 ** decimals());
    }
}

Code explaination:

the first line is a comment which states the license of the code

the second line specifies the version of solidity the code is compatible with

the third line imports code from an open source library called openzeppelin

the forth line defines a new contract called MyToken from the ERC20 contract

the next few lines defines the personality of the coin like its name, symbol, amount and decimal points. psss.. BTW dont remove the " " from around your token name and symbol.
Quick FAQ:
-
Click on the third icon in the sidebar to access the Solidity compiler
-
Click on "Compile MyToken.sol" and wait for the compilation to finish
-
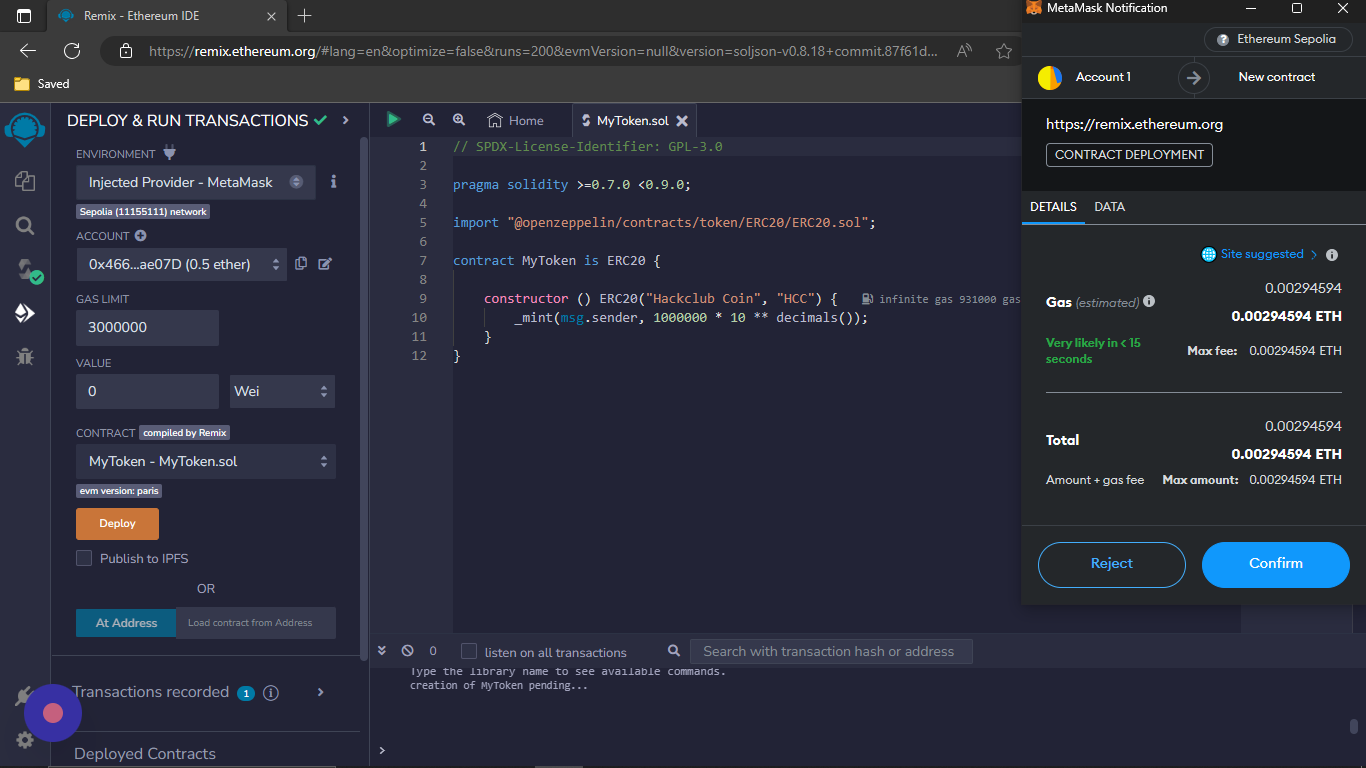
Click on the fourth icon in the sidebar to access the Deploy tool (Deploy, deploy, and away! It's like sending your token into the crypto universe. Ready for takeoff!)
-
Click on the environment dropdown and choose "Injected provider - Metamask" (You may need to refresh the page and the name may not specifically mention MetaMask)
-
Click on "Deploy" (Waiting for confirmation? Don't worry, it's not like waiting for a pizza delivery, It wont take long!)
-
Wait for the MetaMask popup to appear and accept any prompts that show up (Buckle up, folks! You're about to embark on a digital transaction journey. Fasten your seatbelts and prepare for takeoff!)
-
Wait for a message or confirmation from MetaMask indicating the successful deployment
Verifying your tokens existence (This is where you check if you did things right!)
-
Scroll down in the Deploy and Run Transactions tool to find the "Deployed Contracts" section
-
Click on the copy icon to copy the deployed contract's address
-
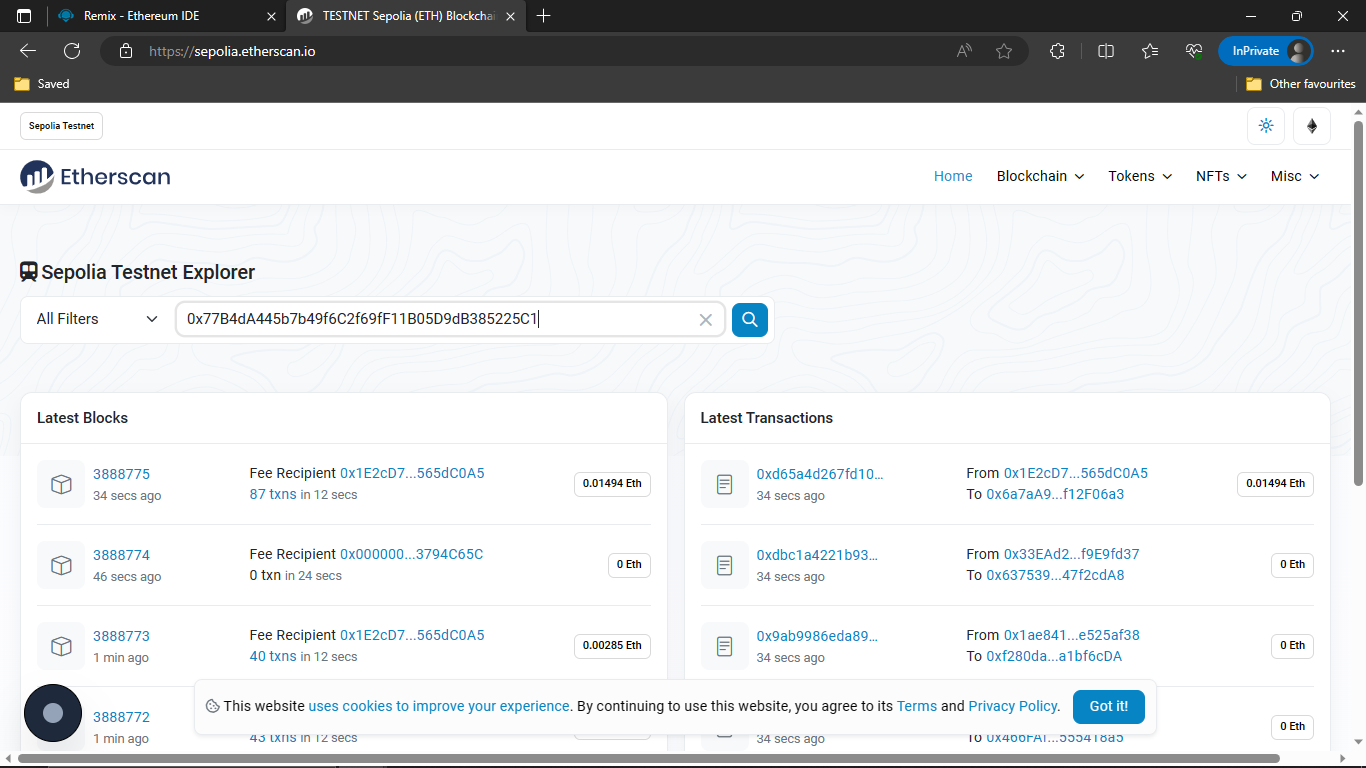
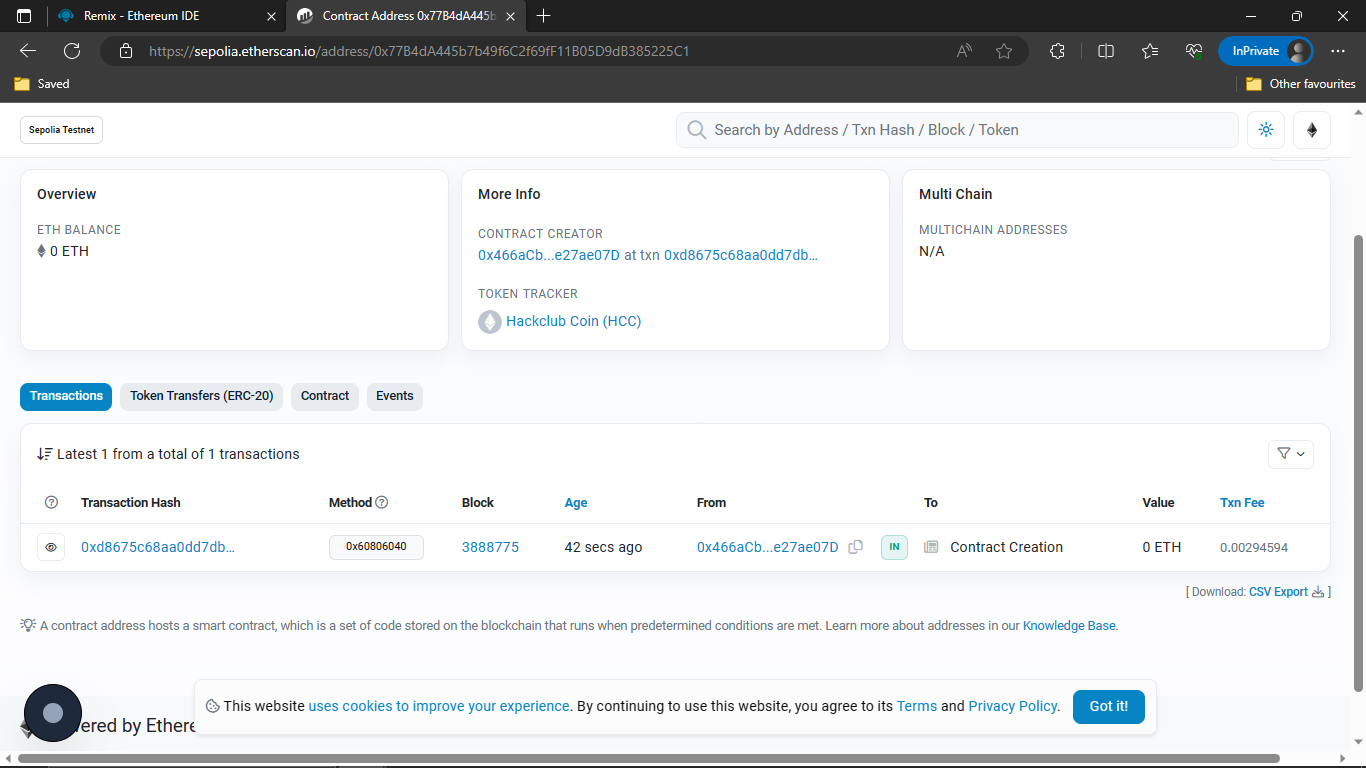
Go to sepolia.etherscan.io in your web browser
-
Paste the copied contract address into the search bar on Etherscan and verify its existence (Let's play detective! Paste the contract address and see if our virtual creation has left its digital footprint on the blockchain.)
-
Go back to MetaMask (Time to check on your tokens like a dragon guarding its treasure!)
-
Click on "Import Tokens" at the bottom of the page
-
Paste the deployed contract's address (same one used in sepolia.etherscan.io) and wait for the form to auto-complete
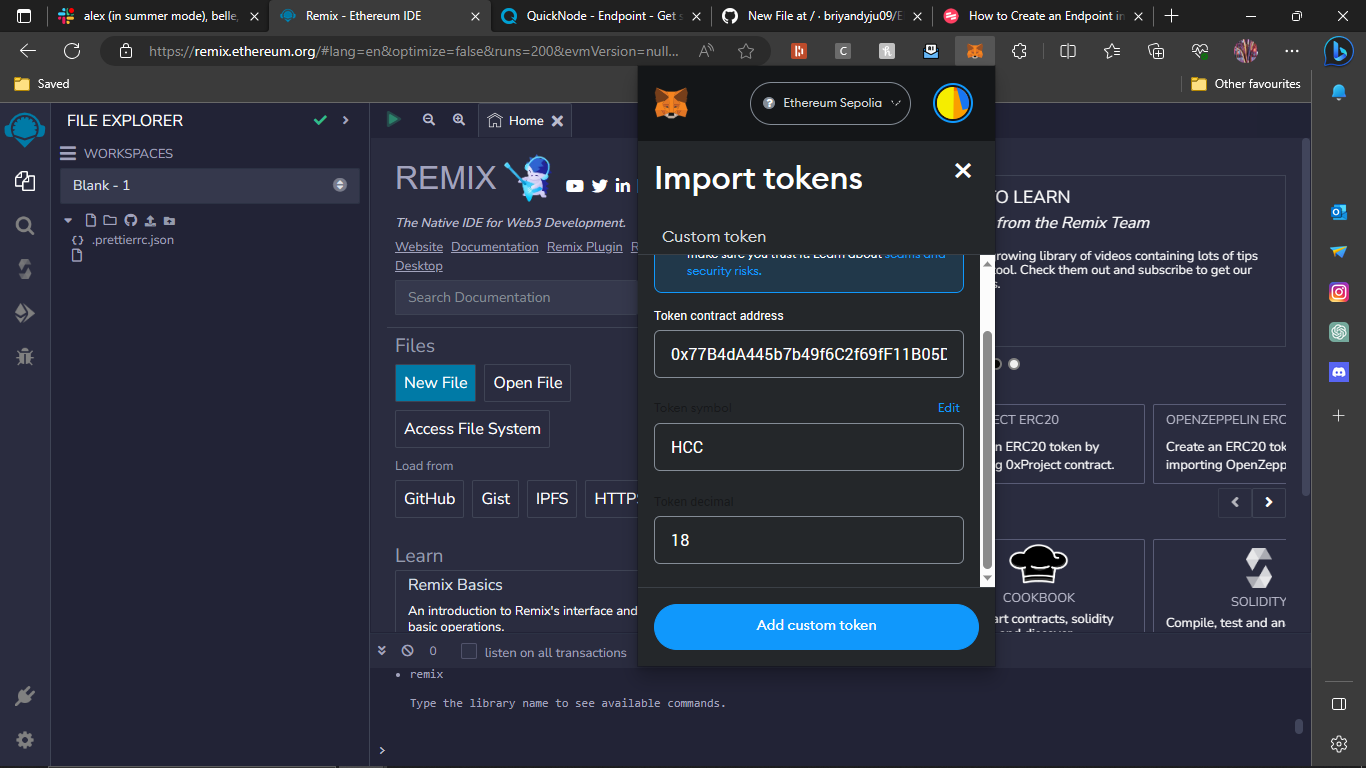
-
Continue and wait for the token to be imported
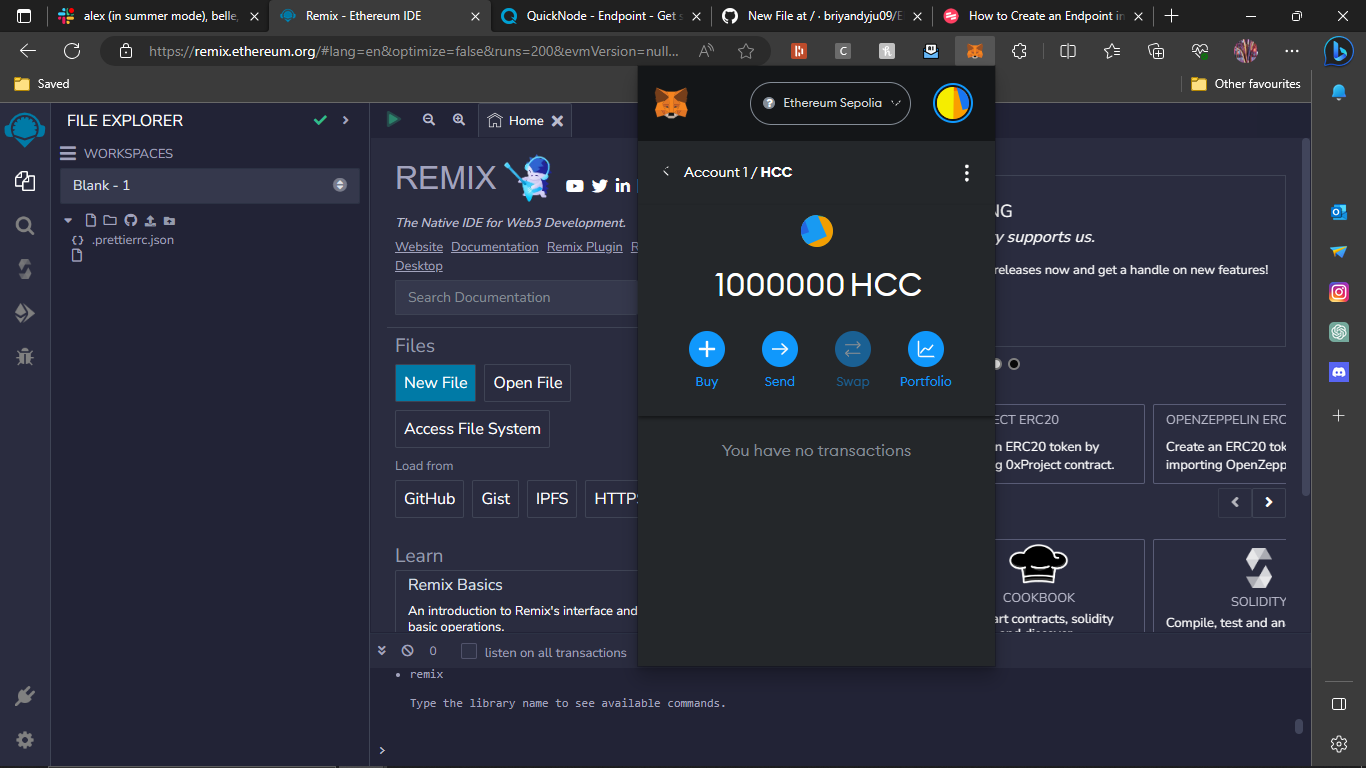
-
You will receive your coins in MetaMask (Cha-ching! It's raining digital coins in your MetaMask wallet. Time to celebrate!)
Personalizing options
- Try experimenting and testing different blockchains like matic!
- Try making more coins for different occasions (maybe one for thanks and one for sorry?)
- Try messing around the settings! It wont hurt to try new things!
How to share tokens?
-
remember steps 13-17? just redo it on your reciever's (the person you want to send the tokens to) metamask
-
IMPORTANT STEP - You can rename the Network name to your coins name and ** ADD YOUR (THE PERSON SENDING THE TOKEN) Quicknode http link (step 9) and paste it in the reciever's NEW RPC URL field.
-
then go back your dashboard, click on your coin, click on send, paste the recievers address (step 18) to send it to him! Its that easy!!!!
A couple of things as tips or bonus
- Make sure to give all your addresses right as messing up addresses can ruin literally everything
- Play around with code or settings to find out how things work! (You can never go wrong in a testnet)
- Before trying out a new Blockchain, do infact read and understand about it.
Additional Resources & Guides
- Check out metaschool.so (where i learnt all of this) for many many for courses where you get to explore the wonders of Web 3.0
- Learn more about ethereum and its blockchain at - ethereum.org/en/
- Make a blockchain with python - https://hackernoon.com/learn-blockchains-by-building-one-117428612f46 & http://ecomunsing.com/build-your-own-blockchain
Stuck? Facing issues? Your last braincell stopped working?
- Feel free to contact me on slack! The name's @Briyan Dyju
Congratulations! 🎉 🎉 🎉If you're a highschooler who enjoys programming or tinkering with hardware, make sure to join Hack Club, the world's largest nonprofit empowering teenagers to make cool projects! There's tons of programs where you can get prizes for programming, get your hardware projects fully funded and you can join the awesome community of 100k+ teenagers who love making cool stuff (just like you!).