Get a PCB Grant
In this jam you'll take an existing design you've made and submit it to the OnBoard repo, an open-source collection of other designs, to request your $100 manufacturing grant.
If you don't already have a design, go to jams.hackclub.com/jam/hacker-card to make one!
This is a shortened version of the full submission instructions for the grant.
Required Materials
- A PCB design: If you don't have one you can make one here: https://jams.hackclub.com/jam/hacker-card
- A GitHub account: If you don't have one, create one here: https://github.com/join
- 60 minutes: It'll take a bit less time if you have experience with GitHub, but if you're new to it, it'll take a bit longer. If you don't have enough go to the time store.
- A good time: This one's on you~
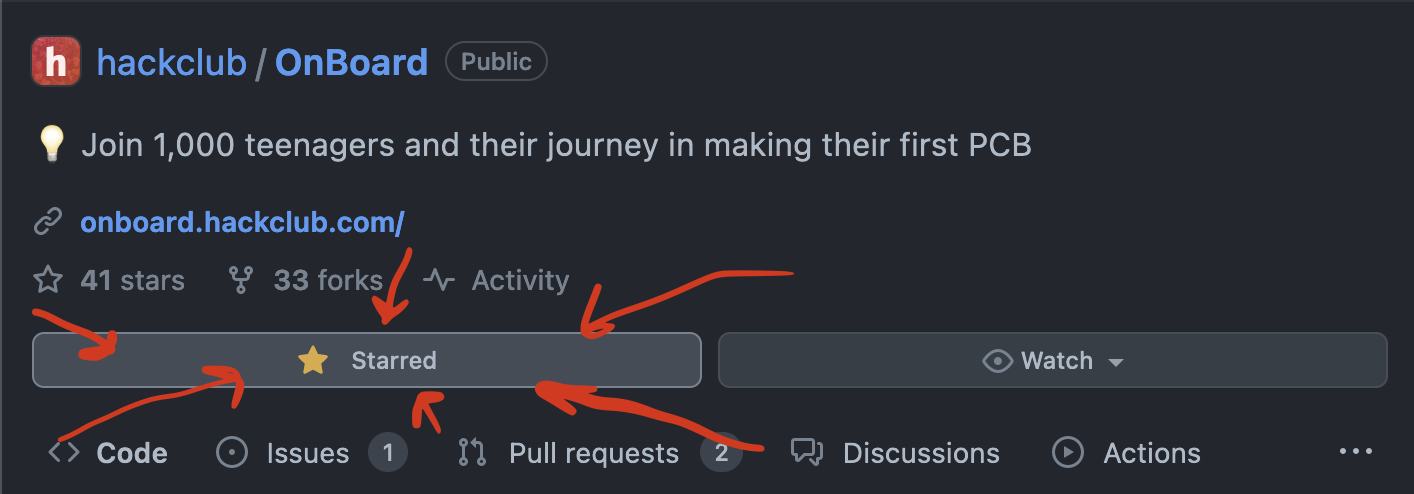
Star the repo (Optional)
To follow the repo for updates and show you're participating, click the "star" button on the hackclub/onboard repo.
1. Join the Slack!
Our #onboard channel is where the party is getting started! If you haven't already joined, make sure to add yourself to the channel. And for those who are new to the Hack Club slack, sign up to our community of 13k+ makers through here (don't worry, there isn't an application).
Perhaps ping a little hello to @Kevin Yang?
2. Upload to JLCPCB and Take a Screenshot
Upload your Gerber files to JLCPCB.com and add them to you cart. Once completed, take a screenshot with cost included!
Note: Your screenshot is VITAL since your project cannot be approved without it. You'll include the screenshot in your PR later.
3. Fork!
Fork the onboard repo! This is the where you'll add your project files and eventually PR from!

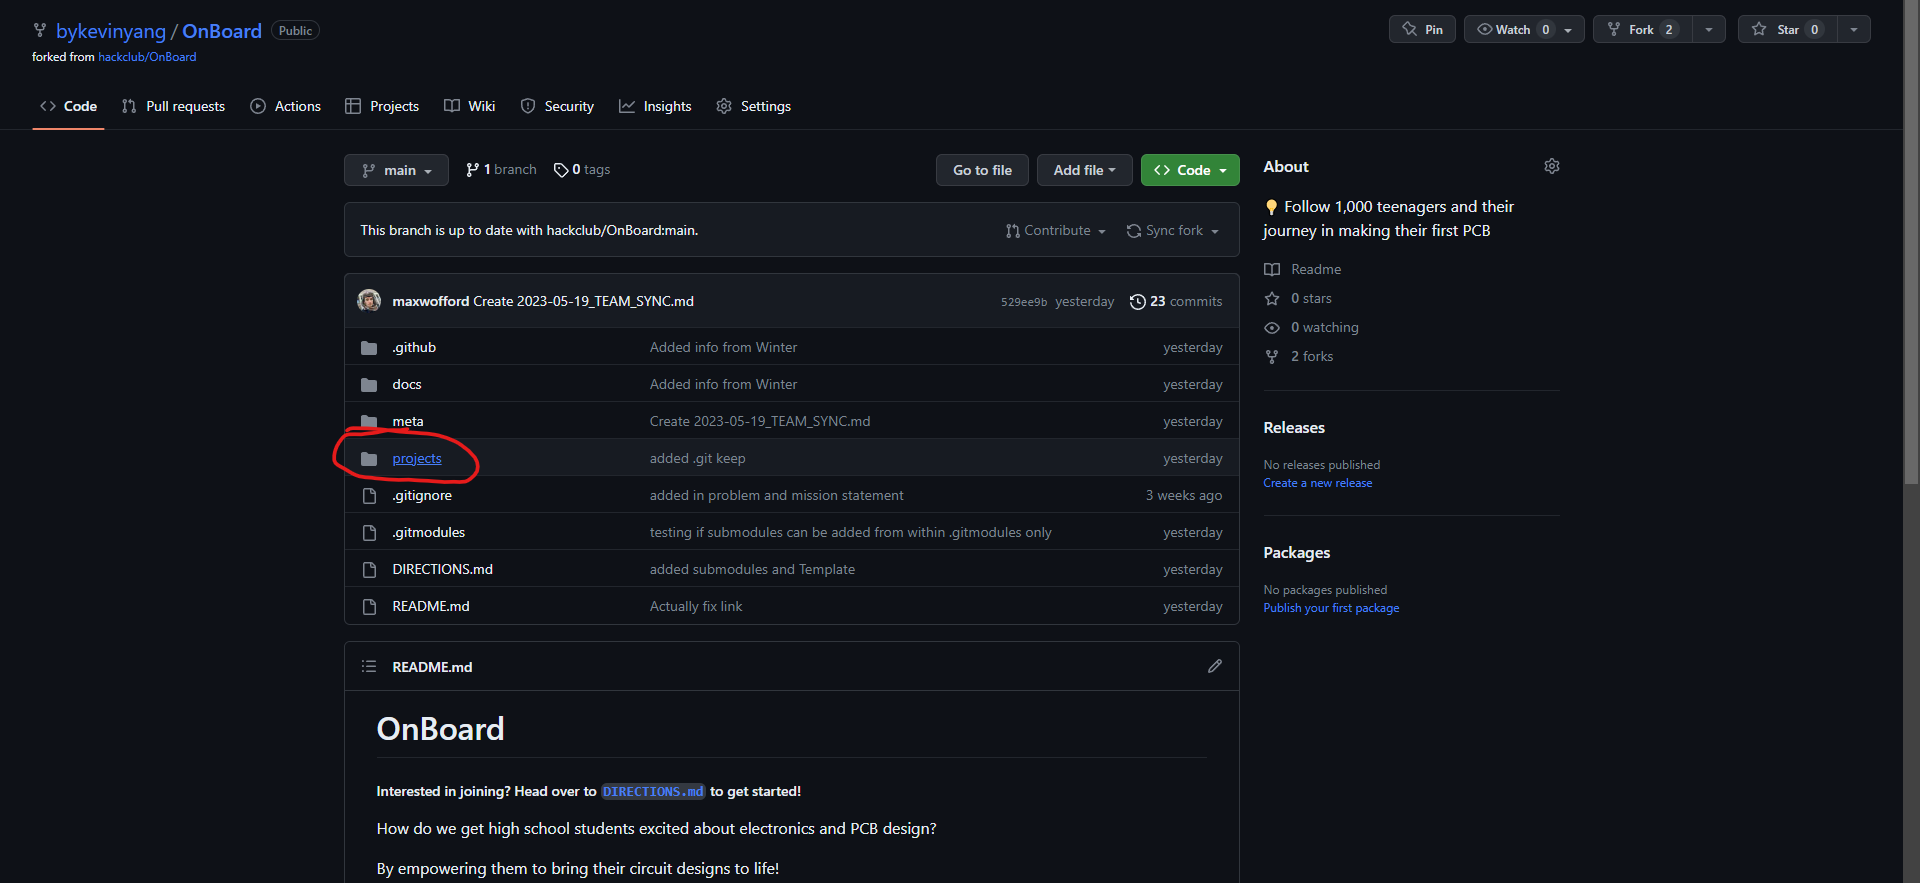
4. Add Your Design to Your Project Repo
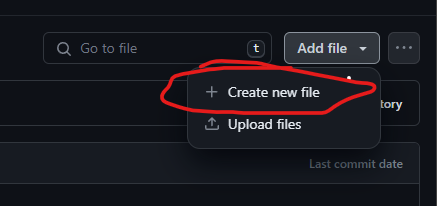
From your fork of OnBoard, create a folder with your project name under OnBoard/projects. To do this, go to the projects folder and click Create new file.
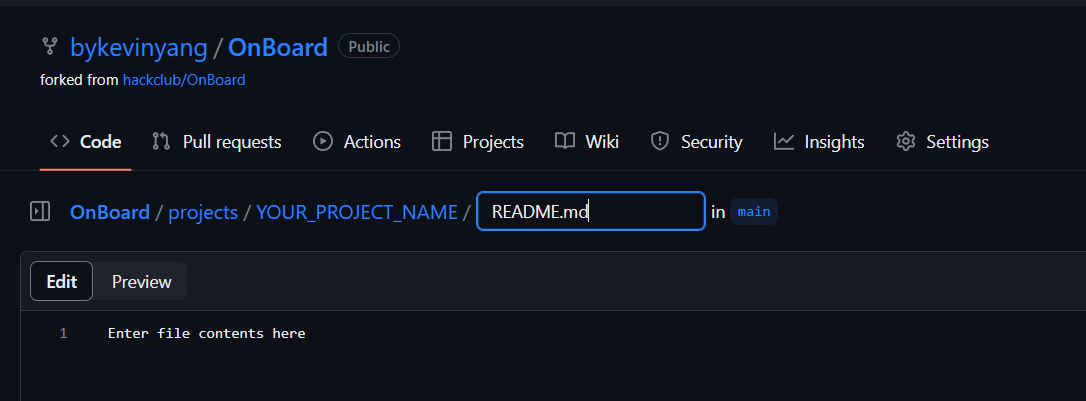
Then in the box labeled name your file..., type in PROJECT_NAME/README.md. This creates a README file under a folder called named after your project.
After this, copy and paste the contents of TEMPLATE.md into the text editor and fill it out!

Once your done, press the big green Commit changes button to save!
With your README filled out, head over to add files to begin uploading your Gerber, design files, and screen shot of vendor approval.
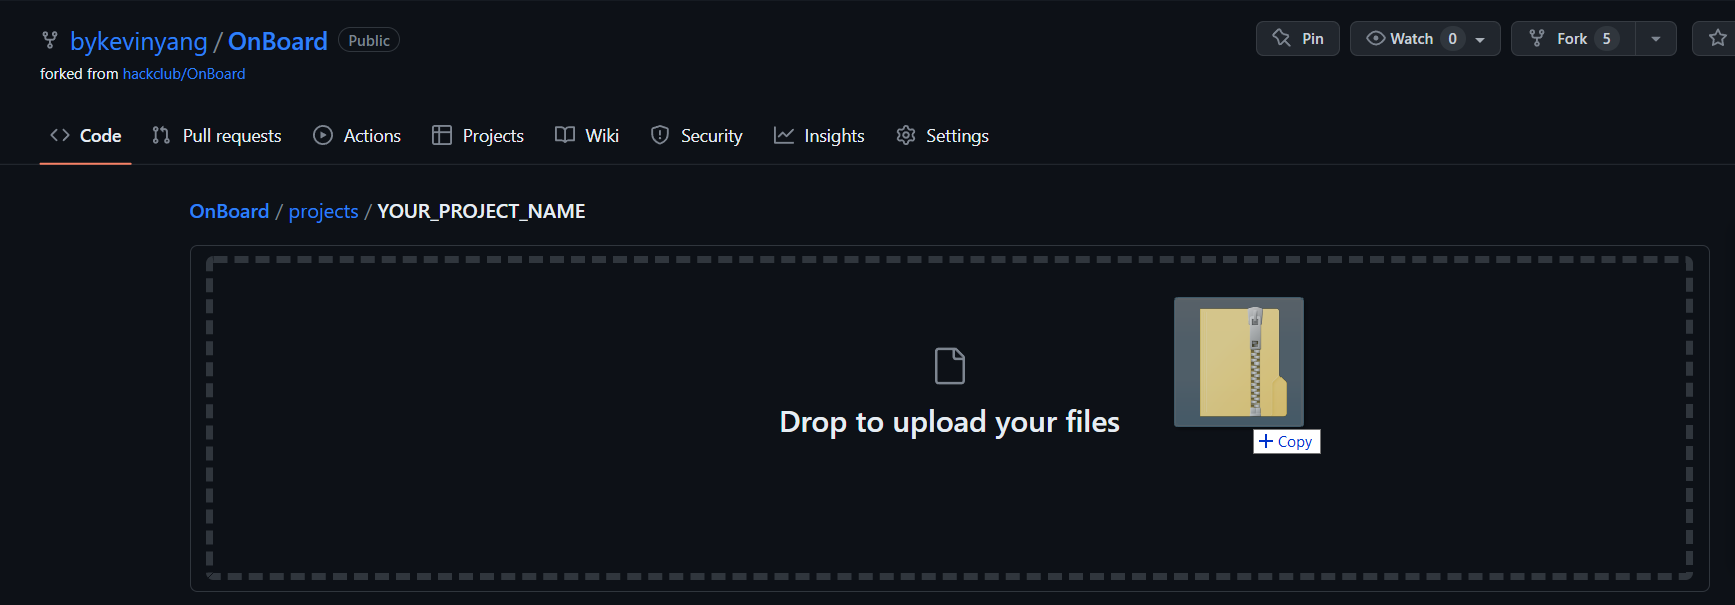
In all, you should have the following files under your project folder:
-
README.md: A filled outTEMPLATE.md, renamed toREADME.md. -
cart.png: A screen shot of your vendor approving your board. -
gerber.zip: This should be the file that you send off to the vendor. - Design files(
design.json,design.sch,design.brd, etc) insrcfolder . Whatever format your designer outputs to should be included. -
schematic.pdf: A pdf of your schematic, obtained from your designer.
cart.png, gerber.zip, and schematic.pdf are all very important to be named EXACTLY that; all lowercase and with the correct file types. This helps our bot to know what they are.
Your files should look roughly like this:

If you have all the above, you're done with this step!
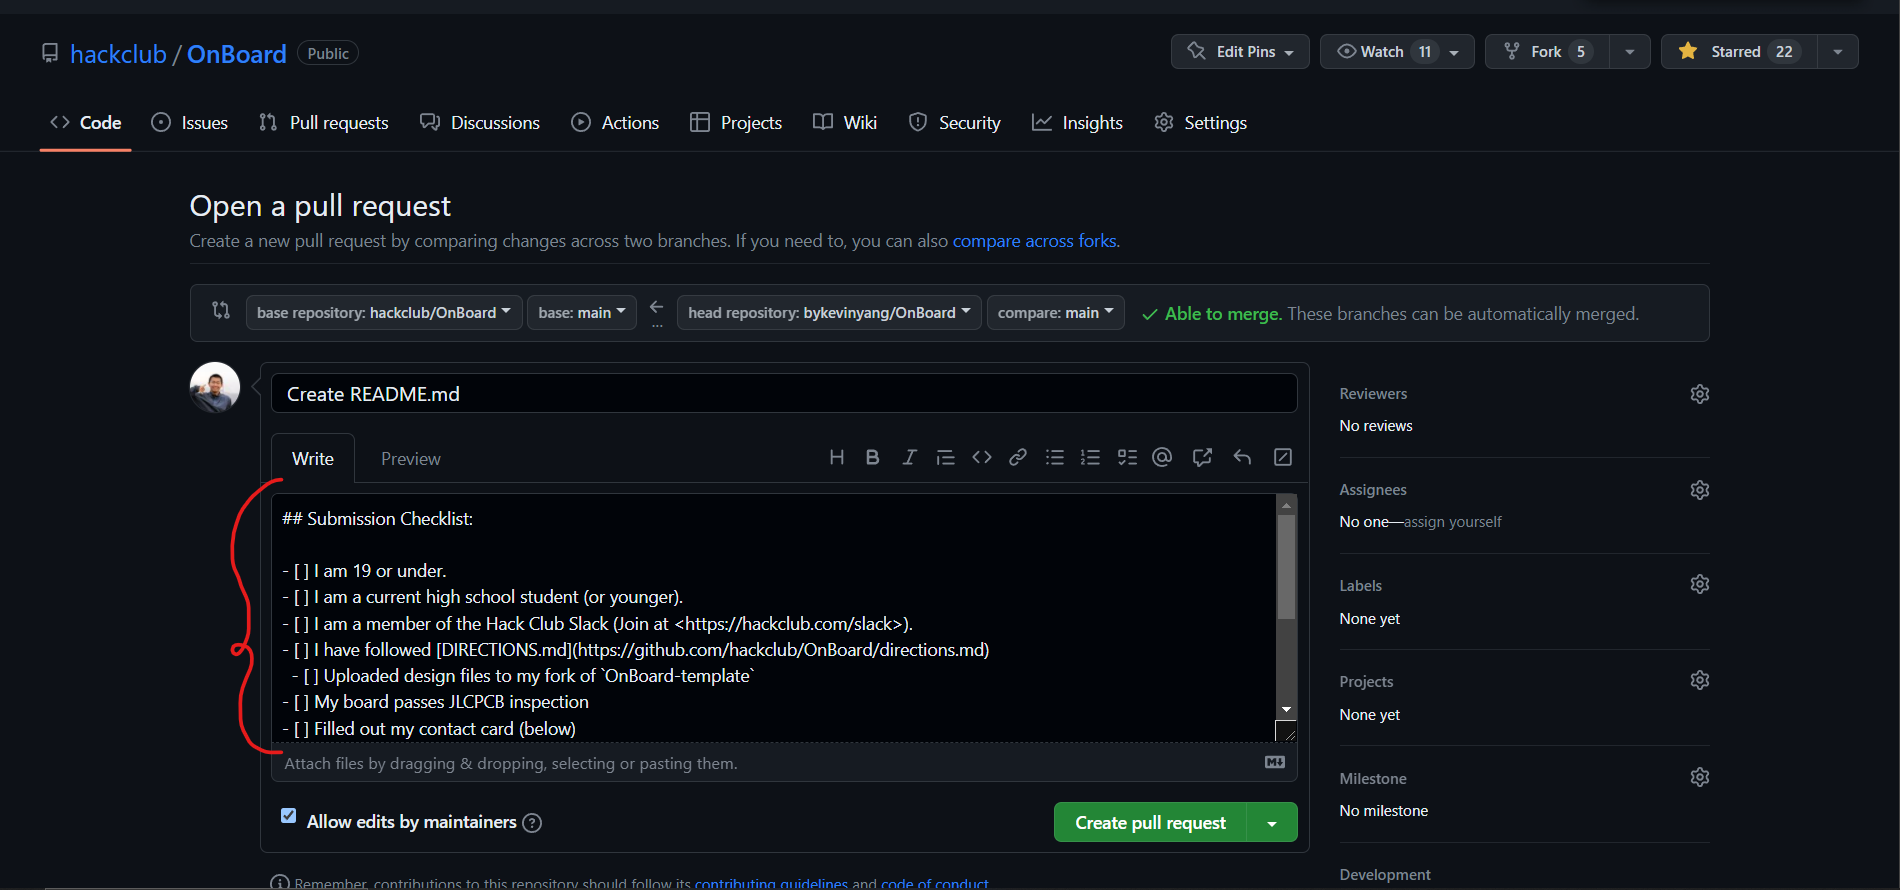
5. Create a PR!
Once you've uploaded your files, you can merge them to the main repo through a pull request! Under the contribute tab of your forked repo, click the big green Open pull request.
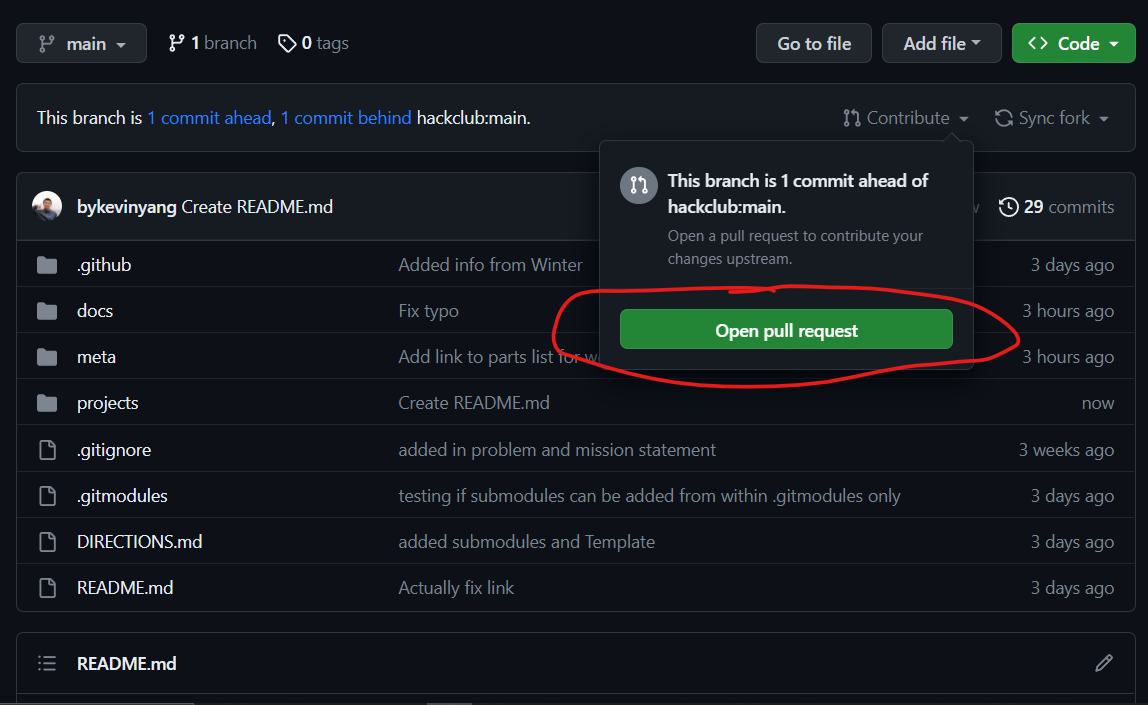
That will bring you to the main repo, where you'll initiate a pull request. All you need to do is to follow the checklist. Then, we'll review your PR, and you'll be off to the races!
6. Ship it!
Post photos of your board in #onboard! We can't wait to see what you make!
Congratulations! 🎉 🎉 🎉If you're a highschooler who enjoys programming or tinkering with hardware, make sure to join Hack Club, the world's largest nonprofit empowering teenagers to make cool projects! There's tons of programs where you can get prizes for programming, get your hardware projects fully funded and you can join the awesome community of 100k+ teenagers who love making cool stuff (just like you!).