Presentation
Video
Crafting a Build Your Own Adventure Game!
Choose Wisely, Code Boldly; Crafting a Build Your Own Adventure Game!
Whether you have programmed your whole life or this is your very first project, there is plenty of fun to be had with creating a Choose Your Own Adventure Game (CYOA)! This build incorporates music, interactive elements, and the ability to control all stylistic features! The most important part is to use your imagination since there is no limit to what YOU can create! No matter what difficulty you choose, you will have a playable game fit to share with family, and friends, and publish! You will gain invaluable knowledge in Python which you can use to create more games or implement in other projects!
What Will We Use?
- We will be using an online coding platform called Replit. It provides a browser based integrated development environment (IDE), which allows users to write, run, and collaborate on programs with support multiple programming languages! The best part? It is available on ALL devices!
Here is Replit's Documentation for future Reference: https://docs.replit.com/
- We will also be using Python to complete this project! Any familiarity with the language is recommended but not required!
Why Choose Python?
Click Here to Start Building: https://replit.com/
- Simplicity and Readability: Python's syntax is best known for its readability and simplicity making it a great option for beginners and those who would like a more straightforward language.
- Beginner Friendly: Python's syntax resembles natural language. This allows users to focus on programming concepts more than complex syntax.
- Rapid Development and Prototyping: Python's focus on code simplicity and the availability of powerful libraries allow users to quickly prototype and iterate on ideas.
Level 1: The Storyteller's Forge
Create your Text-Based Adventure Game
Here is the example code of what we're going to create!: https://replit.com/@ConnemaraPony/Beginner-CYOA?v=1
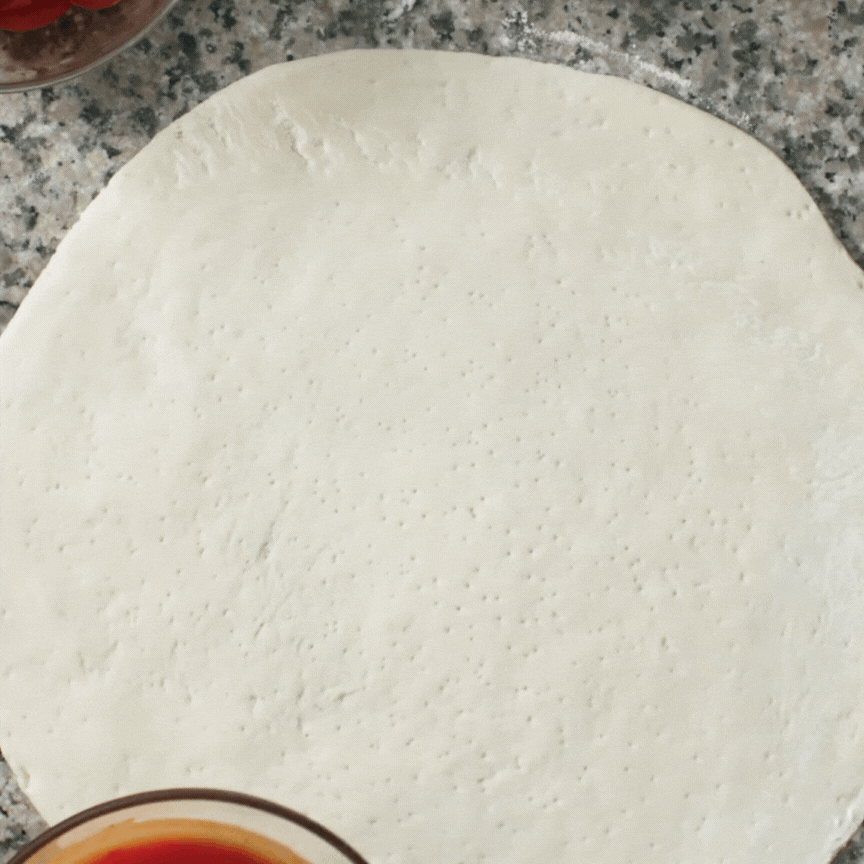
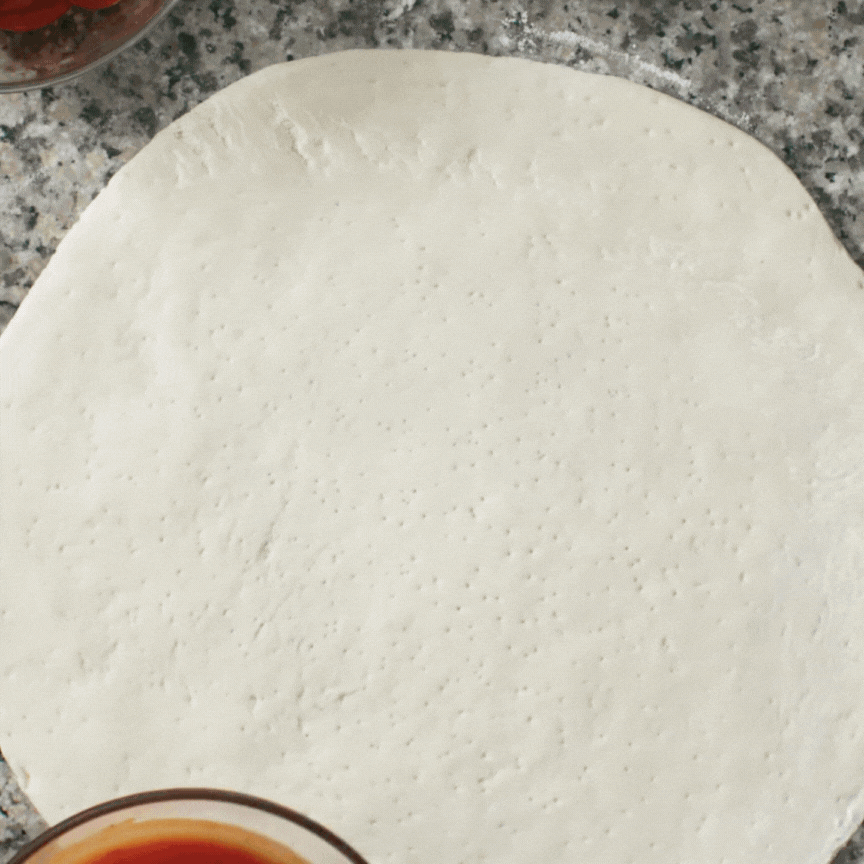
Building a Choose Your Own Adventure Game is kinda like making a pizza! First, the base! The most important part, and the thing that holds everything up... drum roll please... the storyline!
What Makes Text Based Adventure Games SO Playable?
CYOA's are interactive experiences that transport players into imaginative worlds through text based narratives. They normally have rich storylines which make players embark on thrilling quests, solve puzzles, and make choices that shape the course of the game!
Embracing the power of imagination, these games are extremely immersive and invite players to visualize the game world and become active participants in the unfolding story.
Moral of the story is that text adventure games have a huge emphasis on storyline and user interaction. The adventures had are timeless and engaging gaming experiences for players of all ages.
So what's the most important part? Planning.
Game Design

Choosing a Theme or Setting!
Start brainstorming different themes or settings for your story! It could be a mysterious haunted mansion, fantastical forest, or anything that sparks your imagination! Here are some ideas to get started:
- You discover a secret cave with mysterious tunnels each housing... peculiar creatures
- You and a group of friends decide to go to a haunted mansion, but things aren't at all what they seem
- You're being chased and have to escape a maze
- You're opening your own pizza shop
- You're stranded on a desert island
- You're the mayor of a small and... quiet... town
- Create a short "what ___ am I?" quiz
- Create a realistic roleplay
- Each person is gifted a special power... what's yours?
The best part is the sky's the limit! Keep brainstorming until you find something you want to start with.
Also consider the potential story choices, depth, and player engagement.
Planning Game Structure!

Define what the game structure by figuring out the overall goal that players will strive to achieve. It can be finding treasure, surviving on an abandoned island, solving a mystery, or saving the world!
In this stage determine the key challenges, events, or puzzles the players will face through their journey. You can also take this time to divide your game into different chapters/levels if you would like.
Now figure out your player's choices. Imagine a tree, and each choice is a different branch of the story. Identify these "branching off" points in the narrative where the player's choices will affect the outcome.
Characters!
This is also a good time to figure out any potential non-player characters (NPC's). These are characters that the player can interact with and can make the storyline richer.
Here are some tips that can help your character become more fleshed out, relatable, and believable, hooking the user to your game:
- Make your characters have "strong" and or detailed backstories that can include their past experiences, goals, motivations, etc.
- Give your characters unique personalities! Think about their temperament, speech patterns, and quirks. How do they express themselves
and relate to others?
- When writing their dialogue pay attention to how they speak and their language; make sure it reflects their personality and background.
- These NPCs can even have a character arc throughout the story, or perhaps the user's character can influence them.
- You could even create side quests that allow the user to strengthen their relationship with them allowing the, to unlock other
levels.
- This can allow your player to have a more immersive experience.
- You could even create side quests that allow the user to strengthen their relationship with them allowing the, to unlock other
levels.
- You can also make your characters complex by considering their relationships with other NPC characters in the game or the user's.
Once you're all done writing everything up- let's start programming!
Setting Up Replit

Before continuing further, make sure to set up or log in to your https://replit.com account.
Once there click on 'Create a New Repl'
Pick 'Python' as your programming language.
And name the file what you would like ex. CYOA_Part_1
Main Game loop
To start we have to have something that will loop for the game checking if the player wants to quit or start over. To do this we will be
using a while loop.
Now what is that? Why is it important?
Well we want something to loop/run through the code for an unlimited amount of time that checks whether or not our game will end.
That is exactly what a while loop is! It is a repetitive loop that runs until a certain condition becomes false!
Let's start by creating our game's status. We would like the game to keep running until the game's status goes from "yes" to "no". Here's
an example: gameStart == "yes".
Then we need to set our loop to continuously check that our game's status is equal to "yes". For this, we will write while followed by
our condition (gameStart == yes) and a colon.
Then we have to make sure that our player can add their input to determine whether they want to play or not. Inside the while loop, we
will add our variable again: gameStart but we'll set it = to input("") and inside the "" we can add the question of whether or not
they would like to quit.
Note: keep in mind that if they would like to restart or continue with the game it has to equal what our variable was, in this case, "yes" if they input anything else the game will quit.
Yay! We've successfully created a while loop that checks whether or not our game has ended based on the player's input.
This is what an example of the should look like:
gameStart = "yes"

while gameStart == "yes":
    gameStart = input("Would you like to restart? ")
Let's Make Our Game Design Come to Life!
Input System
Let's say for this game we are crafting a pizza and have different choices for special edition toppings: Potatoes or Champignon Mushrooms
using the print function.
gameStart = "yes"

while gameStart == "yes":

    # this is a comment, something that will not appear in the
      final game
    # It is great for taking notes and explaining code!
    # add all game-related content inside this loop

    print("Welcome to La Mia Pizzeria Preferita!")
    print("What would you like for your toppings? Potatoes or
    Champignon Mushrooms")

    gameStart = input("Would you like to restart? ")
Like earlier we would like our player to be able to choose what they would like to do. To do that let's create a variable to store our
user's input for this particular question and name it pizza_choice. Like earlier, we're going to set pizza_choice = to input("").
input(" *insert text/question here* ") prompts our player to respond, allows the program to wait for user input, and stores that in the
variable it is = to for further processing later on (ex. what happens when they choose different options).
it will look something like this: pizza_choice = input("Please choose one > ")
Choices (Conditionals)
But how will we use the input?
Simple! Conditionals! These are composed of if, elif, and else statements which enable your program to perform different actions or
execute different blocks of code based on whether a condition is true or false!
unlike while loops they do not run forever.
Using our example from before: if pizza_choice is == to "Potatoes" then : let's print("") "You chose" + pizza_choice + "!
That's delicious! Coming right up!"
But our other if/else if or in python, elif pizza_choice is == to "Champignon Mushrooms" then : let's print("") "You chose" + pizza_choice + "! It is a fan favorite!"
But what if our user inputs something different? If we don't plan for that, then our program will have an error and the game will stop.
So, if our player writes anything else or other than our option, then : we'll print("") out "Sorry we do not have that item. Come
back another time."
The final code would look something like this:
gameStart = "yes"

while gameStart == "yes":

    # this is a comment, something that will not appear in the final game
    # It is great for taking notes and explaining code!
    # add all game related content inside this loop

    print("Welcome to La Mia Pizzeria Preferita!")
    print("What would you like for your toppings? Potatoes or
    Champignon Mushrooms")

    pizza_choice = input("Please choose one > ")

    if pizza_choice == "Potatoes":
        print("You chose" + pizza_choice + "! That's delicious!
        Coming right up!")

    elif pizza_choice == "Champignon Mushrooms":
	        print("You chose" + pizza_choice + "! It is a fan
	        favorite!")

    else:
        print("Sorry we do not have that item. Come back another
        time.")

    gameStart = input("Would you like to restart? ")
Point Systems
If you are also interested in making a point system for your game start by making a variable, let's call it points and set it = 0 (or
whatever number of points you want your character to start with).
Next, we need to define (def) our function that adds the points the player gets throughout the game let's call it
add_points(number_of_points). Then : we're going to make our points variable global meaning that it can be easily accessed and
changed anywhere throughout the code.
Under that, we need to say that our points will get combined += with the number_of_points the player earns.
To tell our player how many points they got let's create another def for our function print_points() then : say print("You have {} points.") and let's insert the number of points our player got by adding .format(points) which will change our placeholder {} with
the number of points our player has.
Here is what we should get:
points = 0

def add_points(number_of_points):
  global points
  points += number_of_points

def print_points():
  print("You have {} adventure points.".format(points))
To add points we should call the add_points() function and determine in the () how many points to add.
To print how many points the player has just use the print_points() function.
add_points(30)
print_points()
With this base, you can now use a combination of while loops, conditionals, print, and input functions to build fabulous tales!
Congratulations!
You have successfully finished Level 1: The Storyteller's Forge! You now have your own Adventure Game which you can publish, share with family and friends, and play!
Want to take your build to the next level?
Let's add some music and customization options (like colors and text animation!) Go to the next level now!
Level 2: Sonic Sagas
Adding Music and Style to your Text-Based Adventure Game

Once again, great job in finishing Level 1: The Storyteller's Forge. Now we're moving on to the second layer of the pizza, the sauce! A cool add-on that gives a kick of flavor! In this level, we will be learning how to add background music, sound effects, text animation, and color!
Here is the example code of what we're going to create!: https://replit.com/@ConnemaraPony/Intermediate-CYOA?v=1
Making Music
Before we learn how to incorporate music it is important to know where to find it. Nowadays, we have access to a variety of free music libraries. Here are some examples:
- YouTube Audio Library (Free)
- Slip.Stream (Pro and Free)
- Free Music Archive (Pro and Free)
- SoundStripe (Pro and Free)
- iMovie (Free)
Always remember that when publishing your work make sure the music or even graphics you use are not copyrighted because that can give you a headache in the legal department. Instead, try to find royalty free music or have a license to use it commercially.
You can even make your own music! Here are some example options:
- Create a music generator!
- Use existing music software on your device (ex. GarageBand)
- Make music on MuseScore
Once you figure out your music and sound effects... it's time to start!
Adding backGround() Music
Adding music to your replit game is very simple!
Let's start off by importing the module audio from a package called replit. And add it at the very top of our game (I'll be using
the pizza example from earlier):
from replit import audio

# Rest of the game code goes below
GameStart = "yes"

while GameStart == "yes":
	...
Now you have to make sure to import your music files to the project. You can either drag and drop your files into the sidebar or press "new file."
Once everything is downloaded let's define the music we're adding to our game. The function I'm going to def is the backGround()
function and then : I'm going to show where the program can locate my music file or source. I'll set source = to my
audio.play_file('') so that it knows to process and play my music, and inside the '' I'll add my file name. In this case
'Mezzogiorno.mp3'.
*Note: Replit audio currently supports .wav, .mp3, and .aif files. If your file has a different extension then it will not work. *
Now I need to make sure my music plays when the game is running. To do that I'll just call the function in the main loop like so:
backGround()
There you have it! Here is what the code should look like:
"""
This is a block comment which is great for comments that are longer than one line.

Music creators!
Background Music: Track: "Mezzogiorno"
Music provided by https://slip.stream
Free Download / Stream: https://get.slip.stream/p2t2Ot

"""
from replit import audio

def backGround():
    source = audio.play_file('Mezzogiorno.mp3')

gameStart = "yes"
while gameStart == "yes":
  # this is a comment, something that will not appear in the final
    game
  # It is great for taking notes and explaining code!
  # add all game related content inside this loop

  backGround()

  ...
Adding soundEffects()
You use the exact same process for sound effects. But how can we determine the duration of it? To do that we will need to import time package. Then, we'll go to our def function, and under the source = ... we'll add time.sleep(). This tells the computer how
long the music should play until it quits/sleeps. Inside the () add the duration. I'll make it set to (2). Then, call on the function
wherever you would like.
Here is our updated code with my pop() sound effect function:
from replit import audio
import time

def backGround():
    source = audio.play_file('Mezzogiorno.mp3')

def pop():
    source = audio.play_file('Pop.mp3')
    time.sleep(2)

gameStart = "yes"
while gameStart == "yes":
  # add all game related content inside this loop

  backGround()

  pop()
  print("Welcome to La Mia Pizzeria Preferita!")

...
Text Animation
One of the most popular text animations for CYOA games is the typewriter effect. So, let's make it! To start off let's def a function
called typewriter() and inside the parentheses let's determine what this function will affect which is (text). Then : we want to say
that for each letter in our text the program should then : print() our letters side by side which can be written as end="",
and it should be immediately printed or flushed out which means we have to =True. Similar to how we determined music length we need
to determine how long each letter should wait until it's printed out, to do that we'll use time.sleep() and in the parentheses, I'll set
it to (0.05).
We should have something like this:
def typewriter(text):
  for letter in text:
    print(letter, end="", flush=True)
    time.sleep(0.05)
Now to call on it we can change any of the print("") functions we have to typewriter(""). Here is what our updated code should look
like:
from replit import audio
import time

def typewriter(text):
    for letter in text:
       print(letter, end="", flush=True)
       time.sleep(0.05)

def backGround():
    source = audio.play_file('Mezzogiorno.mp3')

def pop():
    source = audio.play_file('Pop.mp3')
    time.sleep(2)

gameStart = "yes"
while gameStart == "yes":
  # add all game related content inside this loop

  backGround()

  pop()
  typewriter("Welcome to La Mia Pizzeria Preferita!")

...
Coloring Text
Another cool thing we can do is change our text's color!
For this, we need to head over to the tools sidebar and go to shell. In the shell let's type pip install termcolor. This is a package
that will help us change the color of our text. It might take a couple of seconds to load.
After, let's head back to our main.py file and import termcolor. Let's def a new function and name it change_color() in the
parentheses we want to make sure it takes in two inputs: (text, color). The purpose of this function is to take the text and change it
to a given color. To make this possible we then : write termcolor.cprint(text,color).
We should have something like this:
import termcolor

def change_color(text, color):
    termcolor.cprint(text, color)
Now to call on it we can change any of the print("") functions we have to change_color(("add whatever text we like here"), ("add whatever color we like here")). Here is what our updated code should look like:
from replit import audio
import time

def typewriter(text):
    for letter in text:
        print(letter, end="", flush=True)
        time.sleep(0.05)

def backGround():
    source = audio.play_file('Mezzogiorno.mp3')

def pop():
    source = audio.play_file('Pop.mp3')
    time.sleep(2)

gameStart = "yes"
while gameStart == "yes":
  # add all game related content inside this loop

  backGround()

  pop()
  typewriter("Welcome to La Mia Pizzeria Preferita!", "red")
Congratulations!
You have successfully finished Level 2: Sonic Sagas! You now have your own Adventure Game with music and style which you can publish, share with family and friends, and play!
Want to take your build to the next level?
Let's add a Graphical User Interface (GUI) that will allow our player to interact with the game in a different way~ BUTTONS! Go to the next level now!
Level 3: GUI, the Final Boss
Creating a Graphical User Interface
Once again, great job in finishing Level 2: Sonic Sagas. Now we're moving on to the third and final layer of the pizza, the cheese! It's the thing that all of our users will get to see and experience first before the storyline, music, etc. THE GUI!
Here is the example code of what we're going to create!: https://replit.com/@ConnemaraPony/Advanced-CYOA?v=1
Importing Libraries
To begin we need to import these packages in our Repl:
import tkinter as tk
import time
from replit import audio
tkinteris for creating the graphical user interface (GUI)timeis for delays in the typewriter effect and or specifying music durationaudiois for being able to read and play music
Point System
Like how we implemented in Level 1 :
points = 0

def add_points(number_of_points):
    global points
    points += number_of_points

def print_points():
    points_label.config(text="You have {} adventure points.".format(points))

# Place where you want players to get points + see num of points
add_points(30)
print_points()
Text Animation
Similar to what we implemented in Level 2 but with a few minor changes:
def typewriter(text, text_widget):
    for letter in text:
        text_widget.config(state=tk.NORMAL)
        if letter == "
":
            text_widget.insert(tk.END, "
")
        else:
            text_widget.insert(tk.END, letter)
            text_widget.see(tk.END)
        text_widget.config(state=tk.DISABLED)
        text_widget.update()
        time.sleep(0.05)
- The function takes in two inputs instead of one
(text, text_widget) - It still loops over each
letter in textstring - It makes our
text_widgeteditable by setting its state totk.NORMAL-- but what is that?text_widgets are GUI elements that allow for text to appear on windows/frames instead of the terminal/console! (like what you're seeing here!)
- If the letter is on a new line
(" ")it adds a new line letter into thetext_widgetusing theinsertmethod. If a character is not on a new line it inserts the letter in the widget usinginsert. Lastly, it positions the scrollbar to the end of the widget usingsee(tk.END)to make each letter visible. - After each character is added, the widget is set to
tk.DISABLEDto make it read-only (not editable by the user) - The widget is updated to show the changes made with
updatemethod - We still have the
time.sleepfunction for a 0.05-second delay
Defining Game Functions
This is by far one of the most important parts. If we don't define our functions properly, or if the computer can not reference them during the game then we'll be dealing with A LOT of errors.
Here are some example functions we've already created:
add_points(number_of_points) which keeps track of the player's points throughout the game.
print_points() which prints out the number of points the player has.
typewriter(text, text_widget) for simulating the typewriter effect.
Here are some new ones:
let's def a function called start_game which is called when our Start button is pressed. It then : hides or pack_forget the
welcome_frame and shows our new frame (in this case where the user inputs their name) name_frame.pack().
def start_game():
    welcome_frame.pack_forget()
    name_frame.pack()
Next let's def our submit_name that we talked about earlier (while this is for a user's name, you can rename the function for another
question where the user input is unique)
def submit_name():
    global points

	# retrieving user input to store in widget name_entry
    name = name_entry.get()

    # giving points
    add_points(10)
    print_points()

    # what the user sees
    typewriter(f"Hey {name}, now it's time to choose a morning
    activity!", output_text)

    # move on to the next frame and get current
    name_frame.pack_forget()
    activity_frame.pack()
Also, make sure to add each part of your story under a def function. For example, from above if our player had to choose a morning
activity we will def a function called select_activity() where the player picks an (activity) button. Then : we can add our
conditional statements and make sure to add .pack_forget() that closes a frame and .pack that opens a new frame where needed.
def select_activity(activity):

    if activity == "swimming":
        typewriter("You have chosen swimming!", output_text)

        add_points(10)
        print_points()

        typewriter("
You go to the beach but boating is the only
        thing available. You get a boat. Things are
        going smoothly until your motor gives out.",
        output_text)

        typewriter("
You have two options: SOS (try to flag down a
        boat for help) or fix (fix the motor
        yourself).
", output_text)

        activity_frame.pack_forget()
        helpSwim_frame.pack()

    elif activity == "hiking":
        add_points(5)
        print_points()

        typewriter("
There are no trail leaders available at this
        time. Try again later!", output_text)

    elif activity == "volunteer":
        add_points(5)
        print_points()

        typewriter("
Unfortunately, they are still setting up
        different volunteer opportunities. You decide to
        rest in the shade and read a book.", output_text)

    else:

        typewriter("
Unfortunately, this activity is closed for
        the day for repairs.", output_text)

        add_points(5)
        print_points()

        typewriter("Choose a different activity", output_text)
Then for the choices that branch out from the original should be defined in a new function. By doing that, and adding a
helpSwim_frame.pack() above, now I can extend my swimming adventure:
def submit_helpSwim():
    global points
    helpSwim = helpSwim_entry.get()

    if helpSwim == "SOS":
        add_points(30)
        print_points()
        typewriter("You start waving your hands
                   and yelling at the
                   top of your lungs.",
                   output_text)
        typewriter("
Each second that passes,
                   the boat is pulled
                   further away from shore. No
                   one is able to hear
                   you.", output_text)
        typewriter("
You have to think of
                   another solution.",
                   output_text)
        typewriter("
Your other option is to
                   fix your motor...",
                   output_text)
        typewriter("
You hop in the water to
                   check. It is
                   completely fried and there is
                   some plastic
                   tightly wrapped around it.",
                   output_text)
        typewriter("
There is no chance for you
                   to fix it without
                   proper tools.", output_text)
        typewriter("
You end up deciding to
                   swim back to shore.",
                   output_text)
        typewriter("
As you are swimming back,
			       a person on a boat
                   spots you and helps you back
                   to camp and
                   explains what happened to the
                   counselors.",
                   output_text)
        typewriter("
You are safe.",
                   output_text)

    elif helpSwim == "fix":
        add_points(30)
        print_points()
        typewriter("You consider yourself to be
                   a pretty strong
		           swimmer, so the strength of
		           the currents doesn't
		           faze you.", output_text)
        typewriter("
You hop off the boat and
                  swim to the motor
			      area in the back.",
			      output_text)
        typewriter("
Your motor is completely
                  fried and there is
		          some plastic tightly wrapped
		          around it.",
		          output_text)
        typewriter("
There is no chance for you                   to fix it without
                  proper tools.", output_text)
        typewriter("
You end up deciding to
                  swim back to shore.",
                  output_text)
        typewriter("
As you are swimming back,
                  a person on a boat
                  spots you and helps you back
                  to camp and
                  explains what happened to the
                  counselors.",
                  output_text)
        typewriter("
You are safe.",
                  output_text)

    else:
        print_points()
This submit_helpSwim() function is called when the submit button (helpSwim_button) is clicked during the swimming activity. It gets
the user's choice from the helpSwim_entry field and gives a different scenario based on the choice (what happens in the conditional
statements).
Keep storing each part of your in def functions... after you're done, let's get to the fun part!
Creating Main Window and Frames!
We've been talking a lot about windows and frames-- but what are they and what's the difference? Lastly, how do we MAKE them?
This might sound crazy but imagine a house. The window is like an entire house. It has its own structure, windows and doors (title bar, and controls), walls (size of window), etc. and it is the main thing that the user interacts with.
Let's start by creating the window object and setting it = to the Tk() constructor from the tk module. This will create the main
window of the application.
window = tk.Tk()
Next, let's make the title bar by writing window.title("") and in the "" writing our title.
While we're at it, let's set the size of the window by writing window.geometry(""), and in the "" we can specify the size. For now,
let's make it ("600x400") pixels.
This is more of a style choice, but I do not want the window to keep resizing depending on the amount of content inside it. To do this
let's write window.resizable(). Inside the parentheses, it has two arguments width and height. Let's make sure that they do not get
resized by making them both False.
By the end we should have something like this:
window.title("Camp Wildwood Adventure")
window.geometry("600x400")
window.resizable(False, False)
Next are frames! Building off of our house concept, frames are like the rooms inside of a house. They have their own walls, supports, etc., and are areas where you can arrange your "furniture" items and other decor like text, input, buttons, etc.
Each new event that happens in our game will have a Frame.
To create a frame, first, make a variable for example welcome_frame, and set it = to tk.Frame(window).
Continue this for each scene change you have in the game. Here is what we have in our example:
welcome_frame = tk.Frame(window)
name_frame = tk.Frame(window)
activity_frame = tk.Frame(window)
helpSwim_frame = tk.Frame(window)
More GUI Components
Let's Create our Buttons and input using our def function helpSwim from earlier as an example.
All the GUI components we're going to create for each scenario will be connected to their respective frames. For helpSwim we have the
helpSwim_frame from the previous step.
Crafting Labels!
First step is to create a label that = its respective frame, displaying specified text like the question we want to ask the user
to answer. Then we want to make sure our label is organized and displayed within our frame using the .pack method:
helpSwim_label = tk.Label(helpSwim_frame,
                        text="SOS (try to flag
                        down a boat for help) or
                        fix (fix the motor
                        yourself)?"

helpSwim_label.pack()
User Text-Input!
Second step let's make this answer have a text input, to do that let's create a text Entry() widget, connect it to our frame, and make
sure it displays by using the .pack method:
helpSwim_entry = tk.Entry(helpSwim_frame) helpSwim_entry.pack()
Buttons!
Next, let's create a submit button (this button format will also work if you're asking your user to choose a button rather than add text input like above).
First, let's create a button widget using the Button() class from the tk library. The button widget is used to show different
scenarios when clicked by the user. We also need to connect it to its set frame, and make sure we have text displayed on the button,
that = "Submit" in this case.
We also need our button to be called when it is clicked. To do that we need to use the command parameter and set it = to our def
function, in this case submit_helpSwim which we defined earlier.
Let's also make things fun and change the button color! To do this we use bg and set it = to a color name. Let's just use "purple"
for now.
Like before, our last step is using .pack() to make sure it is displayed correctly~ we should have something like this:
helpSwim_button = tk.Button(helpSwim_frame, text="Submit", command=submit_helpSwim, bg="purple")

helpSwim_button.pack()
Text Widgets!
Let's also make sure that our storyline has a place to get displayed by creating a Text widget that can display multi-line text that is
set to read-only (so that our users can not alter it).
Let's create a variable called output_text which creates our text widget. Let's use the Text() parameter from the tk library. We
need to make sure it is placed in our window so that it always appears, and set our height = to what we want, and our width = to
what we want.
We also want to make sure our text is pleasing to look at, and if a word exceeds the width it should go to a new line. To do that we'll
use the wrap parameter that does just that and set it = to tk.WORD so that it doesn't break apart words and ensures that whole words
are shown on a single line.
It should look something like this:
output_text = tk.Text(window, height=10,
			         width=50, wrap=tk.WORD)
As said before we want to make sure our text is on read-only. To do that we will configure or config() the state of the output_text
widget and set it = to tk.DISABLED which doesn't allow the user to edit it.
Lastly we need to .pack it to make sure it displays properly:
output_text.config(state=tk.DISABLED)
output_text.pack()
Repeat the first three for all scenarios in your game! Feel free to play around with different questions having user input be either buttons or text and even multiple text widgets!
Displaying Frames and Starting Loop
Finally, it's time for our open house! We can now display the welcome frame and start the GUI event loop using mainloop():
welcome_frame.pack()
window.mainloop()
Congratulations!
You have successfully finished Level 3: GUI the Final Boss! You now have your own Adventure Game with music, style, and a fully functioning GUI which you can publish, share with family and friends, and play!
What's next from here?
Well, adventurers, there is nowhere to go but up from here! The sky's the limit to what YOU can create! Some fun ideas might be to
- continue your coloring journey
- add pictures, maybe videos or gifs
- try out different storylines, quizzes, etc.
Most importantly USE YOUR RESOURCES! There are plenty of amazing YouTube videos to learn more about programming with Python, more jams to create, lessons, books, and much more!
The Replit Documentation can also play a great role in your exploration: https://docs.replit.com/
Feeling stuck? Want new challenges or prompts? Head on over to HackClub's Slack where you can connect with a wonderful community of creators and get feedback and help!
Congratulations! 🎉 🎉 🎉If you're a highschooler who enjoys programming or tinkering with hardware, make sure to join Hack Club, the world's largest nonprofit empowering teenagers to make cool projects! There's tons of programs where you can get prizes for programming, get your hardware projects fully funded and you can join the awesome community of 100k+ teenagers who love making cool stuff (just like you!).