Mastering the Matrix: Crafting Your Own Web-based AR App

Imagine a universe where you hold the magic to create your own dimensions and craft the castles of your dreams. Today, we'll embark on a journey through the heart of VR development by constructing our very own floating virtual lands and join forces by integrating them into a shared celestial town.
Objective
In this workshop, we'll not only dive into the futuristic world of Augmented Reality (AR) but we're going one step further, summoning not one, but multiple interactive 3D models to our web-based AR application. Because if you can make one duck appear, why not a whole duck army?
Prerequisites
You should have a basic understanding of HTML, CSS, and JavaScript. If you can say "Hello, World!" in these languages, you're ready to conquer the AR world.

Tools
- HTML, CSS, JavaScript - The holy trinity of web development.
- AR.js and A-Frame libraries - Our magic AR wand.
- Any text editor - Even Notepad is invited to this party!
- Any modern web browser - Yes, even Internet Explorer... if you dare.
Getting Started
- Head over to Argument Reality Template and click "fork". Then, sign up or sign in, which will load the new dashboard where you can do everything.
- Take a moment to look around and familiarize yourself with this lovely dashboard.
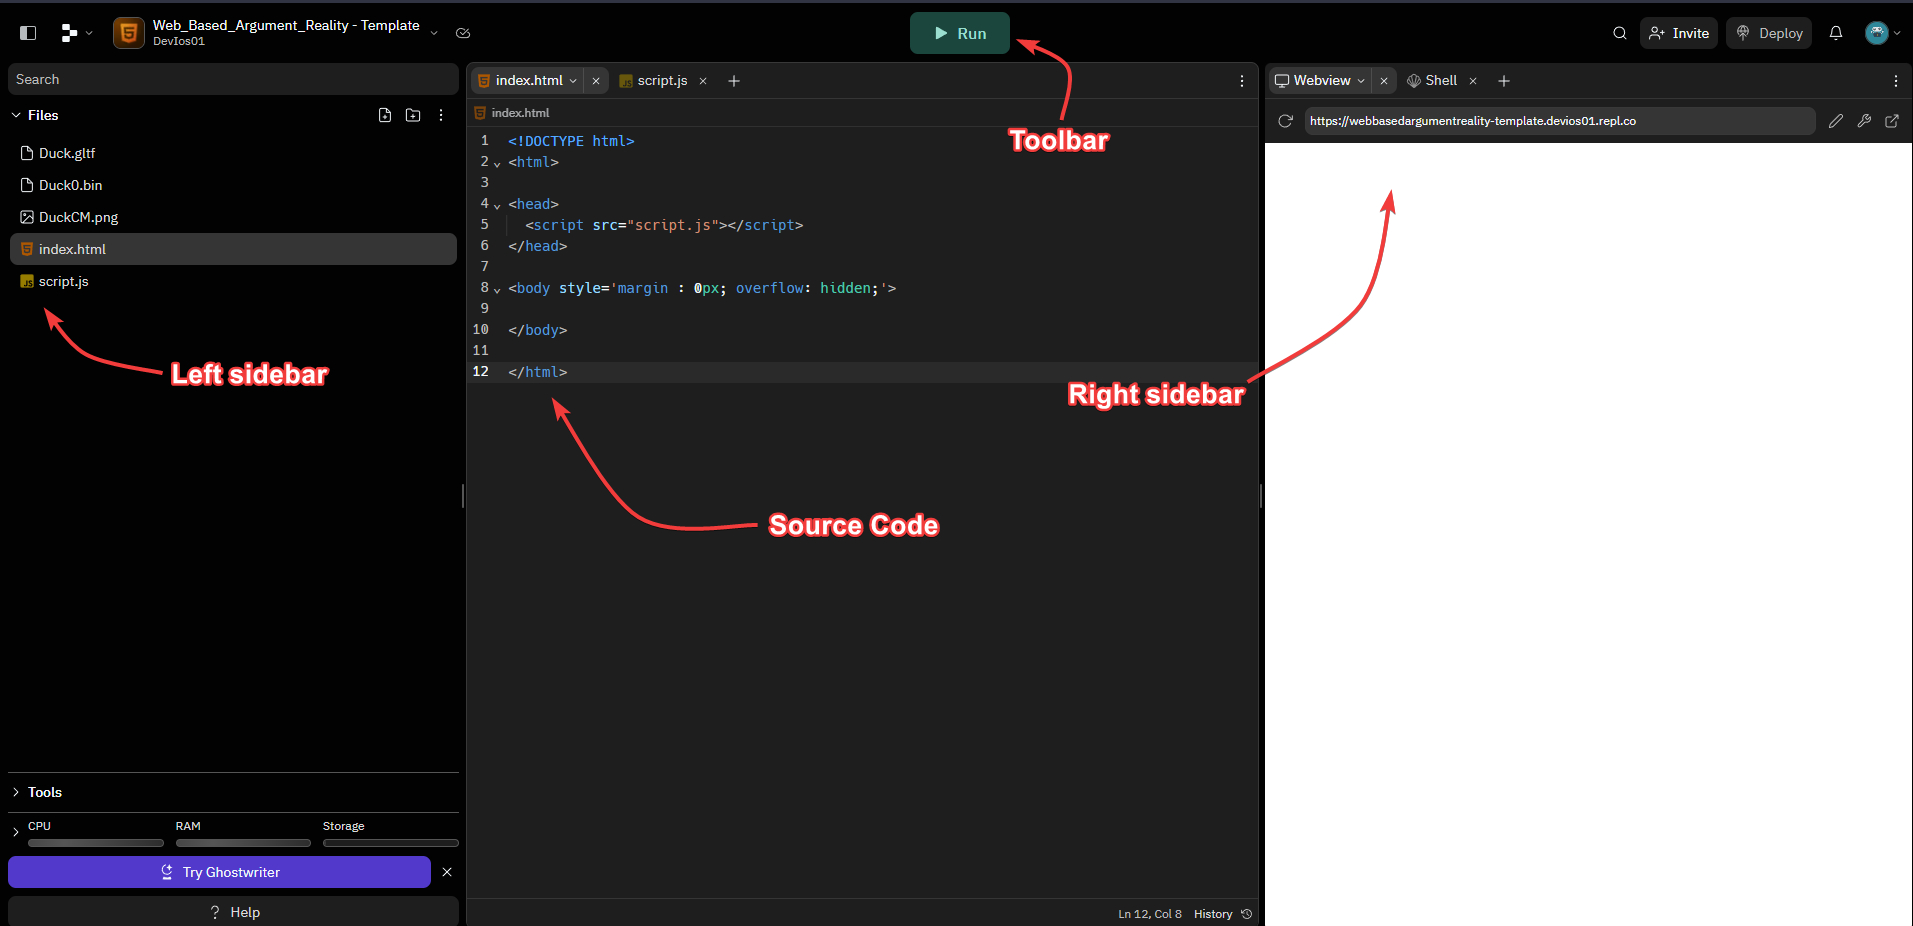
Source Code: The canvas where all your creativity takes the form of code.
- Type in your desired code, using the provided programming language syntax.
- Lines are numbered for easy tracking and debugging.
- Syntax is color-coded for readability and error prevention.
Toolbar: Actions for coding and executing scripts.
- Press "Run" to execute your current script.
- Press "Version control" to manage your coding versions.
Left sidebar: File explorer, list of all files in the current workspace.
- Click on a filename to open it in the editor.
- Right-click a file for more options like rename, move, delete, and more.
Right sidebar: Debug console, shows the output of your executed scripts.
- Use the "Clear" button to clear the console.
Important controls:
- New File:
Ctrl+N - Save File:
Ctrl+S - Find:
Ctrl+F - Replace:
Ctrl+H - Comment/Uncomment:
Ctrl+/ - Indent:
Tab - Outdent:
Shift+Tab - Delete:
Ctrl+D - Go to line:
Ctrl+G - Autocomplete:
Ctrl+Space
Steps
1. Setting Up
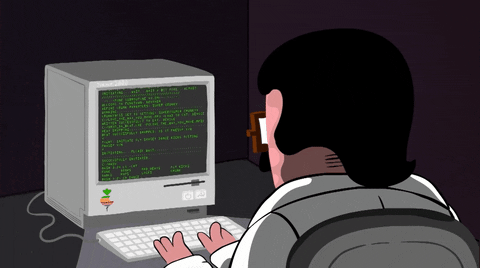
Picture this - you're a wizard, and you're about to cast your first spell. You reach out for your wand and your spell book, right? Similarly, in the realm of AR, our HTML document is our spell book and the JavaScript files are our magic wands!
<!DOCTYPE html>
<html>
  <head>
      <!-- We import our trusty AR tools -->
  <script src="https://aframe.io/releases/1.0.4/aframe.min.js"></script>
  <script src="https://raw.githack.com/AR-js-org/AR.js/master/aframe/build/aframe-ar.js"></script>
  <script src="https://raw.githack.com/donmccurdy/aframe-extras/master/dist/aframe-extras.loaders.min.js"></script>
  <script
    src="https://raw.githack.com/AR-js-org/studio-backend/master/src/modules/marker/tools/gesture-detector.js"></script>
  <script
    src="https://raw.githack.com/AR-js-org/studio-backend/master/src/modules/marker/tools/gesture-handler.js"></script>
</head>
<body style='margin : 0px; overflow: hidden;'>
  <!-- Our mystical AR scene will be conjured here. It's invisible for now, but not for long! -->
</body>
</html>
We're essentially incorporating these 'spells' into our web page to breathe interactivity into it. Without them, our web page would be a static set. But with JS (our magic ink), we make the elements come alive, move, disappear, change colors, and much more!
Now, we've prepared our magical stage. It's invisible for now, but we're just getting started. Hold onto your wizard hats as we dive deeper into the mystical world of AR!
2. Unveiling the AR Scene
Now that we've prepared our magical spell book, it's time to set the stage for the grand performance! Imagine you're a magician, and you want to conjure a magical creature for your audience. In our digital magic show, that creature is a 3D duck.🦆✨
The Magical Treasure Chest
First, we need a place to store our magical entities, our 3D models.
    <a-assets>
      <a-asset-item id="animated-asset" src="demo.gltf"></a-asset-item>
    </a-assets>
This is our magical treasure chest, holding our precious 3D duck.
The Magic Circle
Next, we draw our magic circle. Whenever someone activates this circle (using a specific marker), our magic comes to life!
    <a-marker id="animated-marker" type="pattern" preset="custom" url="marker.patt" raycaster="objects: .clickable"
      emitevents="true" cursor="fuse: false; rayOrigin: mouse;" id="markerA">
      <a-entity id="bowser-model" scale="0.4 0.4 0.4" animation-mixer="loop: repeat" gltf-model="#animated-asset"
        class="clickable" gesture-handler></a-entity>
    </a-marker>
The Magician's Eye
Every magician needs a way to see and interact with his audience. That's what the magical camera is for:
<a-entity camera></a-entity>
With the cursor, we can point, choose, and interact, just as a magician might use a wand!
The Magical Scroll
Lastly, the magician leaves a message, guiding the audience on how to partake in the magic:
<a-text value="Please point your camera at the custom HackClub marker." align="center" position="0 -0.5 -1.5"
      color="red" visible="true"></a-text>

When these ingredients come together in our digital cauldron, a delightful AR experience is brewed! The 3D duck majestically appears, twirling and spinning in all its glory. Every magician has more than one trick up their sleeve, and so will we! Stay tuned!🎩🔮
If you've followed the steps to the letter, the enchantments inside your <body> tag should now look like this. If they don't, fear not! Even the most seasoned magic-makers sometimes stumble. Take a moment to retrace your steps, realign your magic symbols, and let's try the spell within the <body> realm again!
  <a-scene vr-mode-ui="enabled: false;" loading-screen="enabled: false;" renderer="logarithmicDepthBuffer: true;"
    arjs="trackingMethod: best; sourceType: webcam; debugUIEnabled: false;" id="scene" embedded gesture-detector>
    <a-assets>
      <a-asset-item id="animated-asset" src="demo.gltf"></a-asset-item>
    </a-assets>

    <a-marker id="animated-marker" type="pattern" preset="custom" url="marker.patt" raycaster="objects: .clickable"
      emitevents="true" cursor="fuse: false; rayOrigin: mouse;" id="markerA">
      <a-entity id="bowser-model" scale="0.4 0.4 0.4" animation-mixer="loop: repeat" gltf-model="#animated-asset"
        class="clickable" gesture-handler></a-entity>
    </a-marker>

    <a-entity camera></a-entity>
  </a-scene>
3. Unleashing Multiple AR Entities (optional)
Alright, conjuring one 3D duck is cool, but you know what's cooler? Conjuring multiple 3D entities! Each entity will be linked to a different marker, leading to an entirely new model. It's like having multiple magic tricks up your sleeve!
  <a-scene embedded arjs>
    <a-assets>
      <a-asset-item id="duck-model" src="Duck.gltf"></a-asset-item>
      <a-asset-item id="another-model" src="AnotherModel.gltf"></a-asset-item>
    </a-assets>
    <a-marker preset="hiro">
      <a-entity id="duck" gltf-model="#duck-model" scale="0.3 0.3 0.3"
        animation="property: rotation; to: 0 360 0; loop: true; dur: 10000; startEvents: spin">
      </a-entity>
    </a-marker>
    <a-marker preset="kanji">
      <a-entity id="another-entity" gltf-model="#another-model" scale="0.3 0.3 0.3"
        animation="property: rotation; to: 0 360 0; loop: true; dur: 10000; startEvents: spin">
      </a-entity>
    </a-marker>
    <a-entity camera>
      <a-cursor></a-cursor>
      <a-text value="Please point your camera at the Hiro or Kanji marker." align="center" position="0 -0.5 -1.5"
        color="red" visible="true"></a-text>
    </a-entity>
  </a-scene>
What Did We Learn?
We've now built a basic AR application with multiple 3D models, and we didn't even need goofy glasses! Not only do we know how to set up an AR scene, but we can also add multiple 3D models to the scene and make them come alive. We've mastered the basics and we're ready to create our own digital universe. Remember, in the world of AR, the only limit is your imagination. Keep coding and keep exploring!

Congratulations! 🎉 🎉 🎉If you're a highschooler who enjoys programming or tinkering with hardware, make sure to join Hack Club, the world's largest nonprofit empowering teenagers to make cool projects! There's tons of programs where you can get prizes for programming, get your hardware projects fully funded and you can join the awesome community of 100k+ teenagers who love making cool stuff (just like you!).