Ordering a KiCAD board from JLCPCB
In this jam, we will take a KiCAD PCB and order it through JLCPCB with assembly1.
If you're just jumping in, make sure you have your DRC checked from Part 2 of this jam series.
Here are some component notes2:
- The grant allows you to purchase anything from one of the allowed suppliers, including JLCPCB.
- One of JLCPCB's sister/partner companies, LCSC, stocks virtually every generic component you'd ever need, and all of them can be assembled.
- Keep in mind that JLCPCB charges a $3 fee for every "extended component" type that they assemble.
- You will not be able to get specialized components from Adafruit or similar companies through the grant.
- A complete library of JLCPCB/LCSC components is available at jlcpcb.com/parts.
- If following the ATMega328P workshop, you will need an Arduino, FTDI board, or any other AVR programmer to flash the bootloader before you can use the board's USB port. Verify what you need for your chip. ESP32s and RP2040s typically work out of the box.
Install the Extension
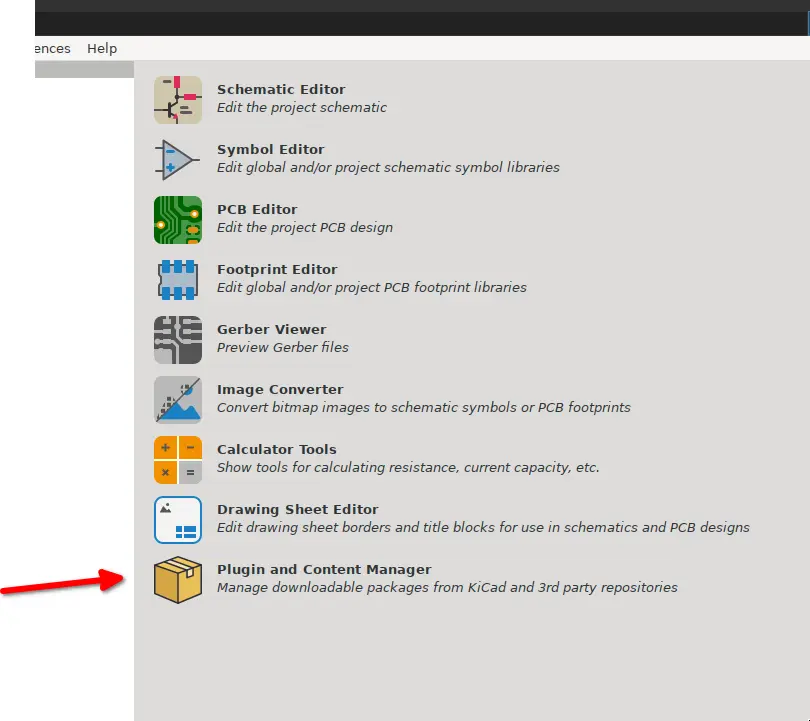
Click on Plugin Manager on the KiCAD home page.
Search for 'JLC'.
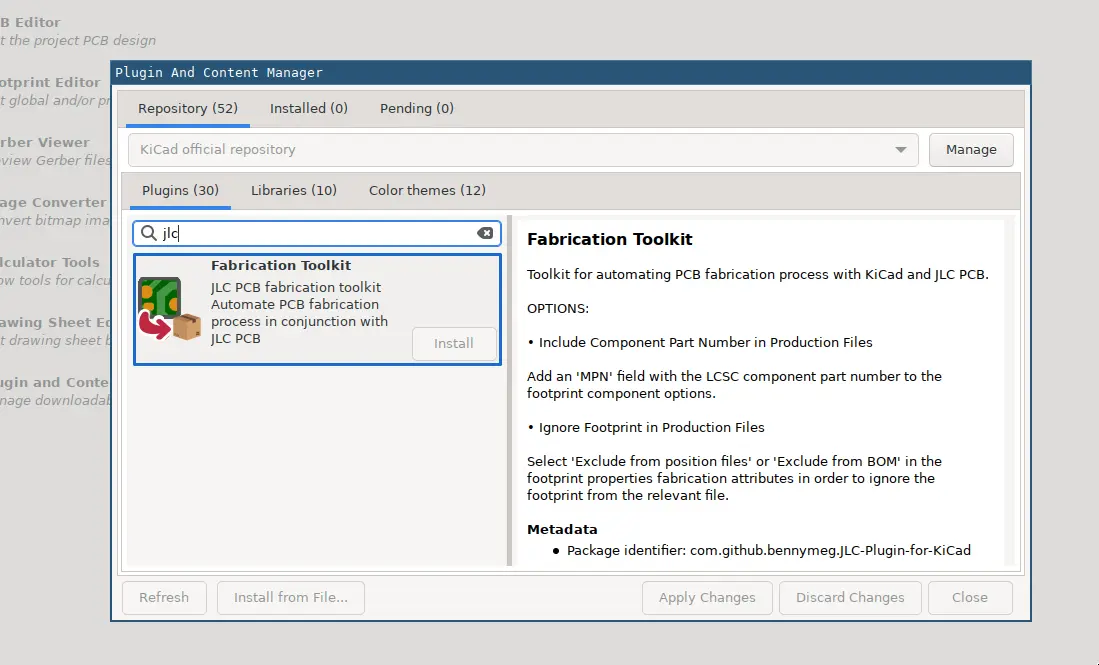
Install 'Fabrication Toolkit' and apply changes.
Assign Part Numbers
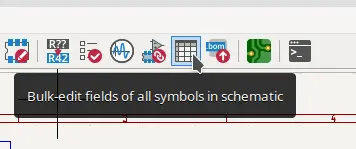
Open your schematic. Go to Bulk Edit fields.
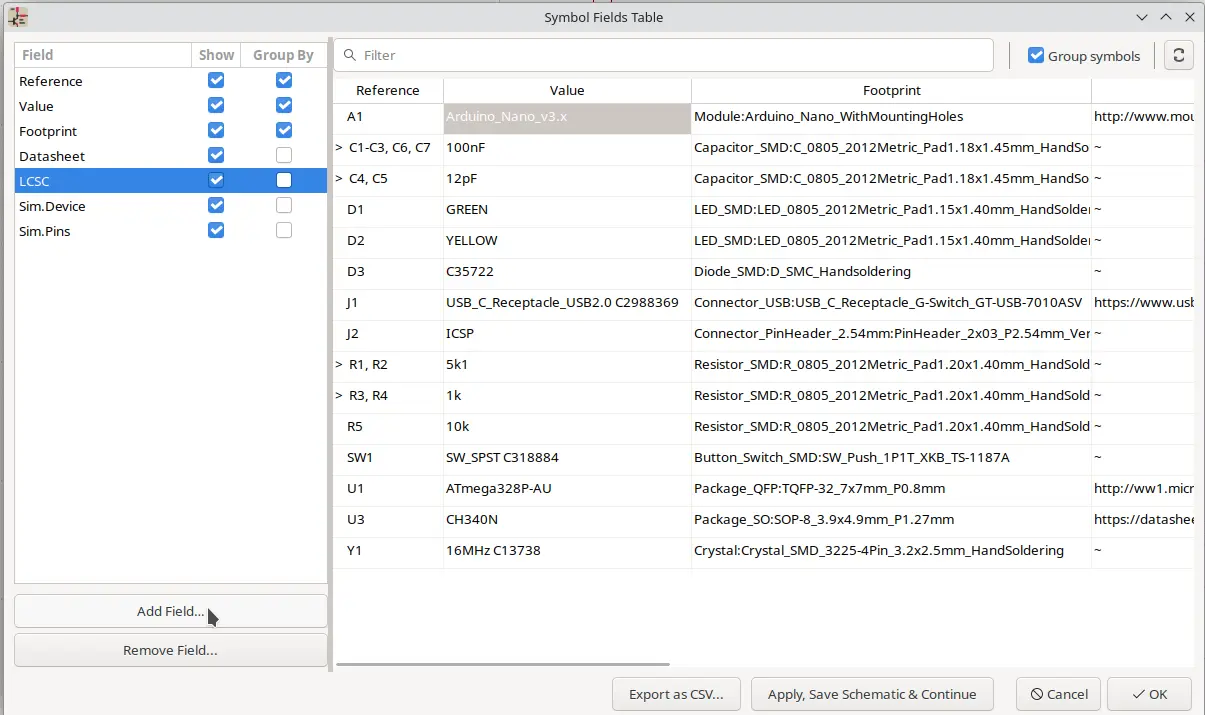
In the Field Editor window, click on 'Add Field' and add the field LCSC. It doesn't matter whether you have Sim.* or Datasheet fields or not.
Then, search for your components at jlcpcb.com/parts and fill in the LCSC id.
For generic components, search for the Value and Footprint - 100nF 0805 - and check basic parts. You'll see a couple of different voltages, pick the lower (cheaper) one since we are only at 5V.
You don't have to necessarily specify the part number for generic components like 0805 resistors or capacitors, but I prefer to manually select it rather than leave it up to JLCPCB to decide.
The LCSC Part number (aka JLCPCB Part #) looks like Cxxxx.

For more specific components, like the Atmega328P-AU, you should only have a couple of options and just pick the most popular one (Basic Part if possible).

Try doing this yourself before you look at my version below.
This is what your table should look like, and then Apply and Save.
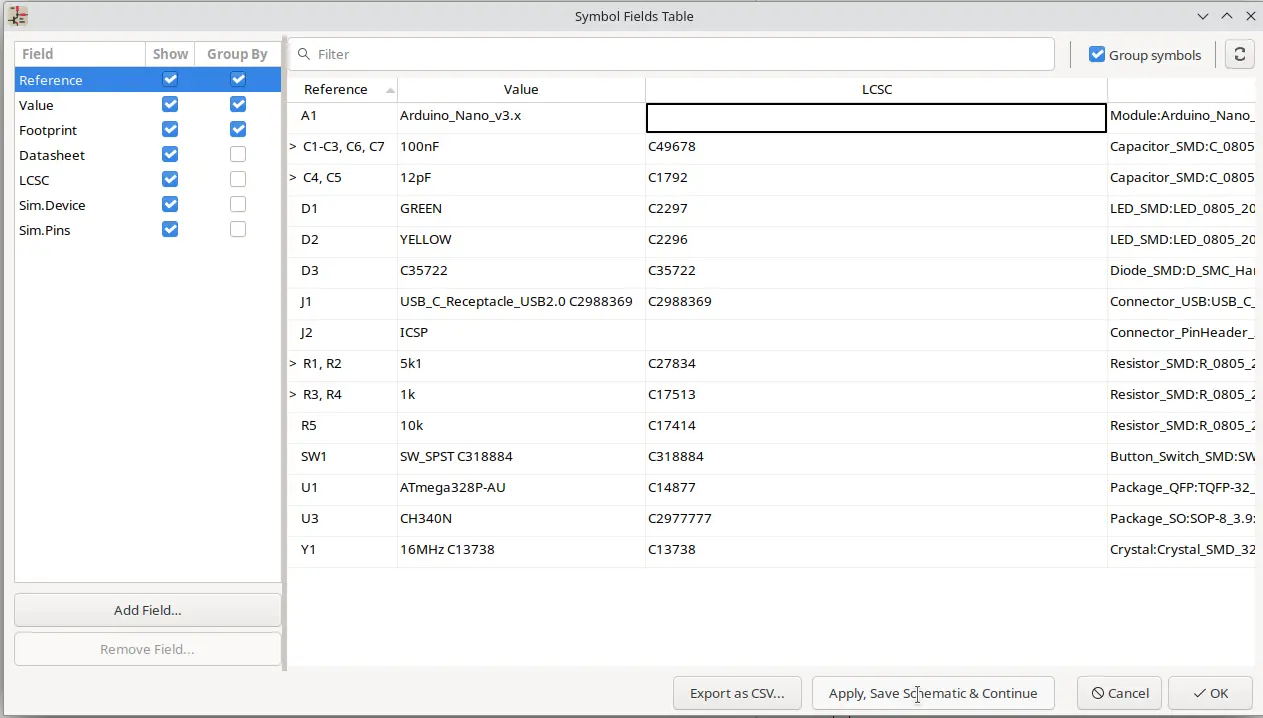
Because A1 and J2 aren't real components - we only need their footprint and pin layout, not the component itself - they don't need an LCSC part number.
Export files
Now, go back to the PCB view and sync it.
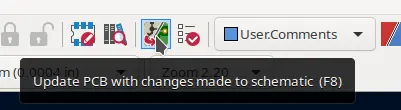
Then, click on Tools > External Plugins > Fabrication Toolkit.

Everything you need to order your board will now be in your_kicad_project/production/.

Now, log in to jlcpcb.com. Go to cart.jlcpcb.com/quote and upload gerber.zip into "Add Gerber file".
You should see something like this:
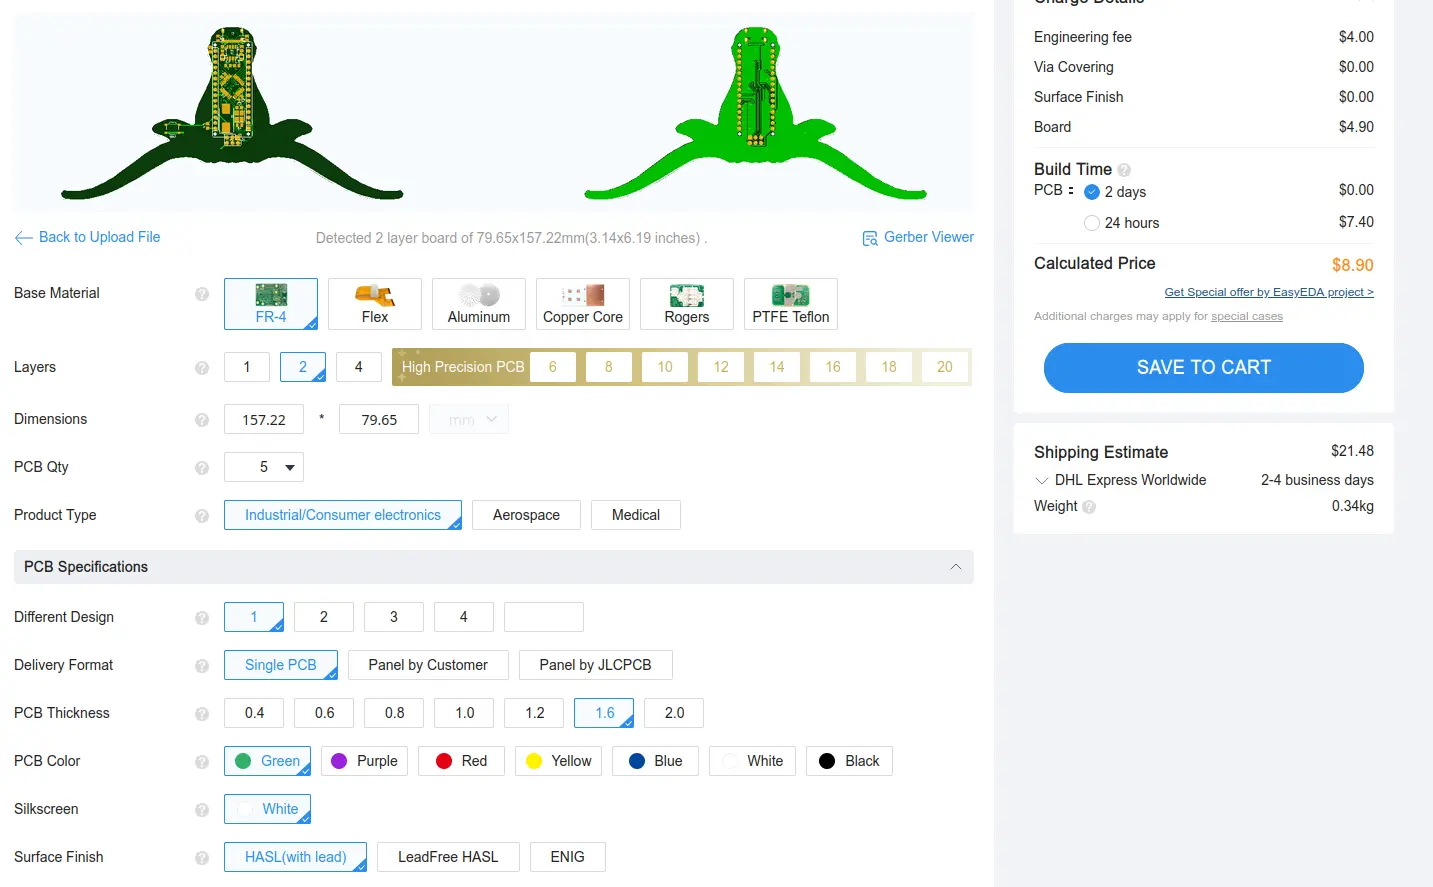
Tips:
- 5 is the minimum number of PCBs you can order.
- You can change your shipping option on the right 'Shipping Estimate' sidebar.
- Sometimes, reducing the PCB thickness from 1.6 to ~1.0 will reduce the weight of the package, and thus the shipping price without increasing manufacturing price.
- If your PCB will be handled a lot consider selecting 'LeadFree HASL' for its surface; excessive exposure to lead can be toxic.
Leave the 'High-spec options' at their defaults, and then, enable assembly.
- You can choose to only assemble 2 boards out of 5, in which case the other 3 bare boards will be shipped to you. If you only want one PCB, this can save money on parts.
- You can only assemble one side in Economic PCB assembly.
- Standard PCB assembly with both sides is very expensive (~$65) and will use up most of your grant money. Try to design PCBs that have components on one side and don't use any 'Standard Only' components. Or, solder the other side by hand.
 Then, on the Bill of Materials page, upload bom.csv and positions.csv from your production folder.
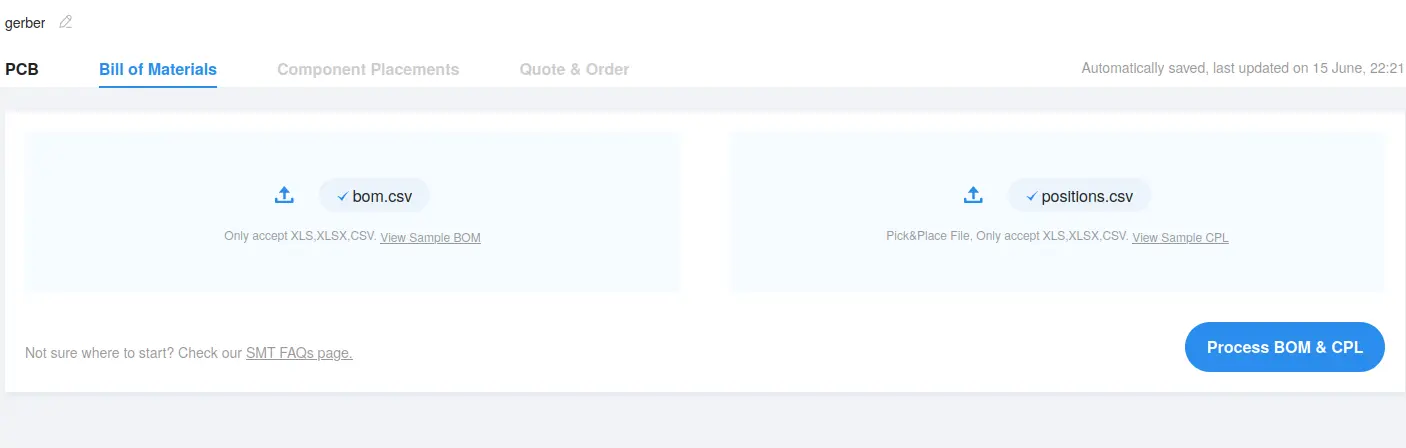
- You can save a lot of money on Extended Parts in the long run (if you plan on making many PCBs) by buying them directly and soldering them yourself 3. For example, basically every project has a USB-C connector and header pins, so it makes sense to buy a bunch yourself and avoid the $3 extended part fee every time you buy a board from JLCPCB.
- Virtual Components (only used for their through holes) like the Arduino Nano and ICSP header can be ignored.
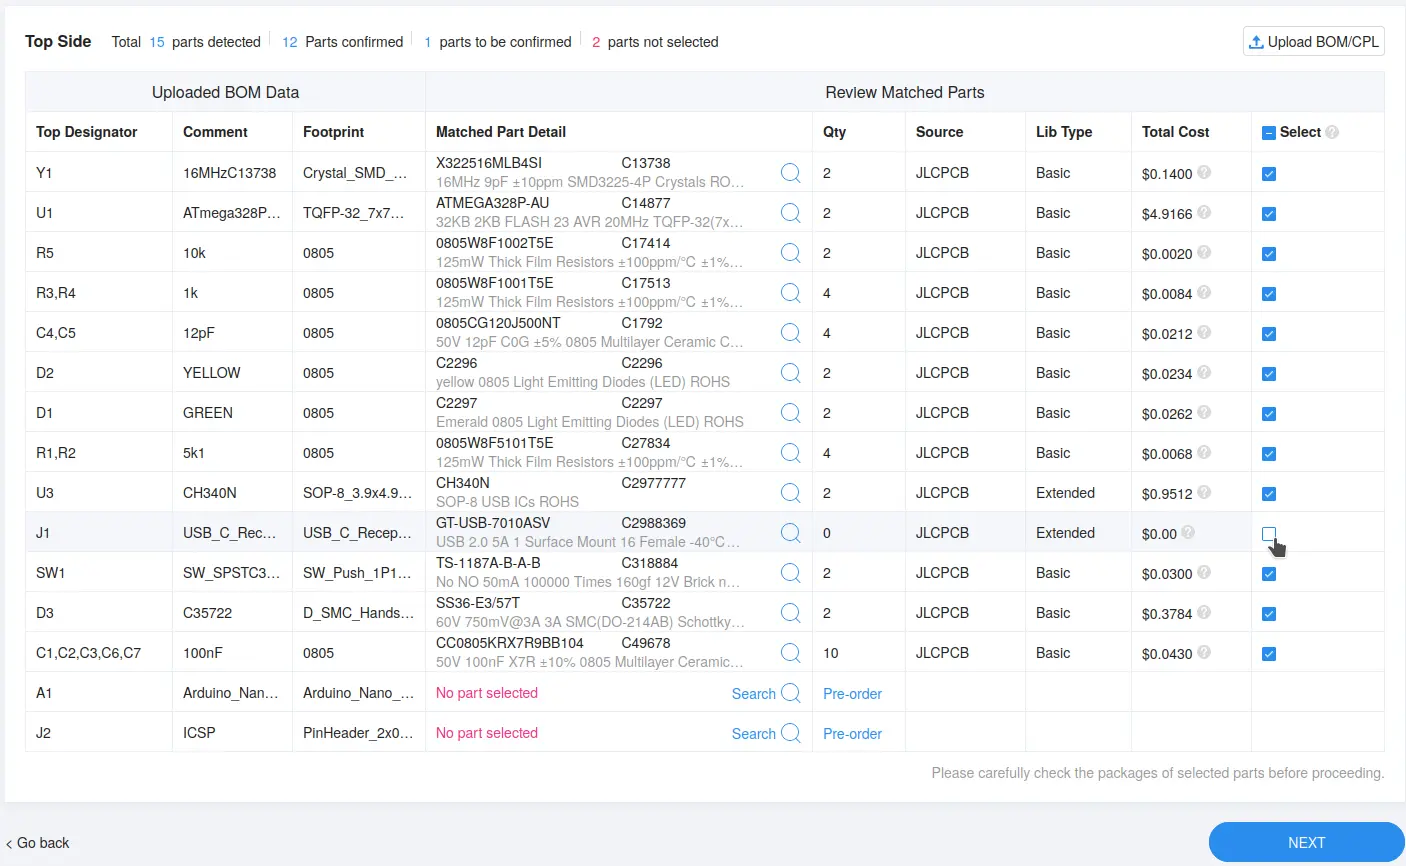 When it prompts you about unselected parts, just click 'Do not place'.
Zoom into your components on the 'Component Placements' screen and rotate them to the correct orientation if they're wrong.
If you get all parts assembled, this board (from part 2)4 ends up being around $33.
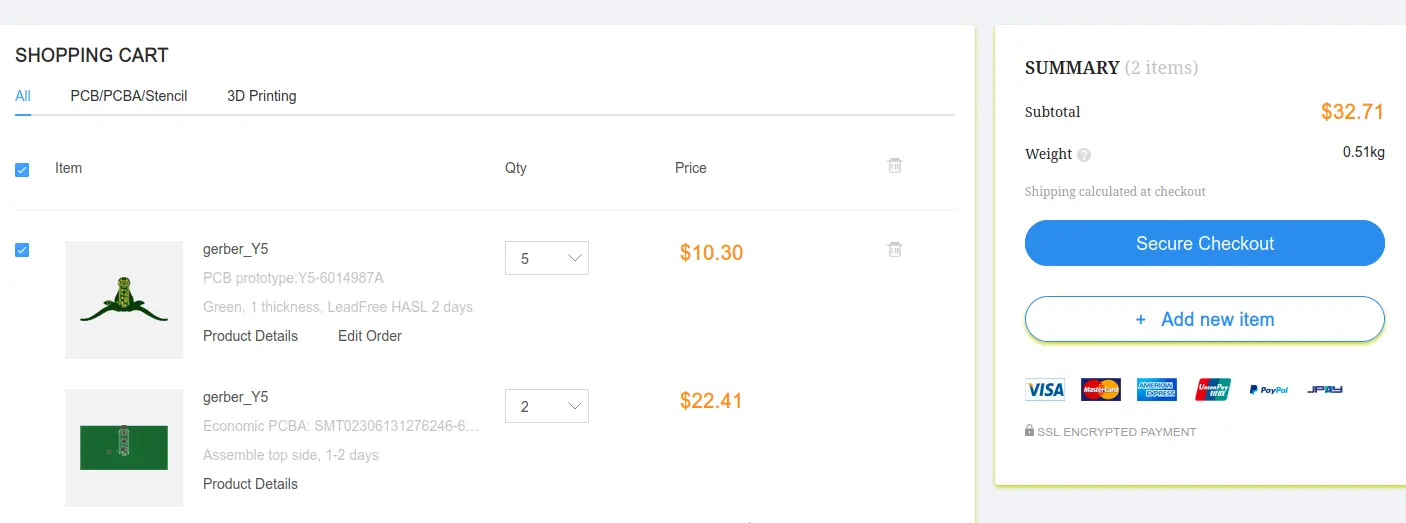
With shipping, that's $45 for me.

Footnotes
-
There are a million different ways to export your files and order with different manufacturers, but for simplicity, this jam only focuses on one. ↩
-
by @camdan.me ↩
-
You might want to edit the footprints of components you are hand-soldering. For example, to hand solder the USB-C connector, make the pads longer and remove unused ones like SBUS. ↩
-
This is just the microcontroller board from parts 1 and 2. It does not include any of the peripherals such as th LEDs and accelerometer. ↩
Congratulations! 🎉 🎉 🎉If you're a highschooler who enjoys programming or tinkering with hardware, make sure to join Hack Club, the world's largest nonprofit empowering teenagers to make cool projects! There's tons of programs where you can get prizes for programming, get your hardware projects fully funded and you can join the awesome community of 100k+ teenagers who love making cool stuff (just like you!).